the desired dish

  • Eats
  • Sweets
  • Bites
  • Sides
  • Basics
  • Breads
  • Home
  • Eats
Home

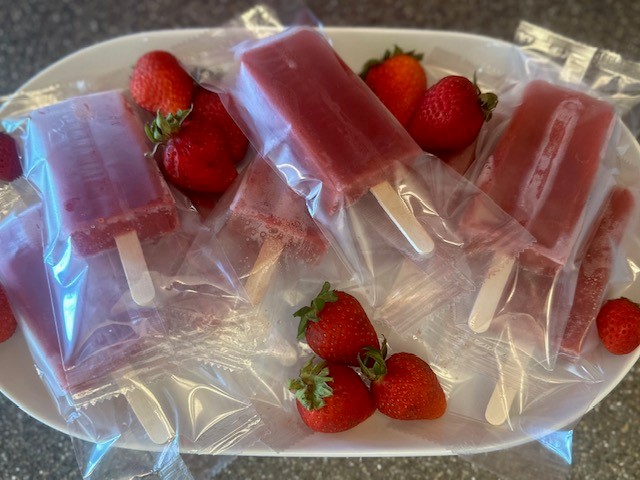
Strawberry Lemonade Sorbet

by

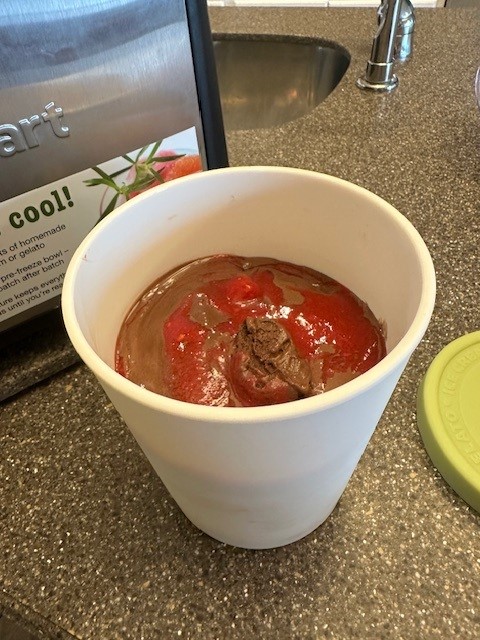
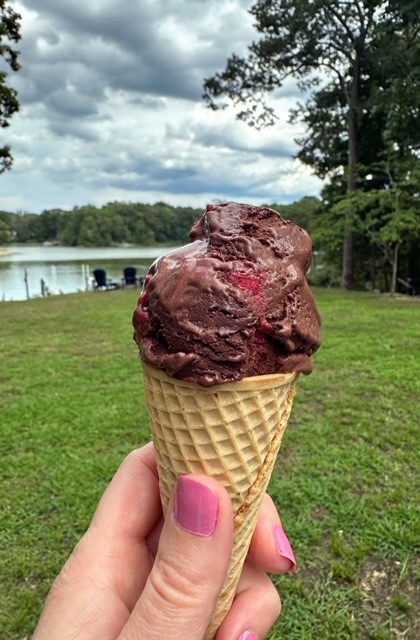
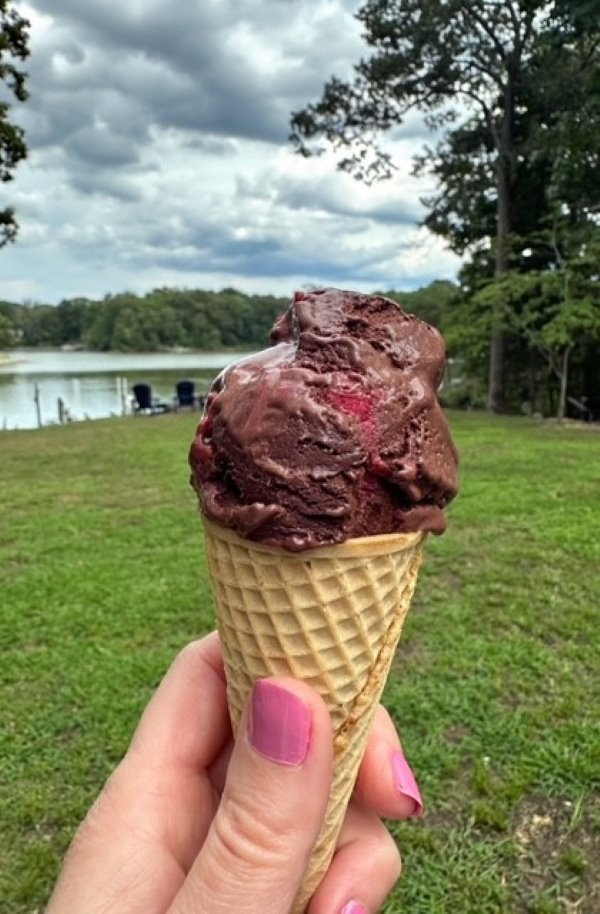
This creamy, strawberry lemonade sorbet screams summer! This has been a favorite when I've taught my ice cream, sorbet and gelato class, refreshing and sweet, accented by a light tartness from fresh lemon juice. While sorbet can easily be made by blending fresh, pureed fruit and simple syrup, I've learned that the addition of just a little xanthan gum in the mix plays a unique role of ensuring a perfect, scoopable texture. While you can always just allow your strawberries to macerate, releasing their natural juices when mixed with sugar and a pinch of salt), roasting the berries yields a more robust flavor, especially when they're super ripe. This recipe is made in two parts, a sorbet base and a puree, so if you're able, give yourself several hours ahead of time to prepare both components (or even the day before, if you can), to ensure the ingredients are very cold before adding them to your ice cream maker.

INGREDIENTS:

Sorbet Base

  • 1-¼ C. Water
  • 1 C. Granulated Sugar
  • ¼ C. Light Corn Syrup
  • ½ tsp. Xanthan Gum

Strawberry Lemonade Puree

  • 1-½ Pints Fresh Strawberries, hulled and quartered
  • ½ C. Granulated Sugar
  • 2 Each Lemons, Freshly Squeezed
  • ¼ tsp. Kosher Salt

INSTRUCTIONS:

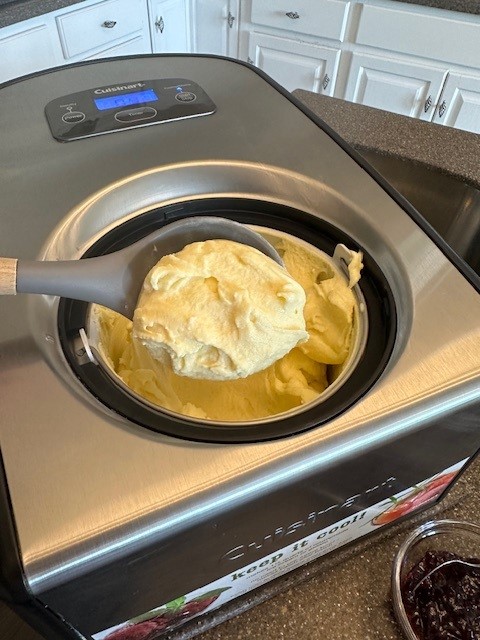
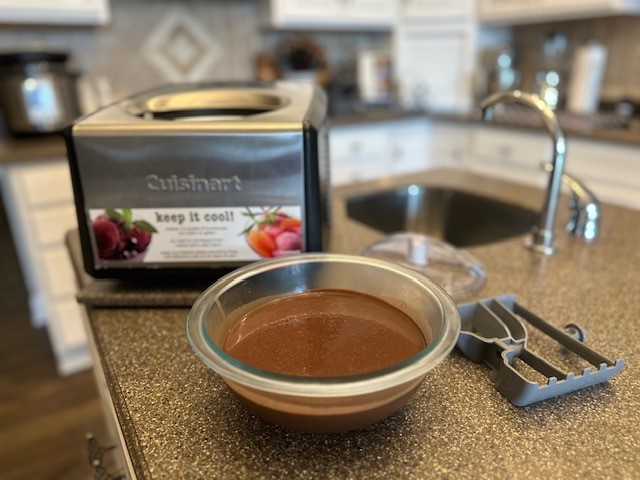
Before getting started, follow the instructions for your ice cream maker and be sure to freeze the core, if required. My favorite ice cream maker is this one from Cuisinart, which has an automatic, commercial-grade compressor so it’s ready to use anytime, batch after batch, no pre-freezing necessary.

Prepare the Sorbet Base

Step 1: To prepare the sorbet base, measure the water, granulated sugar, light corn syrup and xanthan gum. Mix the sugar and the xanthan gum together.

While xanthan gum is an ingredient you may not be too familiar with, adding it will help protect your homemade sorbet (or ice creams) from developing ice crystals when frozen; you can find it the baking aisle of most grocery stores.

Note: I used Pure Cane Granulated Golden Sugar, which is less processed than regular white sugar, and what I had on hand. Your base will come out looking a bit cloudy using regular sugar- mine just has a slight golden-brown hue.

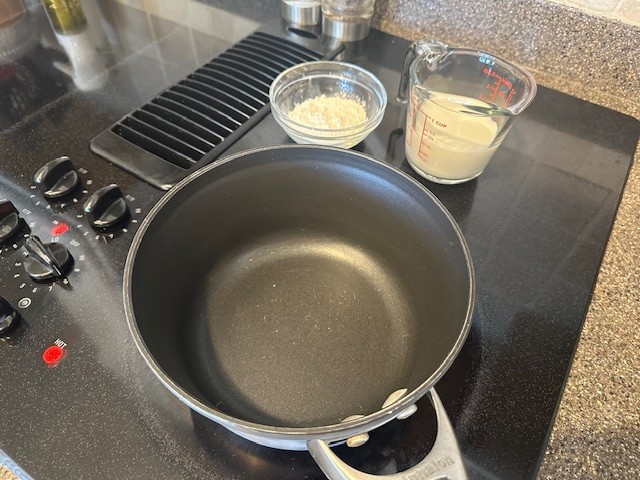
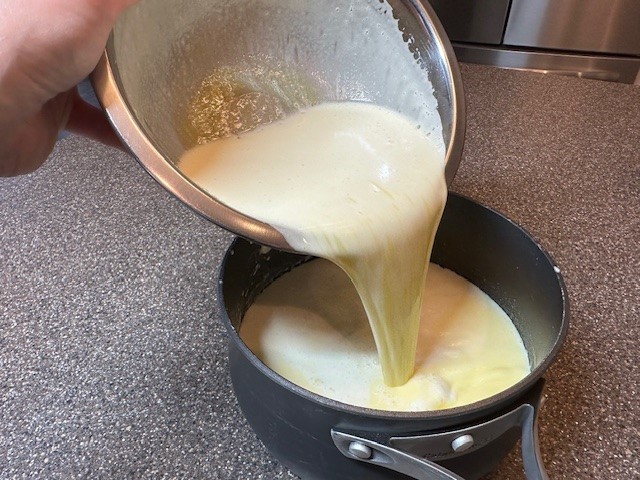
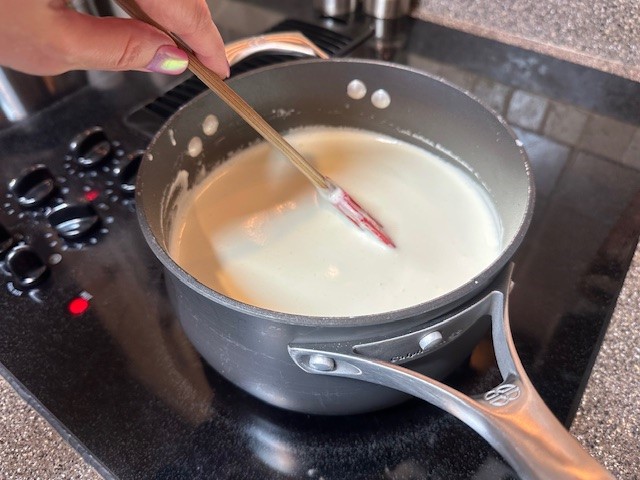
Step 2: Add all of the sorbet base ingredients together in a pot over medium-low heat. Whisk just until the sugar has fully dissolved, about 3-4 minutes. Keep an eye on it, as you don't want the mixture to simmer.

Step 3: Remove the mixture from heat, pour into a separate container with a tight-fitting lid or a glass bowl, allow to cool completely, and then store in the refrigerator, covered, for at least 4 hours.

Prepare the Strawberry Lemonade Puree

Step 4: Preheat your oven to 350℉. Line 2 baking sheet pans with parchment paper and gather all of your ingredients. Hull and quarter the strawberries.

Step 5: In a large bowl, toss the strawberries with the sugar and salt. Squeeze in the juice from both lemons and mix well. If you want a more 'tart' and less 'sweet' sorbet with a stronger lemonade flavor, first zest the lemons, and then cut in half before squeezing.

Step 6: Spoon the prepared strawberries onto the baking sheets and place in the preheated oven for 20 minutes. We're just looking to enhance the flavor of the berries and release their natural juices, not take on any color.

Step 7: After baking, move the strawberry pieces and any juice into a bowl or large glass liquid measuring cup. Allow the berries to cool.

Step 8: Once cooled, process the berry mixture in a blender for 2-3 minutes. Move the liquid to a container with a tight-fitting lid, or a glass bowl fitted tightly with plastic wrap. Place in the refrigerator for a few hours to get cold.

Churn the Sorbet

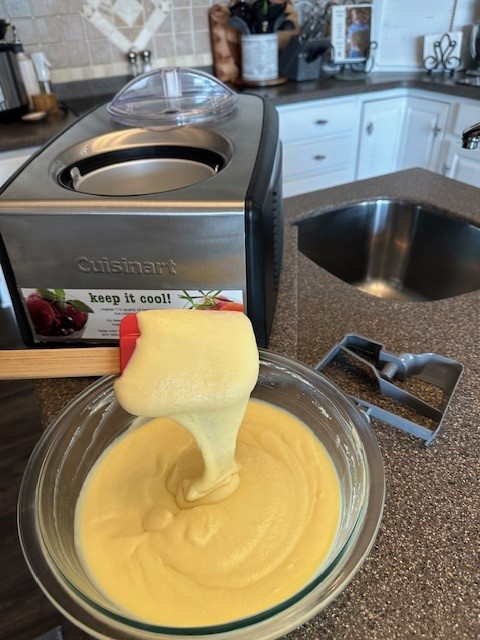
Step 9: Once both the sorbet base and the strawberry lemonade puree have chilled for several hours, combine the two liquids together and whisk thoroughly.

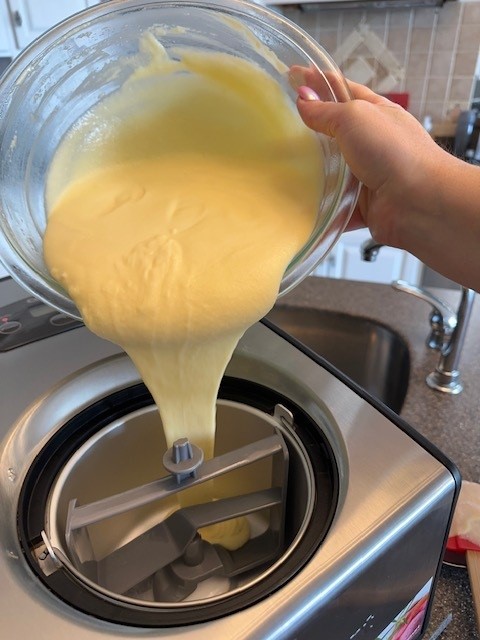
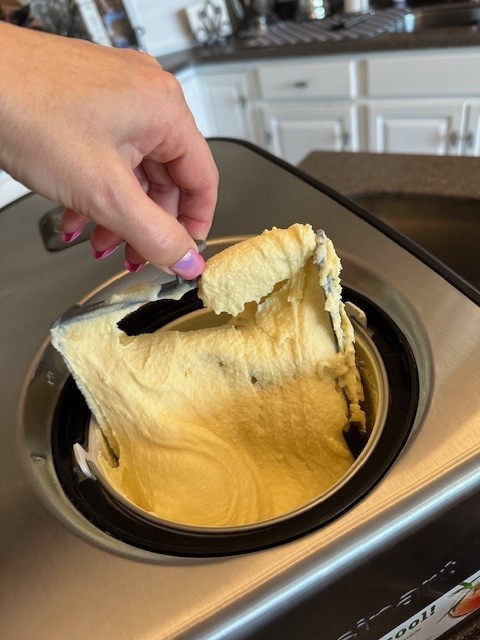
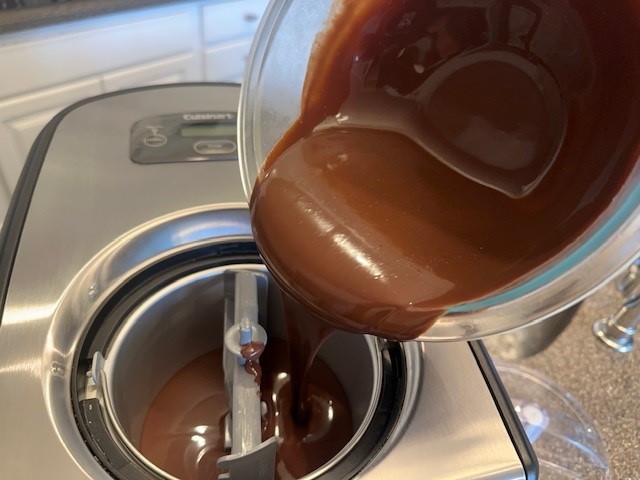
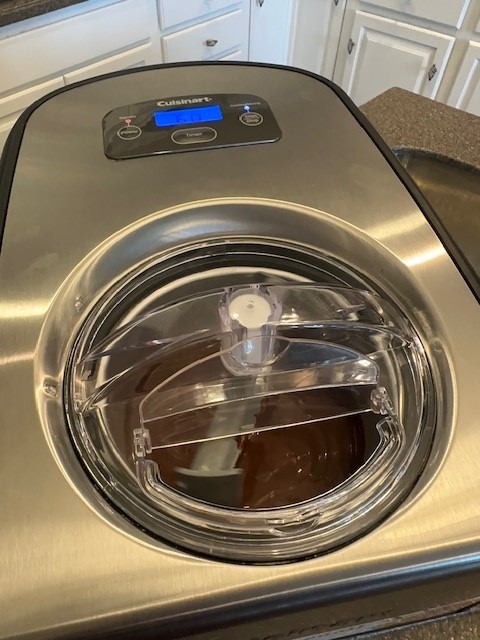
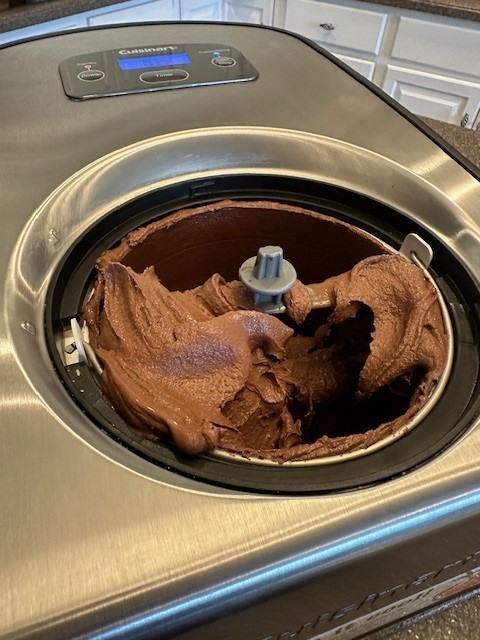
Step 10: Pour the mixture directly into your ice cream maker, and churn for about 40-45 minutes, or until the sorbet has reached a creamy, thickened consistency.

Step 11: Spoon your finished sorbet into an ice cream container with a tight-fitting lid and place in the freezer for a minimum of 4 hours to allow it to freeze properly for the right texture.


Strawberry Lemonade Sorbet

This delightful and refreshing sorbet will be the perfect treat for hot summer days!
No ratings yet
Print Pin Rate
Course: Dessert
Cuisine: French
Keyword: Gelato, Ice Cream, Strawberries, Strawberry
Prep Time: 10 minutes minutes
Cook Time: 20 minutes minutes
Chilling & Freezing Time: 8 hours hours 30 minutes minutes
Servings: 12 Servings
Calories: 143kcal

Equipment

  • Cutting Board
  • Paring Knife
  • 2 Baking Sheets, lined with Parchment Paper
  • Large Bowl
  • Wire Whisk
  • Fruit Reamer (Citrus Juicer) optional
  • Large Spoon
  • Glass Measuring Cups
  • Medium Pot
  • Blender
  • Medium Mixing Bowl
  • Ice Cream Maker
  • Ice Cream Tub

Ingredients

Sorbet Base

  • 1-¼ C. Water
  • 1 C. Granulated Sugar
  • ¼ C. Light Corn Syrup
  • ½ tsp. Xanthan Gum

Strawberry Lemonade Puree

  • 1-½ Pints Fresh Strawberries, hulled and quartered
  • ½ C. Granulated Sugar
  • 2 Each Lemons, Freshly Squeezed
  • ¼ tsp. Kosher Salt

Instructions

  • Before getting started, follow the instructions for your ice cream maker and be sure to freeze the core, if required. My favorite ice cream maker is this one from Cuisinart, which has an automatic, commercial-grade compressor so it’s ready to use anytime, batch after batch, no pre-freezing necessary.

Prepare the Sorbet Base

  • To prepare the sorbet base, measure the water, granulated sugar, light corn syrup and xanthan gum.
    Note: I used Pure Cane Granulated Golden Sugar, which is less processed than regular white sugar, and what I had on hand. Your base will come out looking a bit milky using regular- mine just has a slight brown hue.
  • Mix the xanthan gum and the sugar, then add all of the sorbet base ingredients together in a pot over medium-low heat. Whisk just until the sugar has fully dissolved, about 3-4 minutes. Keep an eye on it, as you don't want the mixture to simmer.
  • Remove the mixture from heat, pour into a separate container with a tight-fitting lid or a glass bowl, allow to cool completely, and then store in the refrigerator, covered, for about 4 hours.

Prepare the Strawberry Lemonade Puree

  • Preheat your oven to 350℉. Line 2 baking sheet pans with parchment paper and gather all of your ingredients. Hull and quarter the strawberries.
  • In a large bowl, toss the strawberries with the sugar and salt. Squeeze in the juice from both lemons and mix well. If you want a more 'tart' and less 'sweet' sorbet, first zest the lemons, and then cut in half before squeezing.
  • Spoon the prepared strawberries onto the baking sheets and place in the preheated oven for 20 minutes. We're just looking to enhance the flavor of the berries and release their natural juices, not take on any color.
  • After baking, move the strawberry pieces and any juice into a bowl or large glass liquid measuring cup. Allow the berries to cool.
  • Once cooled, process the berry mixture in a blender for 2-3 minutes. Move the liquid to a container with a tight-fitting lid, or a glass bowl fitted tightly with plastic wrap. Place in the refrigerator for a few hours to get cold.

Churn the Sorbet

  • Once both the sorbet base and the strawberry lemonade puree have chilled for several hours, mix the two liquids together and whisk thoroughly to combine.
  • Pour the mixture directly into your ice cream maker, and churn for about 40-45 minutes, or until the sorbet has reached a creamy, thickened consistency.
  • Spoon your finished sorbet into an ice cream container with a tight-fitting lid and place in the freezer for a minimum of 4 hours to allow it to freeze properly for the right texture.

Nutrition

Serving: 1Scoop | Calories: 143kcal | Carbohydrates: 38g | Protein: 0.4g | Sodium: 54mg | Potassium: 77mg | Fiber: 0.9g | Sugar: 36g | Calcium: 8.7mg | Iron: 0.2mg

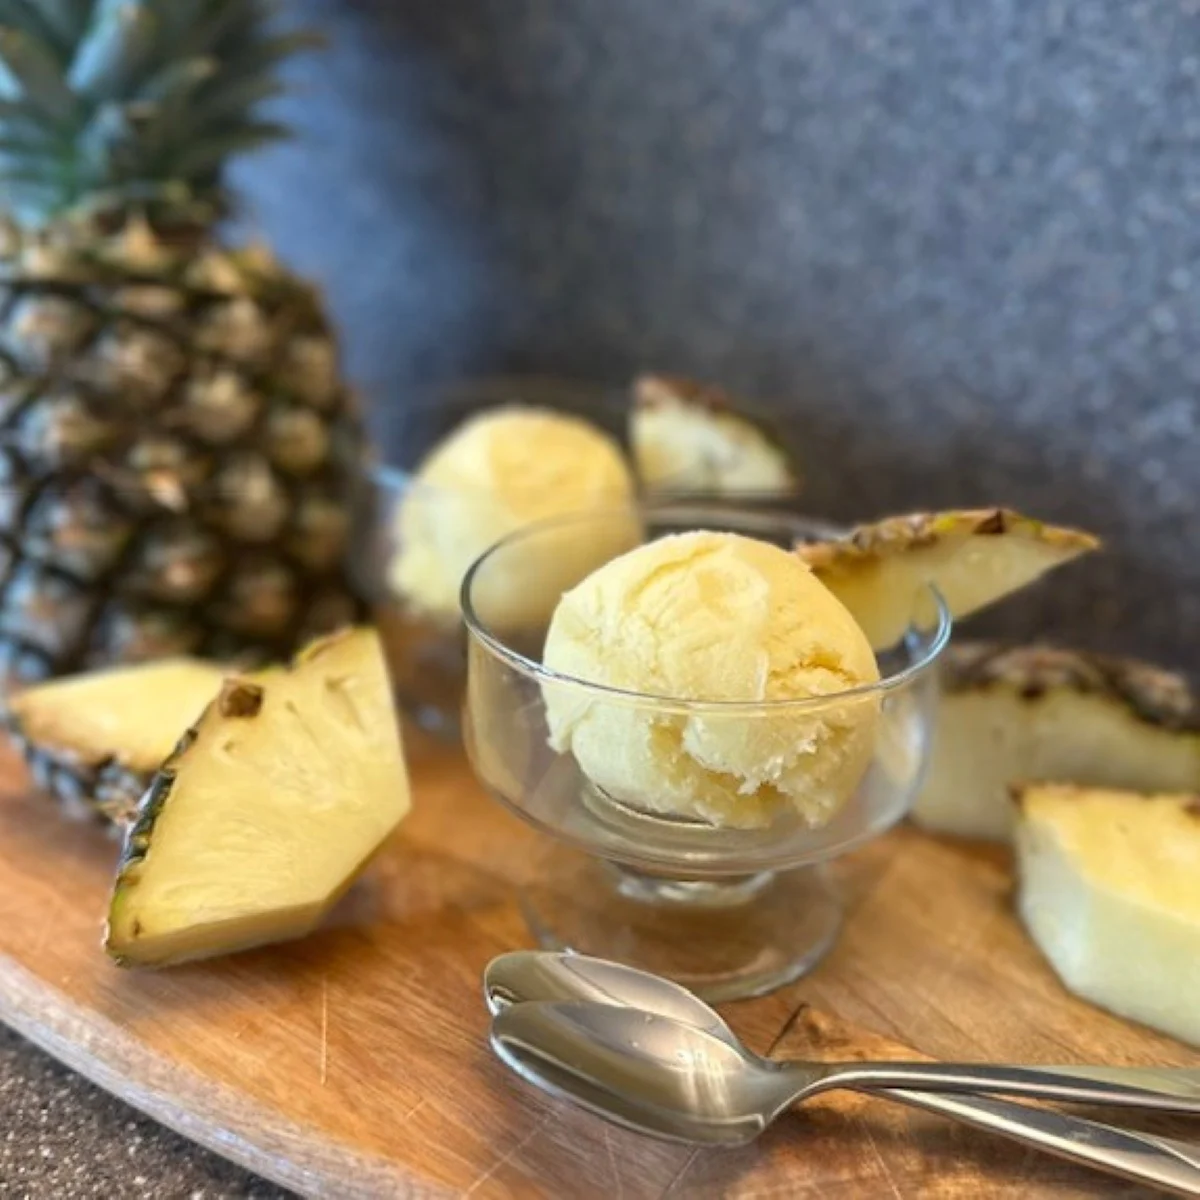
Roasted Pineapple Sorbet

by

Fresh fruit desserts are the absolute best, in my opinion, and fresh pineapple is one of those fruits that I always love having on hand. In the summertime, a scoop of sorbet is so light and refreshing, and roasting the pineapple intensifies that delicious flavor even more.

Ingredients:

  • 1 Large Pineapple, skin removed, cored, and cut into chunks
  • ¾ Cup Simple Syrup
  • 2 tsp. Vodka

Instructions:

Before getting started, follow the instructions for your ice cream maker and be sure to freeze the core, if required. My favorite ice cream maker is this one from Cuisinart, which has an automatic, commercial-grade compressor so it's ready to use anytime, batch after batch!

Step 1: Preheat your oven to 400℉. Grab your pineapple and simple syrup along with a cutting board, Chef knife, and a large bowl. Cut the pineapple by first slicing off the ends, standing the cut pineapple upright, cutting off the skin, quartering, removing the core, and then cutting the rest of the pineapple into chunks.

Step 2: Lay the pineapple chunks onto the parchment lined sheet pan, and roast in the preheated oven for about 30 minutes. You want the pineapple to just lightly dry out but not take on any color (a little bit around the edges of some pieces is okay). Allow the fruit to cool, just a few minutes.

Step 3: Place the roasted pineapple into the blender, along with the simple syrup and vodka and process, 1-2 minutes until the mixture is smooth. The vodka aids the mixture from freezing solid, without imparting any flavor to the sorbet.

Step 4: Pour the mixture into a container with a tight-fitting lid, or a glass bowl tightly wrapped with plastic. Place in the refrigerator for a few hours to get cold.

Step 5: After chilling your sorbet mixture, add it to your ice cream maker and process, about 30 minutes. The texture will thicken once it's been churned but won't be the same consistency as ice cream.

Step 6: Spoon your churned sorbet into a 1.5 to 2-Quart, freezer safe container or ice cream tub, such as this one from Tivolo. Freeze for at least 4 hours, or ideally overnight for the best consistency.


Roasted Pineapple Sorbet

Roasting fresh pineapple adds a rich depth of flavor in this delicious frozen treat!
No ratings yet
Print Pin Rate
Course: Dessert
Cuisine: French
Keyword: Desserts, Frozen Desserts, Fruit Desserts, Gelato, Ice Cream, Pineapple, Sorbet
Prep Time: 10 minutes minutes
Cook Time: 30 minutes minutes
Chilling & Freezing Time: 6 hours hours 30 minutes minutes
Servings: 12 Servings
Calories: 73kcal

Equipment

  • Cutting Board
  • Chef Knife
  • Large Bowl
  • Blender
  • Sheet Pan, lined with Parchment
  • Medium-sized Container with Lid, or Bowl with Plastic Wrap.
  • Ice Cream Maker
  • Ice Cream Tub

Ingredients

  • 1 Lg Pineapple, skin removed, cored and cut into chunks
  • ¾ C. Simple Syrup
  • 2 tsp. Vodka added to the simple syrup

Instructions

  • Preheat your oven to 400℉. Grab your pineapple and simple syrup along with a cutting board, Chef Knife, and a large bowl. Cut the pineapple by first slicing off the ends, standing the cut pineapple upright, cutting off the skin, quartering, removing the core, and then cutting the rest of the pineapple into chunks.
  • Lay the pineapple chunks onto the parchment lined sheet pan, and roast in the preheated oven for about 30 minutes. You want the pineapple to just lightly dry out but not take on any color (a little bit around the edges of some pieces is okay). Allow the fruit to cool, just a few minutes.
  • Place the roasted pineapple into the blender, along with the simple syrup, and process, 1-2 minutes until the mixture is smooth.
  • Pour the mixture into a container with a tight-fitting lid, or a glass bowl tightly wrapped with plastic. Place in the refrigerator for a few hours to get cold.
  • After chilling your sorbet mixture, add it to your ice cream maker and process, about 30 minutes. The texture will thicken once it's been churned but won't be the same consistency as ice cream.
  • Spoon your churned sorbet into a 1.5 to 2-Quart, freezer safe container or ice cream tub, such as this one from Tivolo. Freeze for at least 4 hours, or ideally overnight for the best consistency.

Nutrition

Serving: 1Scoop | Calories: 73kcal | Carbohydrates: 19g | Protein: 0.4g | Fat: 0.1g | Sodium: 1.4mg | Potassium: 82mg | Fiber: 1.1g | Sugar: 17g | Calcium: 10mg | Iron: 0.2mg

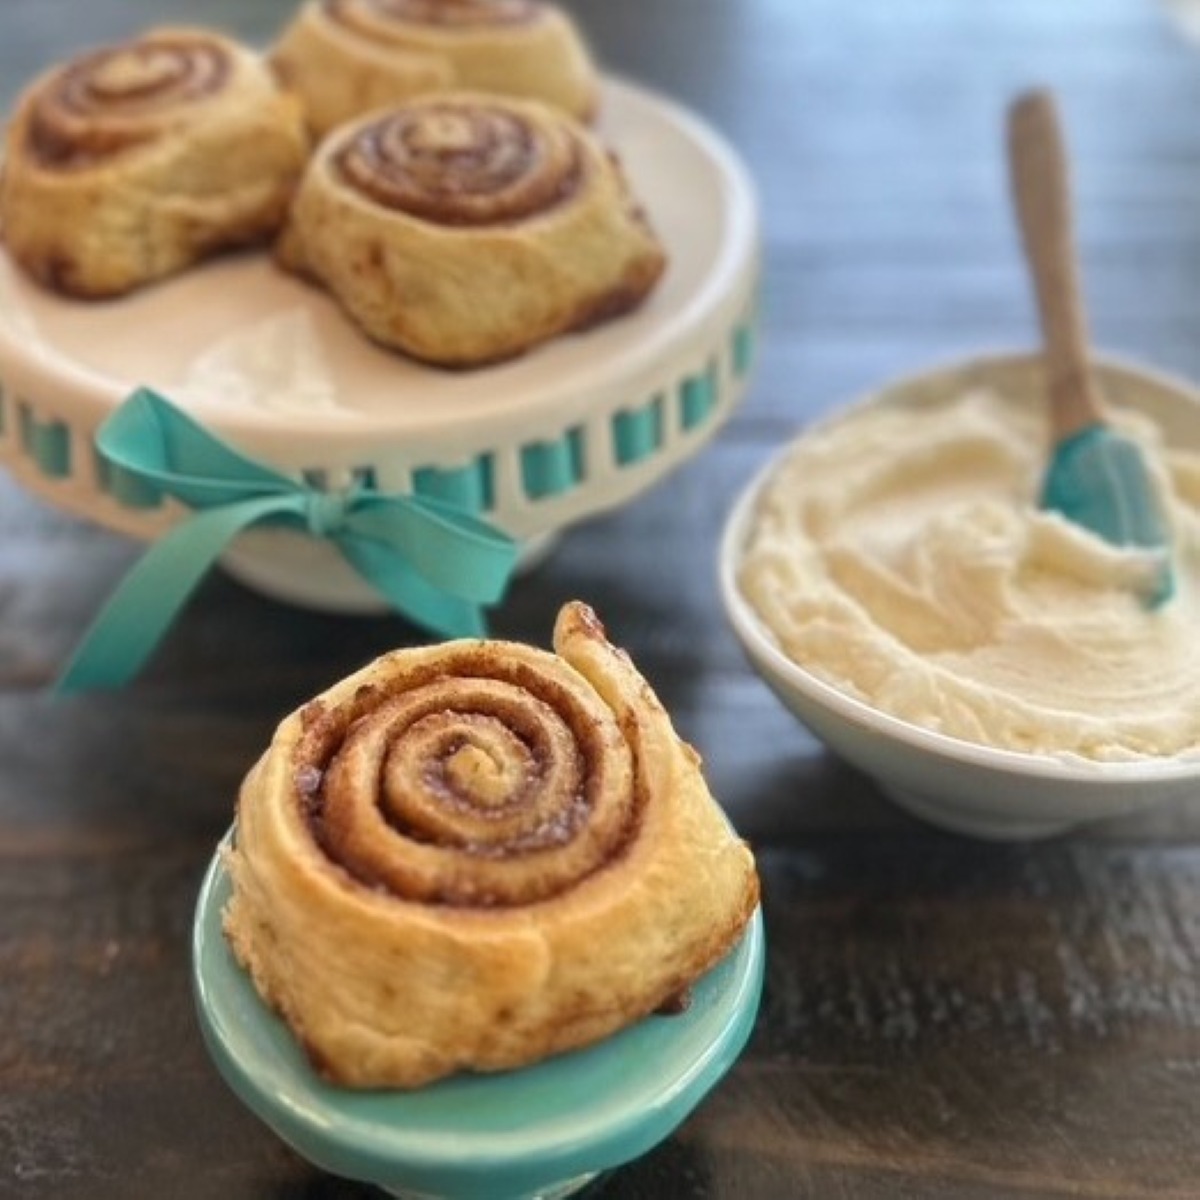
Bakery-Style Cinnamon Rolls

by

Ingredients:

Dough

  • ½ + ⅔ Cup Whole Milk Divided
  • 324 grams Unbleached Bread Flour Divided (2-½ Cups, 3 Tbsp.)
  • 1 tsp. Kosher Salt
  • 25 grams Granulated White Sugar about 2 Tablespoons
  • 2-¼ tsp. Instant Yeast
  • 4 Tbsp. Unsalted Butter, at Room Temperature

Cinnamon Sugar Filling

  • 1 Tbsp. Unsalted Butter, Melted
  • ¾ Cup Light Brown Sugar, Packed
  • ¼ Cup Unbleached Bread Flour
  • 1-½ Tbsp. Cinnamon
  • 1 Tbsp. Granulated Sugar
  • 1 Pinch Kosher Salt

Buttercream Icing

  • 6 Tbsp. Unsalted Butter
  • 4 Cups Powdered Sugar
  • 2 tsp. Vanilla Extract
  • ¼ Cup Whole Milk
  • Pinch Kosher Salt

Miscellaneous Ingredients

  • Cooking Spray
  • 2 Tbsp. Unsalted Butter, melted to brush onto the hot baked cinnamon rolls

Instructions:

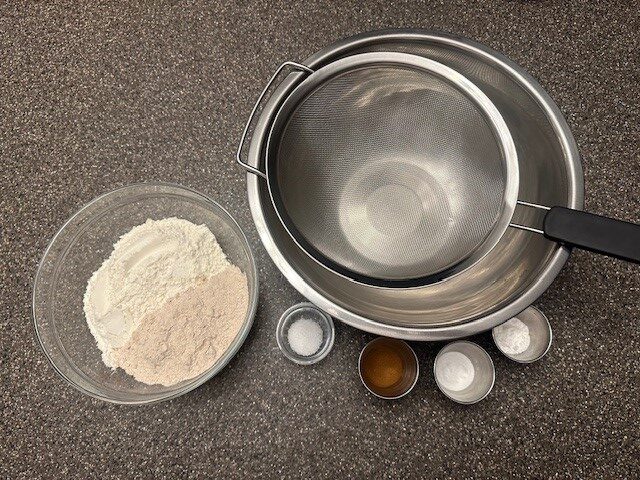
Step 1: Gather all of your dough ingredients, along with measuring cups and spoons, a digital kitchen scale, a large mixing bowl, whisk, a small pot and a stand mixer.

In two separate liquid measuring cups, measure out ½ cup milk and ⅔ cup milk.

Place your mixing bowl onto the scale, set measurement to grams, and press tare to zero out the weight of the bowl itself. Weigh 324 grams of unbleached bread flour. Scoop out 3 tablespoons of the flour and place in a small, separate bowl. This should leave you with 300 grams of flour remaining.

Note: If you don't have a scale, use the "Spoon & Sweep' method! Portion out 2-½ cups by first stirring the flour, then use a spoon to fill the measuring cups, using the handle of the spoon to level and sweep away excess. Separately, measure out 3 tablespoons of the flour and place in a small bowl.

Step 2: To the larger mixing bowl with the flour, add 6 grams of kosher salt (about 1 tsp), 25 grams of sugar (about 2 Tablespoons), and 2-¼ tsp. of instant yeast (if using a packet of dry yeast, this will be the exact amount you need). Whisk the ingredients together and set aside.

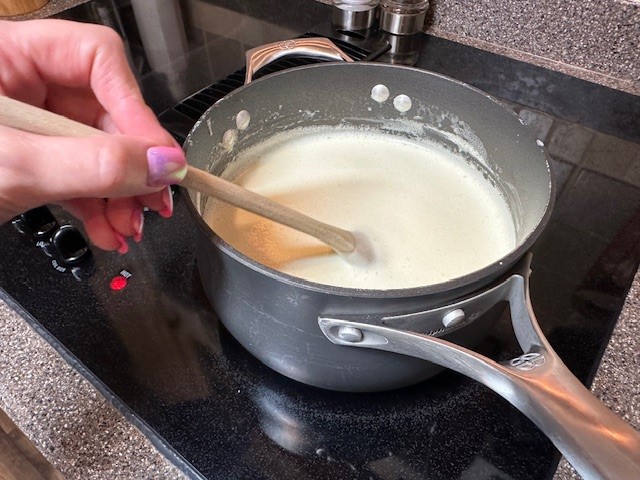
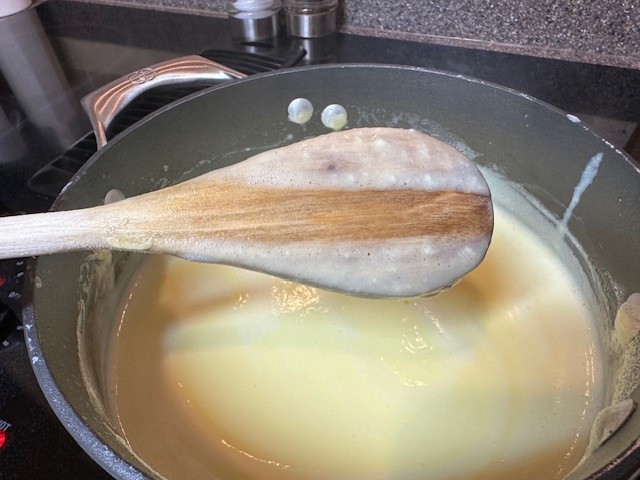
Step 3: In a small pot over medium low heat, mix together the ½ cup of milk and the 3 tablespoons of reserved bread flour. Stir using a wooden spoon until the mixture comes together to form a thick paste, and there are no visible lumps, about 2-3 minutes. Add this mixture directly to the bowl of your stand mixer.

Step 4: Add the flour mixture, ⅔ cup of milk and 4 tablespoons of softened butter into the stand mixer bowl, fitted with the dough hook attachment. Run the mixer for about 10 minutes, scraping down the sides and pulling the dough from the hook midway through. You may also want to use a plastic bench scraper to pull up any unworked dough on the bottom of the bowl.

Step 5: Remove the dough from the mixing bowl, knead lightly with your hands to form into a ball, and place in a medium, glass mixing bowl sprayed lightly with cooking spray (to avoid sticking), and cover tightly with plastic wrap.

Place the bowl in a warm, draft-free area of your kitchen. If your oven has a proof setting, or even an inside light, place it here. Allow your dough to rise about 90 minutes, or just until it has about doubled in size.

Step 6: In the meantime, begin preparing the filling. Mix together the tablespoon of melted butter, ¾ cup packed light brown sugar, ¼ cup bread flour, pinch of kosher salt, cinnamon, granulated sugar, and vanilla extract. Mix everything together using a fork until the mixture comes together like heavy, wet sand. Cover and set aside.

Step 7: After the dough has proofed, spray a clean work surface lightly with cooking spray. You'll want to grab a rolling pin, along with a plastic kitchen ruler, if you have one. Place the dough directly onto the surface, and using your fingertips, gently begin pressing the dough into a rectangle. The dough should be very soft and pillowy, spreading easily and not bouncing back.

Step 8: Use the rolling pin to gently roll out the dough to a 12x10 inch rectangle (the full length of a standard ruler on the long end, and just a few inches shy in depth.

Sprinkle the surface of the dough with the filling mixture, leaving a small border around the outside.

Step 9: To begin rolling, start with light fingertips along the long end of the dough, gently pressing forward from the middle out towards the ends and keeping the dough tightly sealed without pressing too firmly down.

Step 10: Once the dough is fully rolled, lightly tap the ends in to ensure the roll still measures about 12 inches in length.

Using a knife or your bench scraper, carefully mark the dough in the center, mark each half in the center again, and again, so that you have 8 equal portions.

Grab a portion of dental floss, long enough that it can fit around the dough and still have plenty of room. Carefully run the floss underneath until you've reached the center mark. Cross the floss in an 'X' and pull tight. The dough will divide into two equal portions. Repeat until you have cut all 8 rolls.

Step 11: Spray a 13x9 glass baking dish with cooking spray, then place rolls into the pan. Cover the pan with plastic wrap and allow an additional one hour for the final proofing.

After 45 minutes, set the oven to 350℉ so that it will be hot about the same time that your rolls are ready for baking.

Note: If you are making these ahead, and want to bake your rolls in the morning, you can do a slow rise by placing them into refrigerator overnight and then taking them out about 90 minutes to 2 hours before baking to allow the rolls to come back to room temperature and finish proofing.

Alternatively, you can freeze these cinnamon rolls after before the second proof. After you've placed the rolls in the glass baking dish, cover tightly with plastic wrap and add a plastic lid (if you have one) or create a second tight wrap with aluminum foil. Place into the freezer until the night before you are ready to bake. Allow the rolls to thaw in the refrigerator overnight and then bring them to room temperature for about 2 hours before baking the next day.

Step 12: After the second rise, your rolls should have puffed up a bit and will be soft to the touch. Bake for 15-20 minutes in the preheated oven.

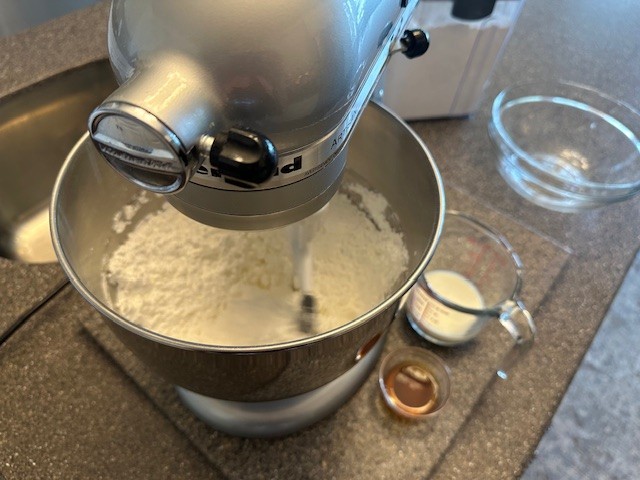
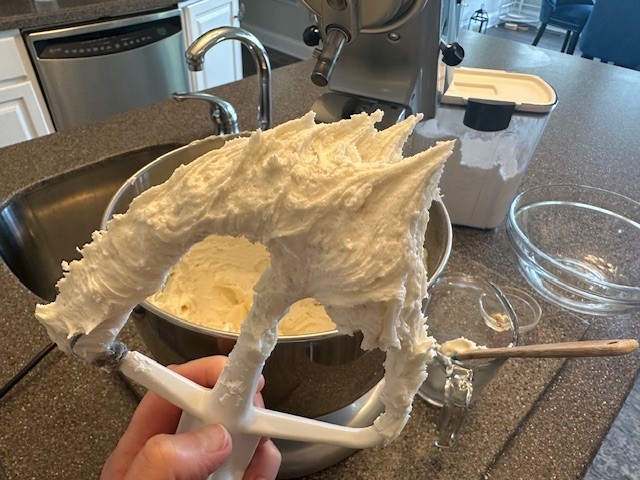
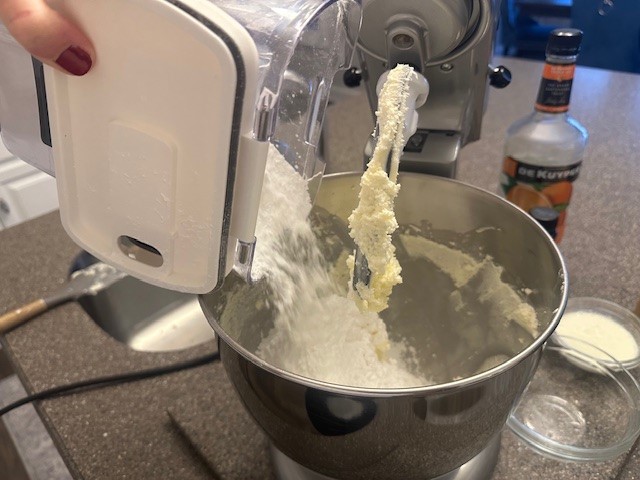
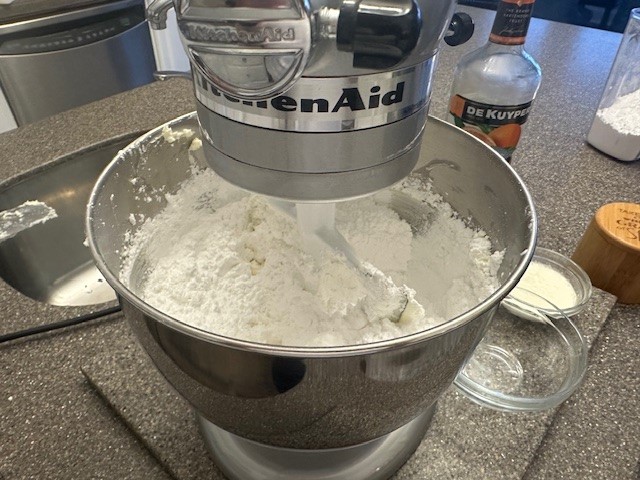
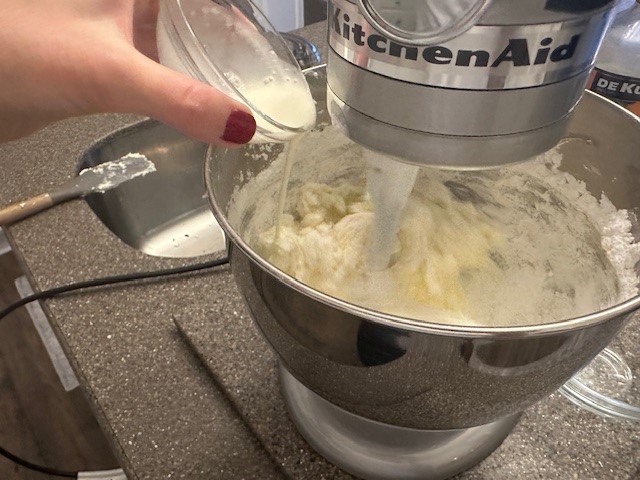
Step 13: Gather all of the ingredients to prepare the buttercream frosting. In a stand mixer fitted with the paddle attachment, cream the butter and powdered sugar, along with a pinch of salt. Start at a slow speed, and then increase as the mixture comes together, to ensure that the powdered sugar stays in the bowl. Add in the vanilla extract, and slowly drizzle in the milk, up to ¼ cup. Whip the frosting until light and fluffy, 4-5 minutes, but stiff enough to hold peaks.

Step 15: Just before the rolls have finished baking, melt the small portion of reserved butter, then immediately brush directly onto the hot rolls after you have taken them out of the oven.

Allow the rolls to cool slightly before adding the buttercream frosting so that it doesn't completely melt.


Bakery-Style Cinnamon Rolls

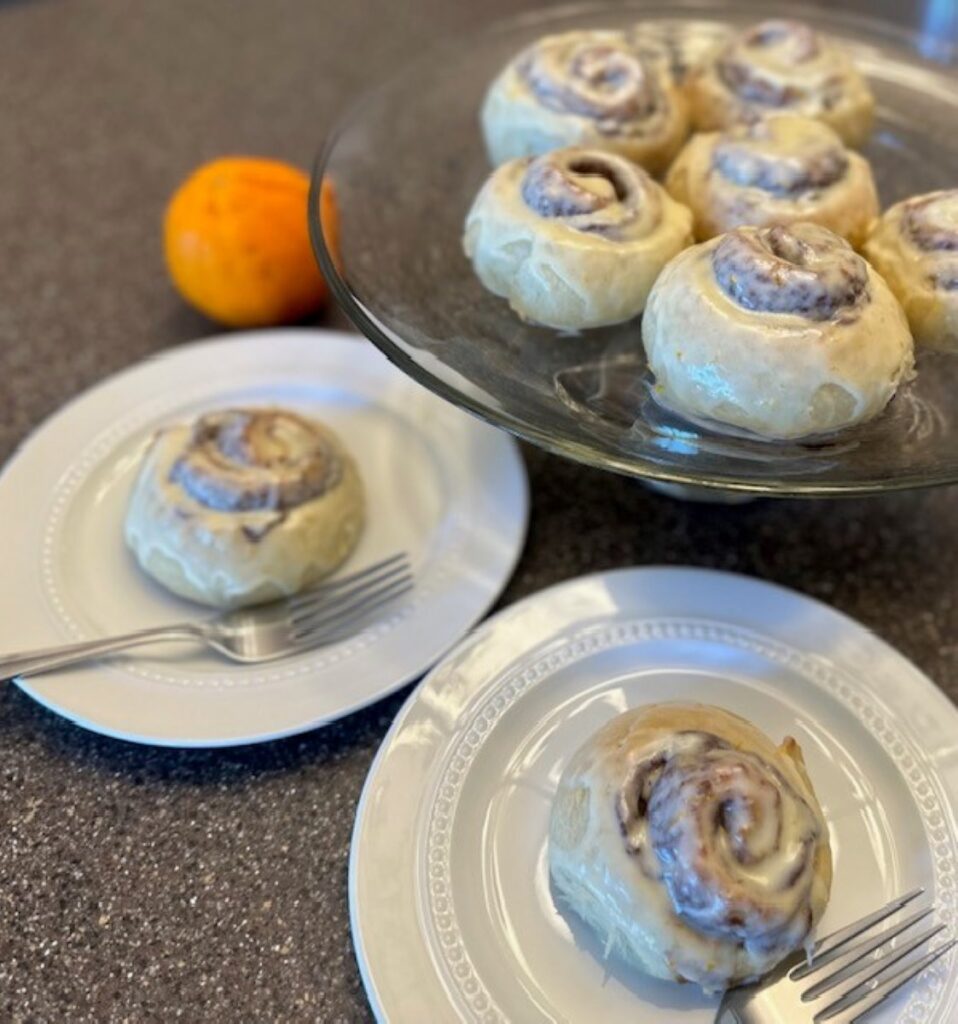
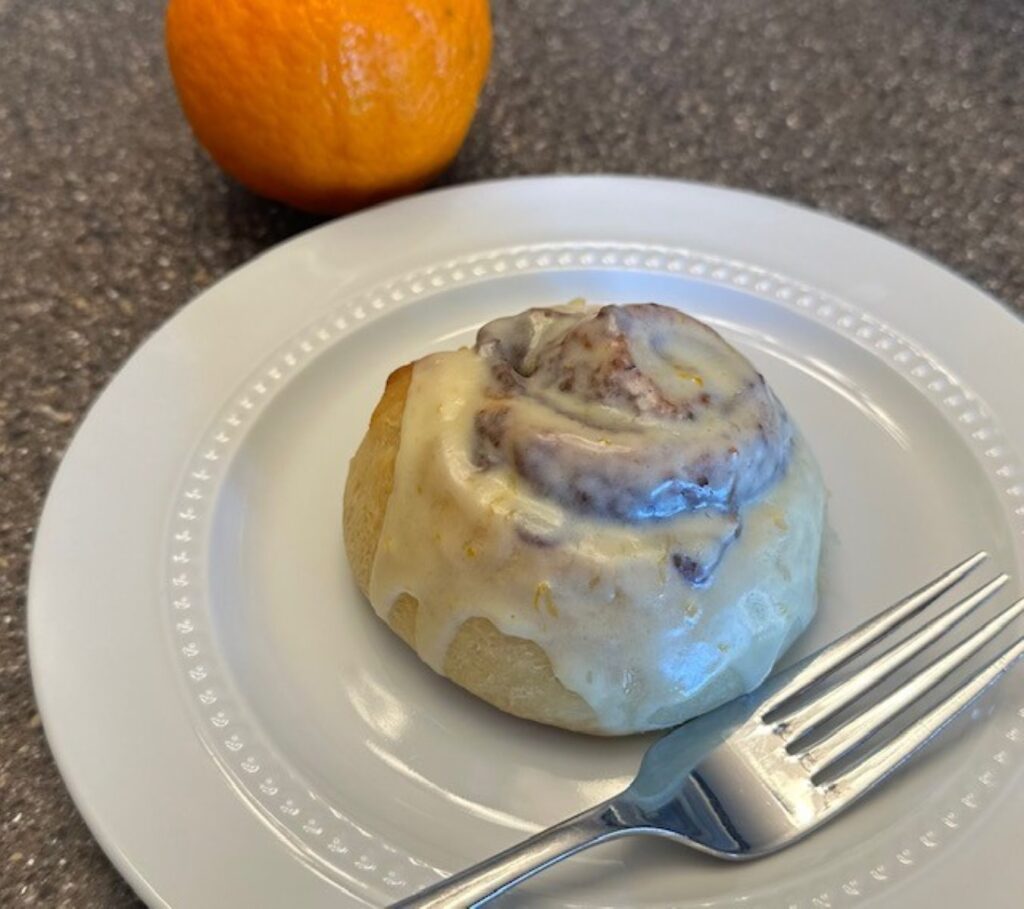
You'll never want to pop open that cylinder of pre-made dough after you've made these amazing, bakery-style cinnamon rolls from scratch!
No ratings yet
Print Pin Rate
Course: Breakfast, Brunch
Cuisine: American
Keyword: Breakfast, Brunch, Cinnamon Rolls, Pastry
Prep Time: 40 minutes minutes
Cook Time: 15 minutes minutes
Proofing Time: 2 hours hours 30 minutes minutes
Servings: 8 servings
Calories: 355kcal

Equipment

  • KitchenAid Stand Mixer with Dough Hook and Paddle Attachments
  • Digital Kitchen Scale
  • Measuring Cups and Spoons
  • Liquid Measuring Cups
  • Large Bowl
  • Small Pot
  • Medium Glass Bowl
  • Small, microwave-safe bowl
  • Wire Whisk
  • Wooden Spoon
  • Plastic Bench Scraper
  • Fork
  • Rolling Pin
  • Plastic Ruler optional
  • Plastic Wrap
  • Dental Floss, Unflavored
  • 13 x 9 Glass Baking Dish
  • Rubber Spatula
  • Pastry Brush
  • Spoon

Ingredients

Dough

  • ½ + ⅔ Cup Whole Milk Divided
  • 324 grams Unbleached Bread Flour Divided (2-½ Cups, 3 Tbsp.)
  • 1 tsp. Kosher Salt
  • 25 grams Granulated White Sugar about 2 Tablespoons
  • 2-¼ tsp. Instant Yeast
  • 4 Tbsp. Unsalted Butter, at Room Temperature

Cinnamon Sugar Filling

  • 1 Tbsp. Unsalted Butter, Melted
  • ¾ Cup Light Brown Sugar, Packed
  • ¼ Cup Unbleached Bread Flour
  • 1-½ Tbsp. Cinnamon
  • 1 Tbsp. Granulated Sugar
  • 1 Pinch Kosher Salt

Buttercream Icing

  • 8 Tbsp. Unsalted Butter, at Room Temperature 2 Sticks
  • 5 Cups Powdered Sugar 5 Cups
  • 2 tsp. Vanilla Extract
  • ¼ Cup Whole Milk
  • Pinch Kosher Salt

Miscellaneous Ingredients

  • Cooking Spray
  • 2 Tbsp. Unsalted Butter, melted to brush onto the hot baked cinnamon rolls

Instructions

  • Gather all of your dough ingredients, along with measuring cups and spoons, a digital kitchen scale, a large mixing bowl, whisk, a small pot and a stand mixer.
  • In two separate liquid measuring cups, measure out ½ cup milk and ⅔ cup milk.
    Place your mixing bowl onto the scale, set measurement to grams, and press tare to zero out the weight of the bowl itself. Weigh 324 grams of unbleached bread flour. Scoop out 3 tablespoons of the flour and place in a small, separate bowl. This should leave you with 300 grams of flour remaining.
    Note: If you don't have a scale, use the "Spoon & Sweep' method! Portion out 2-½ cups by first stirring the flour, then use a spoon to fill the measuring cups, using the handle of the spoon to level and sweep away excess. Separately, measure out 3 tablespoons of the flour and place in a small bowl.
  • To the larger mixing bowl with the flour, add 6 grams of kosher salt (about 1 tsp), 25 grams of sugar (about 2 Tablespoons), and 2-¼ tsp. of instant yeast (if using a packet of dry yeast, this will be the exact amount you need.) Whisk the ingredients together and set aside.
  • In a small pot over medium low heat, mix together the ½ cup of milk and the 3 tablespoons of reserved bread flour. Stir using a wooden spoon until the mixture comes together to form a paste, and there are no visible lumps, about 2-3 minutes. Add this mixture to the bowl of your stand mixer.
  • Add the flour mixture, ⅔ cup of milk and 4 tablespoons of softened butter into the stand mixer bowl, fitted with the dough hook attachment. Run the mixer for about 10 minutes, scraping down the sides and pulling the dough from the hook midway through. You may also want to use a plastic bench scraper to pull up any unworked dough on the bottom of the bowl.
    Remove the dough from the mixing bowl, knead lightly with your hands to form into a ball, and place in a medium, glass mixing bowl sprayed lightly with cooking spray (to avoid sticking), and cover tightly with plastic wrap.
    Place the bowl in a warm, draft-free area of your kitchen. If your oven has a proof setting, or even an inside light, place it here. Allow your dough to rise about 90 minutes, or just until it has about doubled in size.
  • In the meantime, begin preparing the filling. Mix together the tablespoon of melted butter, granulated sugar, brown sugar, bread flour, pinch of kosher salt, cinnamon, and vanilla extract. Mix everything together using a fork until the mixture comes together like heavy, wet sand. Cover and set aside.
  • After the dough has proofed, spray a clean work surface lightly with cooking spray. You'll want to grab a rolling pin, along with a plastic kitchen ruler, if you have one. Place the dough directly onto the surface, and using your fingertips, gently begin pressing the dough into a rectangle. The dough should be very soft and pillowy, spreading easily and not bouncing back.
  • Use the rolling pin to gently roll out the dough to a 12x10 inch rectangle (the full length of a standard ruler on the long end, and just a few inches shy in depth.
    Sprinkle the surface of the dough with the filling mixture, leaving a small border around the outside.
  • To begin rolling, start with light fingertips along the long end of the dough, gently pressing forward from the middle out towards the ends and keeping the dough tightly sealed without pressing too firmly down.
  • Once the dough is fully rolled, lightly tap the ends in to ensure the roll still measures about 12 inches in length.
    Using a knife or your bench scraper, carefully mark the dough in the center, mark each half in the center again, and again, so that you have 8 equal portions.
    Grab a portion of dental floss, long enough that it can fit around the dough and still have plenty of room. Carefully run the floss underneath until you've reached the center mark. Cross the floss in an 'X' and pull tight. The dough will divide into two equal portions. Repeat until you have cut all 8 rolls.
  • Spray a 13x9 glass baking dish cooking spray, then place rolls into the pan. Cover the pan with plastic wrap and allow an additional hour for the final proofing.
    After 45 minutes, set the oven to 350℉ so that it will be hot about the same time that your rolls are ready for baking.
    Note: If you are making these ahead, and want to bake your rolls in the morning, you can do a slow rise by placing them into refrigerator overnight and then taking them out about 90 minutes to 2 hours before baking to allow the rolls to come back to room temperature and finish proofing.
    Alternatively, you can freeze these cinnamon rolls after before the second proof. After you've placed the rolls in the glass baking dish, cover tightly with plastic wrap and add a plastic lid (if you have one) or create a second tight wrap with aluminum foil. Place into the freezer until the night before you are ready to bake. Allow the rolls to thaw in the refrigerator overnight and then bring them to room temperature for about 2 hours before baking the next day.
  • After the second rise, your rolls should have puffed up a bit and will be soft to the touch. Bake for 15-20 minutes in the preheated oven.
  • Gather all of the ingredients to prepare the buttercream frosting. In a stand mixer fitted with the paddle attachment, cream the butter and powdered sugar, along with a pinch of salt. Add in the vanilla extract, and slowly drizzle in the milk, up to ¼ cup. Whip the frosting until light and fluffy, 4-5 minutes, but stiff enough to hold peaks.
  • Just before the rolls have finished baking, melt the small portion of reserved butter, then immediately brush directly onto the hot rolls after you have taken them out of the oven.
    Allow the rolls to cool slightly before adding the buttercream so the frosting doesn't completely melt.

Notes

Extra Bakery-Style Cinnamon Rolls can be stored in the refrigerator for a few days if wrapped tightly in an air-tight container. Keep buttercream frosting separate and top rolls after they've been rewarmed, either in a 350℉ oven for about 5 minutes (preferred) or in the microwave for about 1 minute (if you're in a rush!)  

Nutrition

Serving: 1Roll | Calories: 355kcal | Carbohydrates: 51g | Protein: 6.7g | Fat: 12.9g | Saturated Fat: 8.3g | Cholesterol: 37.5mg | Sodium: 257mg | Potassium: 10.8mg | Fiber: 1.4g | Sugar: 20g | Vitamin C: 2.6mg | Calcium: 28.6mg | Iron: 2mg

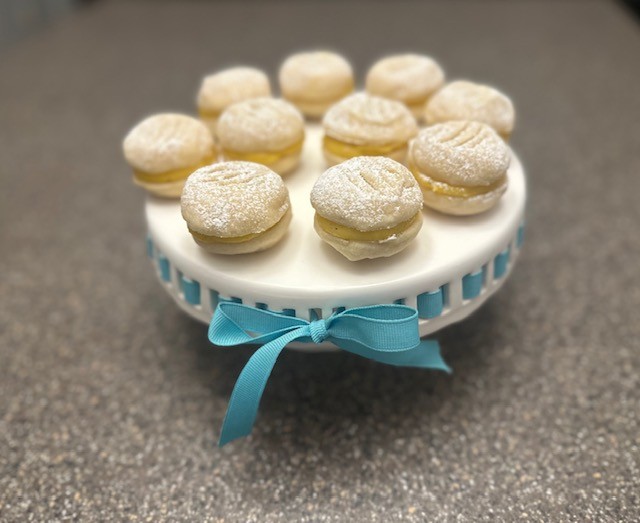
Passion Fruit Shortbread Cookies Sandwiches

by

Passion fruit is a truly unique and tropical flavor, a balance of tart and sweet, and a texture unlike most other fruits, with crunchy, edible seeds. The very first time I tried it was in culinary school, and my partner that week, Lorea, and I opted to make a passionfruit cheesecake. It was magical, winning high praise from our Chef instructors. I recently came across the fruit at the grocery store, which was such a treat, and I immediately wanted to make something a little lighter to relive that delicious food memory, deciding on a fresh curd filling for a delicate shortbread cookie. When shopping for fresh passion fruit, look for a lightly wrinkled and slightly firm skin. If you aren't able to find fresh passion fruit in your area, you can often find frozen puree, which will work just fine.

This recipe yields 24 cookies, enough to make 12 sandwich cookies. However, you'll have extra passion fruit curd if you want to double the cookie dough, you won't need to make more of the filling! If you don't use all the filling, it freezes beautifully!

INGREDIENTS

Fresh Passion Fruit Curd
  • 4 each Passion Fruit Appx. ⅔ C. Pulp with Seeds
  • 4 Lg. Egg Yolks
  • 100 g Granulated Sugar ½ Cup
  • 85 g Unsalted Butter 6 Tablespoons
  • 1-½ tsp. Unflavored Gelatin Powder
Shortbread Cookies
  • 113 g Cold, Unsalted Butter, cut into small cubes, 1 Stick
  • 160 g All Purpose Flour 1-¼ C., Measured by the 'Spoon and Sweep Method'
  • 60 g Powdered Confectioners Sugar ½ Cup, plus a little extra for dusting
  • 35 g Cornstarch ¼ Cup
  • 2 tsp. Pure Vanilla Extract
  • ½ tsp. Kosher Salt

INSTRUCTIONS

Prepare the Passion Fruit Curd

Step 1: Carefully cut the skin of the passion fruit in half (skin may be thick) over a flexible cutting board. Into the base of a blender, directly spoon the flesh and seeds, pouring any excess juice or seeds from the cutting board as well.

Step 2: Pulse the blender a few times and pour the pulp into a small liquid measuring cup. You should have approximately ⅔ cup, but it doesn't need to be exact.

Step 3: Gather the rest of the ingredients to prepare your passion fruit curd.

Step 4: In a medium, heavy-bottomed saucepan, mix the egg yolks, sugar and passion fruit over medium heat.

Step 5: Stir the mixture continuously for about 10 minutes using a wooden spoon, making sure to scrape the corners in the bottom of the saucepan to avoid any burning.

Step 6: The mixture will continue to thicken as it cooks but be mindful of the temperature; you don't want it to boil. The mixture is done once you can run a finger over the back of the spoon and see a definitive line that holds without running.

Step 7: With a fine mesh strainer fitted over a medium bowl, pour the hot puree through, using the wooden spoon to press the liquid through while collecting the excess seeds and any bits of cooked egg yolk. This step will ensure you have a silky, creamy fruit curd with just tiny speckles of the black seeds and no lumps!

Step 8: Sprinkle the surface of the warm puree with the gelatin powder and whisk. Add in the cubed butter* and mix until well blended.

Cover the bowl of passion fruit curd tightly with plastic wrap and place in the fridge for one hour to fully set.

*Chef's Note: If the butter isn't melting into the puree, pop the bowl into the microwave for 10 seconds. This should do the trick.

Prepare the Shortbread Cookies

Step 1: In the meantime, prepare the shortbread cookies. Gather the remaining ingredients, including your mixer and a large bowl fitted with a fine mesh strainer.

Chefs Note: The 'Spoon and Sweep' method is the most accurate way to measure flour, aside from weighing it on a kitchen scale. Use your spoon to gently stir and fluff the flour in its container, then scoop the flour directly into the measuring cup, using the straight edge of the spoon to sweep away the excess flour once the cup is full.

Step 2: Into the mixer, whip the butter until smooth.

Step 3: Add in the powdered sugar and the vanilla. Mix until just incorporated.

Step 4: Separately, sift together the flour, cornstarch and salt.

Step 5: With the mixer on the lowest speed setting, slowly begin adding spoonfuls of the flour mixture and blend with the powdered sugar and butter mixture.

Step 6: Once fully blended, remove the mixing bowl from the base and scrape down the sides using a rubber spatula, ensuring there are no missed dry ingredients not worked into the dough.

Step 7: Using a small scoop, portion cookie dough and place onto parchment lined baking sheets. If using a spoon to portion the dough, make sure you have 22 or 24 cookies.

Step 8: Roll each individual portion of dough into a smooth, round ball. With a fork, press the tongs into the top of half the cookies to make a light imprint. (These will be the 'tops' of your sandwich cookies).

Step 9: Pop the cookies into the refrigerator for about an hour.

Step 10: Once the dough has chilled, remove the baking sheets from the refrigerator and preheat the oven to 350℉.

Step 11: Bake the cookies for 10-12 minutes or just until lightly golden. You don't want the cookies to take on any brown edges. You may also opt to split the time, rotating the baking sheets halfway through baking.

Step 12: Remove the passion fruit curd from the refrigerator and stir well with a rubber spatula. The mixture should be thick.

Step 13: If using a pastry bag (recommended!), carefully spoon the curd into the pastry bag (no need to fit the bag with a pastry tip). Set aside until the cookies have fully cooled after baking.

Step 14: When ready to assemble, flip the "bottom" cookies over, snip the bottom corner of the pastry bag, and squeeze a small portion of the curd onto the center of each cookie.

Step 15: Lightly dust the 'tops' with powdered sugar. Place the top shortbread cookie over the curd and press down gently.

Store your passion fruit shortbread cookie sandwiches in an airtight container in the fridge.


Passionfruit Shortbread Cookie Sandwiches

Delicate shortbread cookies filled with fresh passionfruit curd are a unique treat with tropical flavor in every bite.
No ratings yet
Print Pin
Course: Brunch, Dessert
Keyword: Afternoon Tea, Cookies, Desserts, Fruit Desserts, Shortbread
Prep Time: 20 minutes minutes
Cook Time: 12 minutes minutes
Refrigeration Time: 1 hour hour 30 minutes minutes
Servings: 12 Cookie Sandwiches
Calories: 193kcal

Equipment

  • Kitchen-Aid Mixer fitted with the paddle attachment
  • Blender
  • Small, Liquid Measuring Cup
  • Dry Measuring Cups
  • Fine Mesh Metal Sieve Large and Small
  • Medium Mixing Bowl
  • Chef Knife
  • Flexible Cutting Board
  • Spoon
  • Medium, Heavy-Bottomed Saucepan
  • Wooden Spoon
  • 2 Parchment Lined Baking Sheets
  • Small Cookie Scoop
  • Rubber Spatula
  • Plastic Wrap
  • Pastry Bag Optional

Ingredients

Fresh Passionfruit Curd

  • 4 each Passion Fruit Appx. ⅔ C. Pulp with Seeds
  • 4 Lg. Egg Yolks
  • 100 g Granulated Sugar ½ Cup
  • 85 g Unsalted Butter 6 Tablespoons
  • 1-½ tsp. Unflavored Gelatin Powder

Shortbread Cookies

  • 113 g Cold, Unsalted Butter, cut into small cubes 1 Stick
  • 160 g All Purpose Flour 1-¼ C., Measured by the Spoon and Sweep Method
  • 60 g Powdered Confectioners Sugar ½ Cup, plus a little extra for dusting
  • 35 g Cornstarch ¼ Cup
  • 2 tsp. Pure Vanilla Extract
  • ½ tsp. Kosher Salt

Instructions

Prepare the Passion Fruit Curd

  • Carefully cut the skin of the passion fruit in half (skin may be thick) over a flexible cutting board. Into the base of a blender, directly spoon the flesh and seeds, pouring any excess juice or seeds from the cutting board as well.
  • Pulse the blender a few times and pour the pulp into a small liquid measuring cup. You should have approximately ⅔ cup, but it doesn't need to be exact.
  • Gather the rest of the ingredients to prepare your passion fruit curd.
  • In a medium, heavy-bottomed saucepan, mix the egg yolks, sugar and passionfruit over medium heat.
  • Stir the mixture continuously for about 10 minutes using a wooden spoon, making sure to scrape the corners in the bottom of the saucepan to avoid any burning.
  • The mixture will continue to thicken as it cooks but be mindful of the temperature; you don't want it to boil. The mixture is done once you can run a finger over the back of the spoon and see a definitive line that holds without running.
  • With a fine mesh strainer fitted over a medium bowl, pour the hot puree through, using the wooden spoon to press the liquid through while collecting the excess seeds and any bits of cooked egg yolk. This step will ensure you have a silky, creamy fruit curd with just tiny speckles of the black seeds and no lumps!
  • Sprinkle the surface of the warm puree with the gelatin powder and whisk. Add in the cubed butter and mix until well blended.
    Note: If the butter isn't melting into the puree, pop the bowl into the microwave for 10 seconds. This should do the trick!
    Cover the bowl of passion fruit curd tightly with plastic wrap and place in the fridge for one hour to fully set.

Prepare the Shortbread Cookies

  • In the meantime, prepare the shortbread cookies. Gather the remaining ingredients, including your mixer and a large bowl fitted with a fine mesh strainer.
  • Into the mixer, whip the butter until smooth.
  • Add in the powdered sugar and the vanilla. Mix until just incorporated.
  • Separately, sift together the flour, cornstarch and salt.
  • With the mixer on the lowest speed setting, slowly begin adding spoonfuls of the flour mixture and blend with the powdered sugar and butter mixture.
  • Once fully blended, remove the mixing bowl from the base and scrape down the sides using a rubber spatula, ensuring there are no missed dry ingredients not worked into the dough.
  • Using a small scoop, portion cookie dough and place onto parchment lined baking sheets. If using a spoon to portion the dough, make sure have 22 or 24 cookies.
    With a fork, press the tongs into the top of half the cookies, making a light imprint (These will be the 'tops' of your sandwich cookies).
  • Pop the cookies into the refrigerator for about an hour.
  • After the dough has chilled, remove the baking sheets from the refrigerator and preheat the oven to 350℉.
  • Bake the cookies for 10-12 minutes or just until lightly golden. You don't want the cookies to take on any brown edges. You may also opt to split the time, rotating the baking sheets halfway through baking.
  • Remove the passion fruit curd from the refrigerator and stir well with a rubber spatula. The mixture should be thick.
  • If using a pastry bag (recommended!), carefully spoon the curd into the pastry bag (no need to fit the bag with a pastry tip). Set aside until the cookies have baked and cooled.
  • When ready to assemble, flip the "bottom" cookies over, snip the bottom corner of the pastry bag, and squeeze a small portion of the curd onto the center of each cookie.
  • Lightly dust the 'tops' with powdered sugar. Place the top shortbread cookie over the curd and press down gently.
  • Store your passion fruit shortbread cookie sandwiches in an airtight container in the fridge.

Notes

This recipe yields 24 cookies, enough to make 12 sandwich cookies. However, you'll have extra passion fruit curd if you want to double the cookie dough, you won't need to make more of the filling! 

Nutrition

Serving: 1Cookie | Calories: 193kcal | Carbohydrates: 22.8g | Protein: 2.1g | Fat: 10.4g | Saturated Fat: 6.3g | Cholesterol: 51mg | Sodium: 84mg | Potassium: 37mg | Fiber: 1g | Sugar: 8.9g | Calcium: 5.8mg | Iron: 0.4mg

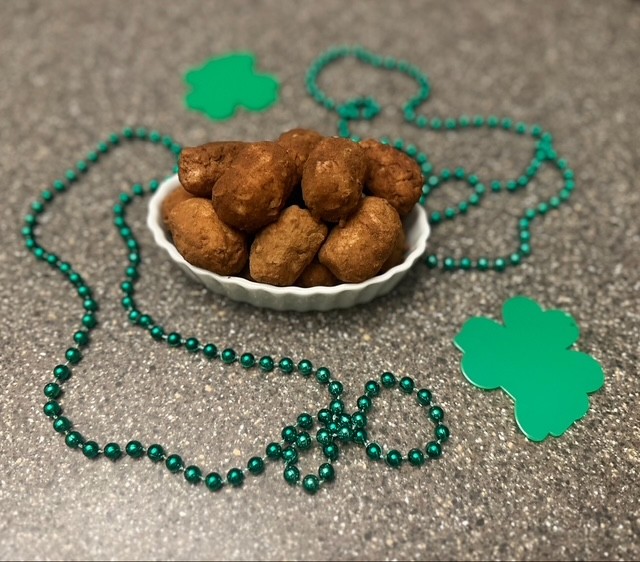
Irish Potato Candy

by

Unlike other holidays, I don't typically go overboard celebrating St. Patrick's Day, but I do always try and wear green and make these adorable little treats to share. Irish Potato Candy originated in Philadelphia, Pennsylvania (not Ireland) but since I grew up near Philly, it's been a tradition as long as I can remember. These cute little coconut cream candies are dusted in a cinnamon spice blend and are meant to resemble a classic Irish staple, the potato! The recipe comes together with just a few simple ingredients, no baking required, and are incredibly delicious!

INGREDIENTS

  • 8 oz Cream Cheese, Softened Preferably Philadelphia Brand
  • 1 Stick Salted Butter, Softened
  • 1-½ Tbsp. Vanilla Extract
  • 2 Lb. Powdered Confectioners Sugar, Sifted
  • 3 C. Shredded Coconut, Sweetened
  • 3 C. Shredded Coconut, Unsweetened
  • ¼ C. Ground Cinnamon
  • ¼ tsp. Ground Cardamom
  • Pinch Nutmeg

INSTRUCTIONS

Step 1: Gather all of your ingredients. Make sure to thoroughly whisk your coconut so that it is well blended. You can easily use the same type of shredded coconut for the entire recipe, but I prefer the blend of both the sweetened and unsweetened.

Step 2: In the bowl of your mixer, blend together the softened cream cheese, butter and vanilla extract until creamy.

Step 3: With the mixer off in between additions, slowly began to add the powdered sugar until it has all been incorporated. Scrape down the sides with a rubber spatula.

Step 4: Add the coconut mixture and stir using a wooden spoon. The mixture will be quite stiff, but make sure to really mix it well. Set aside.

Step 5: In a medium bowl, whisk together the cinnamon, cardamom and nutmeg.

Step 6: Using your cookie scoop (or spoon), portion out small, individual portions of your candy. Using clean hands, roll each into a tight ball to get a smooth surface, and then form into a small, oblong log.

Step 7: Drop each piece of candy filling into the bowl with the spice blend and give a quick toss to fully coat the outside. Move the finished candy onto the parchment-lined baking sheet. Repeat until all of the candy has been done.

Step 8: Irish Potato Candy should be stored in the refrigerator in an airtight container to firm up before serving. This is a great treat to make ahead, as it can be stored for up to 2 weeks. If giving away as gifts, individual pieces fit perfectly in mini paper cupcake liners and look pretty when placed in boxes or wrapped up in cellophane treat bags.

Chefs Note: If your kitchen is warm, or you notice that the candy is getting a bit sticky as you're rolling them in your hands, you may want to portion the candies, placing them onto the baking sheet and then refrigerating them for about 30 minutes before shaping.


Irish Potato Candy

A classic St. Patrick's Day treat, these cute little coconut cream candies dusted in a cinnamon spice blend look just like bite-sized potatoes!
No ratings yet
Print Pin
Course: Dessert
Cuisine: American
Keyword: Candy, Cinnamon, Coconut, Sweets, Treats
Prep Time: 15 minutes minutes
Assembly Time: 1 hour hour
Servings: 76 Pieces
Calories: 90kcal

Equipment

  • Kitchen-Aid Mixer or hand-held mixer
  • Large Mixing Bowl
  • Wooden Spoon
  • Medium Bowl
  • Stainless Steel Whisk
  • Dry Measuring Cups
  • Small Metal Cookie Scoop or a Tablespoon
  • Parchment-Lined Baking Sheet

Ingredients

  • 8 oz Cream Cheese, Softened Preferably Philadelphia Brand
  • 1 Stick Salted Butter
  • 1-½ Tbsp. Vanilla Extract
  • 2 Lb. Powdered Confectioners Sugar
  • 3 C. Shredded Coconut, Sweetened
  • 3 C. Shredded Coconut, Unsweetened
  • ¼ C. Ground Cinnamon
  • ¼ tsp. Ground Cardamom
  • Pinch Nutmeg

Instructions

  • Gather all of your ingredients. Make sure to thoroughly whisk your unsweetened and sweetened coconut so that it is well blended.
  • In the bowl of your mixer, blend together the softened cream cheese, butter and vanilla extract until creamy.
  • With the mixer off in between additions, slowly began to add the powdered sugar until it has all been incorporated.
  • Add the coconut mixture and stir using a wooden spoon. The mixture will be quite stiff, but make sure to really mix it well. Set aside.
  • In a medium bowl, whisk together the cinnamon, cardamom and nutmeg.
  • Using your cookie scoop (or spoon), portion out small, individual portions of your candy. Using clean hands, roll each into a tight ball to get a smooth surface, and then form into a small, oblong log.
  • Drop each piece of candy filling into the bowl with the spice blend and give a quick toss to fully coat the outside. Move the finished candy onto the parchment-lined baking sheet. Repeat until all of the candy has been done.
  • Irish Potato Candy should be stored in the refrigerator in an airtight container to firm up. This is a great treat to make ahead, as it can be stored for up to 2 weeks.

Notes

If your kitchen is warm, or you notice that the candy is getting a bit sticky as you're rolling them in your hands, you may want to portion the candies, placing them onto the baking sheet and then refrigerating them for about 30 minutes before shaping.

Nutrition

Serving: 1Piece | Calories: 90kcal | Carbohydrates: 14g | Protein: 0.2g | Fat: 3.9g | Saturated Fat: 2.9g | Cholesterol: 6.1mg | Sodium: 23mg | Potassium: 17mg | Fiber: 0.6g | Sugar: 13g | Calcium: 8.1mg

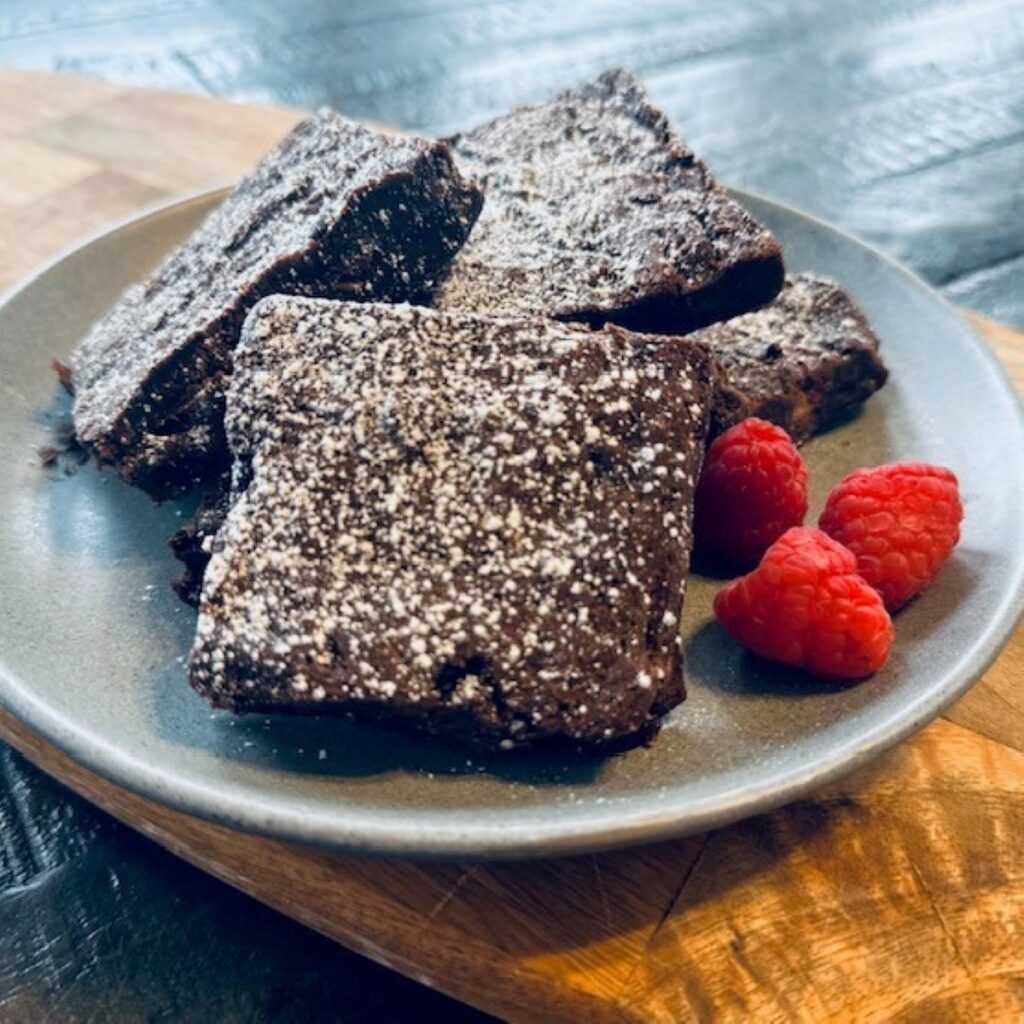
Cinnamon Espresso Fudge Brownies

by

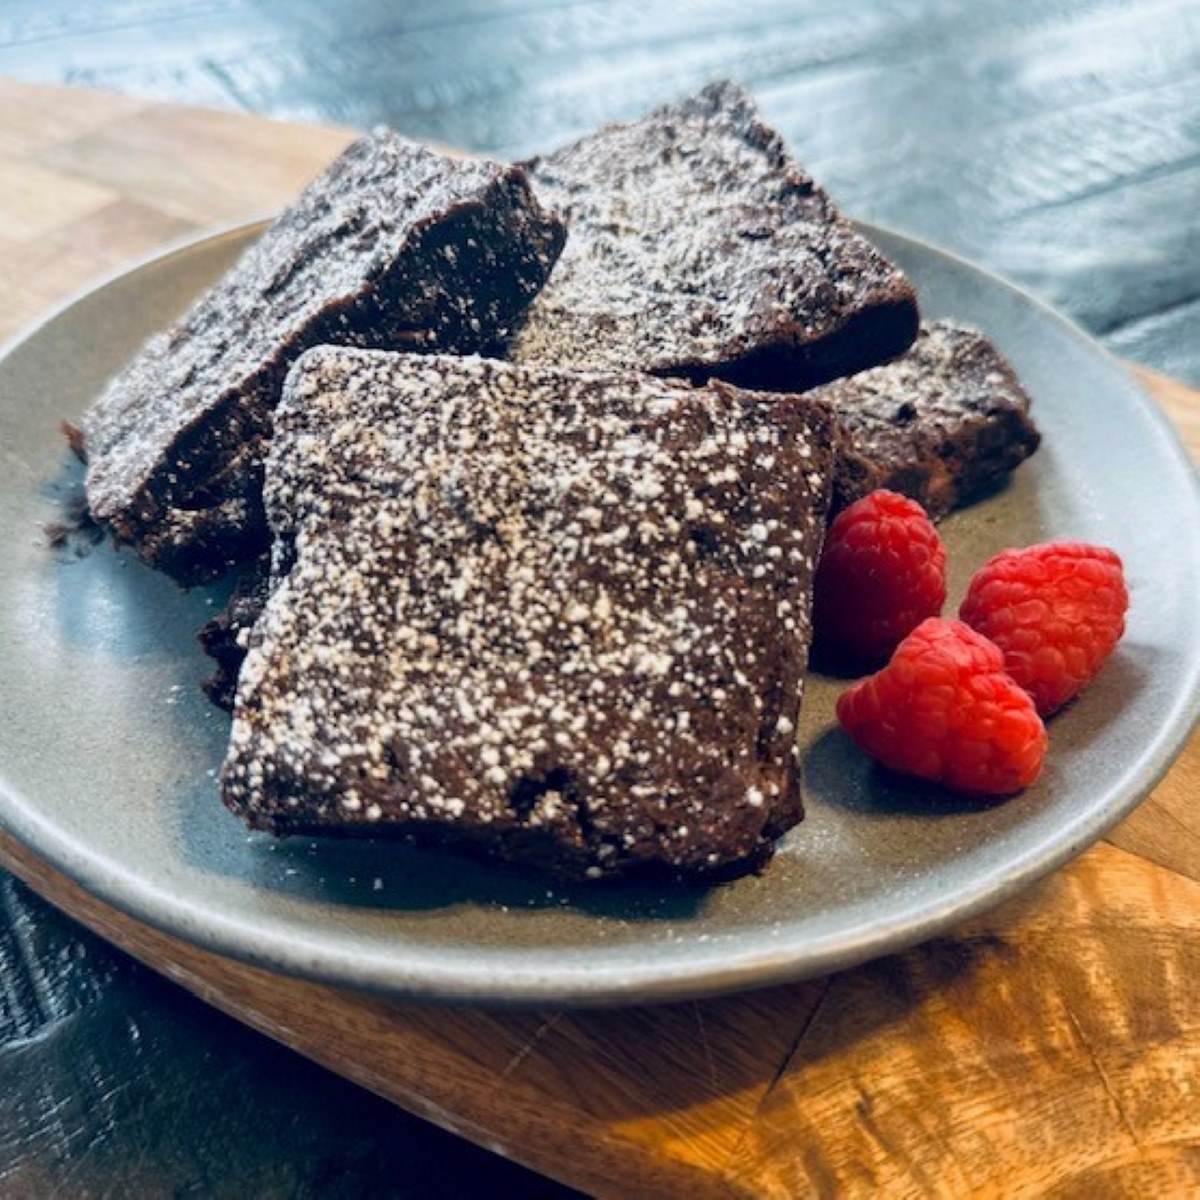
Years ago, during culinary school, one of our administrators asked me to help cater a party she was hired for, and one of the desserts we made was a triple chocolate brownie with a secret ingredient that really "woke up" the flavor of the chocolate. As a non-coffee drinker, I'd never have thought to add espresso powder to a brownie batter, but wow! I rarely make a brownie nowadays without adding it. While you don't necessarily want your brownies to taste like coffee, that warmth and slight bitterness adds a whole new dimension of flavor, especially when paired with a mild spice like cinnamon, along with the sweetness of good quality chocolate. I almost always use Ghirardelli, but any chocolate you prefer will do. Unlike most boxed mixes that yield dry and/or cake-like brownies, these are super decadent and moist, almost like fudge. This recipe yields a lot, which makes them a perfect option for freezing extras and pulling them out when you want just one or two. They don't freeze solid, and I actually prefer them near straight of the freezer- they're just delicious!

INGREDIENTS

  • 4 Sticks Unsalted Butter, cut into small pieces
  • 26 oz. Good Quality Semisweet Chocolate Chips, divided such as Ghirardelli
  • 8 oz. Good Quality, Unsweetened Chocolate, chopped such as Ghirardelli, or Lindt
  • 6 Extra Large Eggs (or 7 Large)
  • 2 Tbsp. Pure Vanilla Extract
  • 2 Tbsp. Espresso Powder
  • 1 tsp. Ground Cinnamon
  • 2-¼ C. Granulated White Sugar
  • 1-¼ C. All Purpose Flour
  • 1 Tbsp. Baking Powder
  • 1 tsp. Kosher Salt
  • Powdered Sugar, for dusting

INSTRUCTIONS

Step 1: Preheat your oven to 350℉ and gather your ingredients. Measure out 1 lb. (16 oz) of chocolate chips and set the remaining 10 oz aside.

Step 2: Set up a 'Bain Marie' by placing a small pot filled ⅓ of the way with water to a full boil, ensuring that your metal bowl can be placed over the pot without the bottom of the bowl directly touching the water.

Step 3: While the water heats up, add 16 oz. of chocolate chips, the chopped, unsweetened chocolate and the butter to a large metal bowl. Reduce the heat, then place the bowl over the simmering water.

Step 4: Using a rubber spoon, stir the chocolate mixture fairly frequently, until the consistency is smooth and drips freely like a ribbon when the spoon is held over the bowl. Remove the bowl from the heat and set aside to cool slightly.

Step 5: In the meantime, crack your eggs into a large mixing bowl. Gently mix in the sugar, espresso powder and vanilla.

Step 6: Using a fine mesh strainer, sift together the flour, baking powder, and cinnamon. Whisk in the kosher salt.

Step 7: Once the chocolate mixture has cooled, slowly add into the egg mixture, folding the ingredients together until smooth.

Step 8: A little at a time, fold the flour mixture into the batter. Be sure there are no streaks of flour.

Step 9: Pour the brownie batter into the prepared pan, and sprinkle evenly with the reserved chocolate chips. Use the spatula to work the chips into the mixture so they are not just laying on top.

Step 10: Bake brownies in the preheated oven for approximately 25 minutes, or until a toothpick inserted into the center comes out clean.

Once the brownies are baked, remove from the oven and allow the pan to cool to room temperature, before placing them in the refrigerator to fully set.

Note: Brownies are SUPER fudgy, so cutting them before they are fully set is not advised.

Cut fully chilled brownies into five rows vertically, four rows horizontally, to create 20 even pieces.

Dust with powdered sugar before serving, if desired.


Cinnamon Espresso Fudge Brownies

Move over boxed mixes! If you prefer a decadent, dense, and ultra fudgy brownie over a cake-like brownie, this one's definitely for you!
No ratings yet
Print Pin
Course: Dessert
Cuisine: American
Keyword: Brownies, Chocolate
Prep Time: 20 minutes minutes
Cook Time: 25 minutes minutes
Servings: 20 Servings
Calories: 491kcal

Equipment

  • Parchment Lined, Half Baking Sheet (12 x 18" x 1"), sprayed lightly with cooking spray or greased with butter
  • Cutting Board
  • Chef Knife
  • Small Pot filled ⅓ with water
  • Large Metal Bowl
  • Potholder or Kitchen Towel
  • Rubber Spatula
  • 2 Large Mixing Bowls
  • Fine-Mesh Metal Strainer

Ingredients

  • 4 Sticks Unsalted Butter, cut into small pieces
  • 26 oz. Good Quality Semisweet Chocolate Chips, divided such as Ghirardelli
  • 8 oz. Good Quality, Unsweetened Chocolate Bars, Chopped such as Ghirardelli, or Lindt
  • 6 XL Eggs (or 7 Large)
  • 2 Tbsp. Pure Vanilla Extract
  • 2 Tbsp. Espresso Powder
  • 1 tsp. Ground Cinnamon
  • 2-¼ C. Granulated White Sugar
  • 1-¼ C. All Purpose Flour
  • 1 Tbsp. Baking Powder
  • 1 tsp. Kosher Salt
  • Powdered Sugar, for dusting

Instructions

  • Preheat your oven to 350℉ and gather your ingredients. Measure out 1 lb. (16 oz) of chocolate chips and set the remaining 10 oz aside.
  • Set up a 'Bain Marie' by placing a small pot filled ⅓ of the way with water to a full boil, ensuring that your metal bowl can be placed over the pot without the bottom of the bowl directly touching the water.
  • While the water heats up, add 16 oz. of chocolate chips, the chopped, unsweetened chocolate and the butter to the large metal bowl. Reduce the heat, then place the bowl over the simmering water.
  • Using a rubber spoon, stir the chocolate mixture fairly frequently, until the consistency is smooth and drips freely like a ribbon when the spoon is held over the bowl. Remove the bowl from the heat and set aside to cool slightly.
  • In the meantime, crack your eggs into a large mixing bowl. Gently mix in the sugar, espresso powder and vanilla.
  • Using a fine mesh strainer, sift together the flour, baking powder, and cinnamon. Whisk in the kosher salt.
  • Once the chocolate mixture has cooled, slowly add into the egg mixture, folding the ingredients together until smooth.
  • A little at a time, fold the flour mixture into the batter. Be sure there are no streaks of flour.
  • Pour the brownie batter into the prepared pan, and sprinkle evenly with the reserved chocolate chips. Use the spatula to work the chips into the mixture so they are not just laying on top.
  • Bake the brownies in the preheated oven for approximately 25 minutes, or until a toothpick inserted into the center comes out clean.
  • Once the brownies are baked, remove from the oven and allow the pan to cool to room temperature, before placing them in the refrigerator to fully set.
    Note: Brownies are SUPER fudgy, so cutting them before they are fully set is not advised.
  • Cut fully chilled brownies into five rows vertically, four rows horizontally, to create 20 even pieces.
  • Dust with powdered sugar before serving, if desired.

Nutrition

Serving: 1Each | Calories: 491kcal | Carbohydrates: 46g | Protein: 6.9g | Fat: 35g | Saturated Fat: 22g | Cholesterol: 112mg | Sodium: 120mg | Potassium: 312mg | Fiber: 4.3g | Sugar: 31g | Calcium: 89mg | Iron: 4.2mg

Banana Nut Bread

by

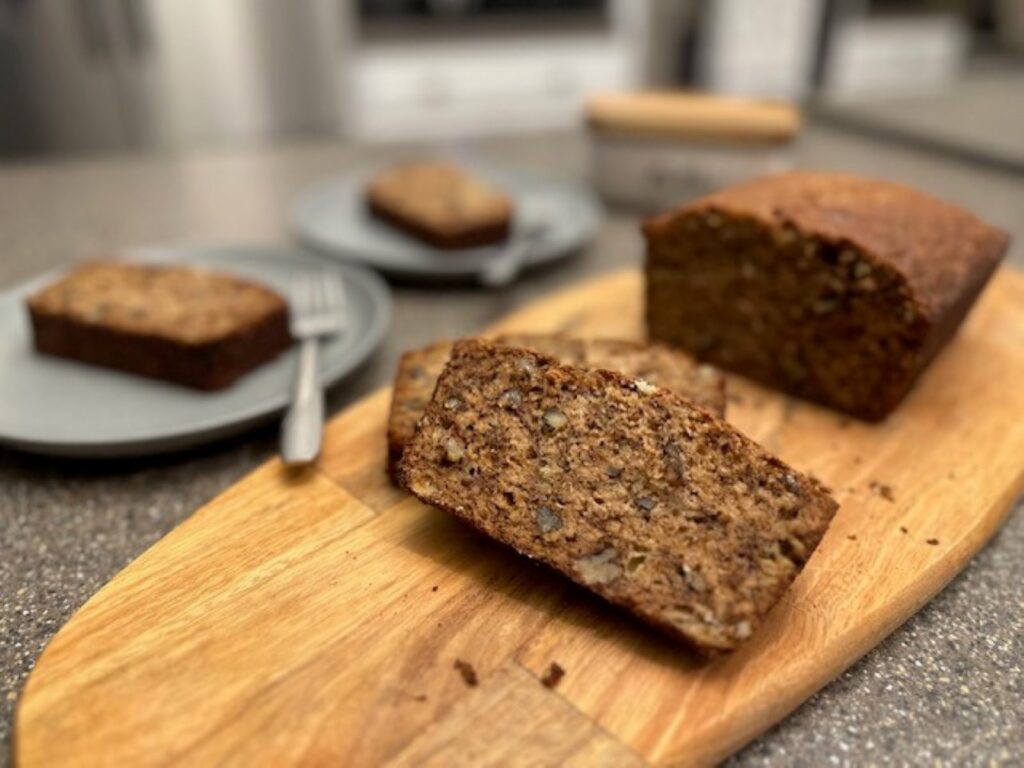
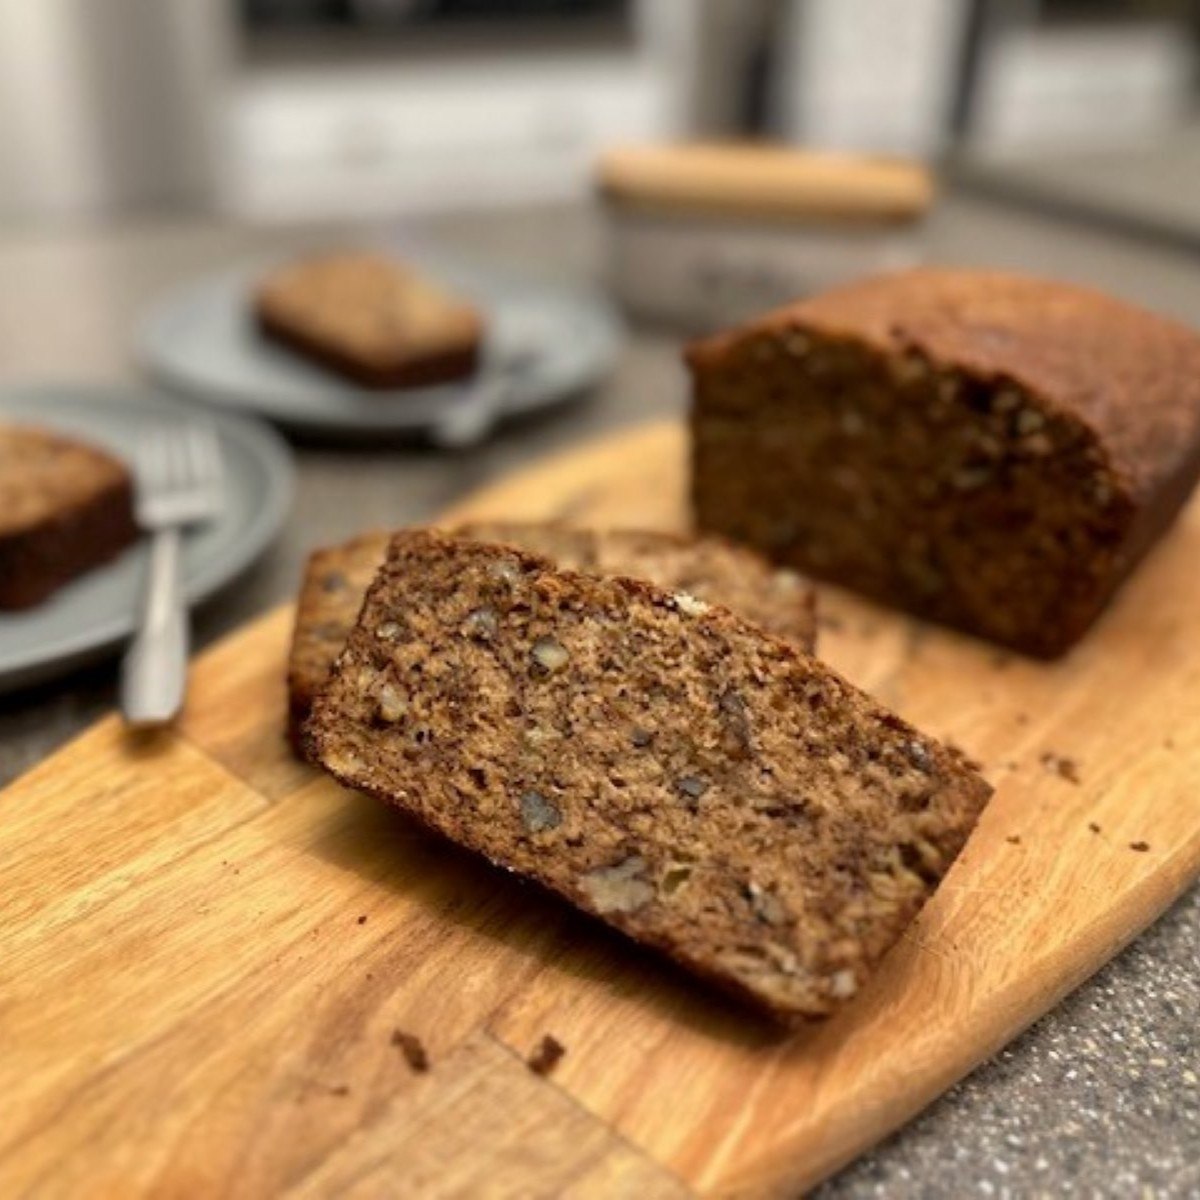
There's nothing quite like the scent of fresh banana bread wafting throughout the house, and overripe bananas were made for making banana bread! This recipe is moist with a tender crumb, each bite a delicious balance of sweetness from the bananas, a little spice from cinnamon and nutmeg, and texture from a blend of toasted walnuts and pecans. To yield great results, be sure your bananas are several days old, with a brown, spotty peel and are soft to the touch- firm and ripe just won't cut it. The fruit's natural sugars break down more easily into the batter when overripe, creating the perfect flavor, texture and density.

Another trick to making great banana bread (and almost all other baked goods!) that's not too dense or heavy is properly measuring out the flour. When not weighing ingredients on a scale, the best way to do this is called the "spoon and sweep" method. By gently 'fluffing' the flour with a quick stir before measuring, this lightens up the flour that has inevitably settled and packed. When you scoop and spoon the flour directly from the container into a measuring cup, then sweep the excess flour away using the flat edge of the spoon's handle, instead of dipping the measuring cup directly into the flour, you get a much more accurate amount.

INGREDIENTS

  • 4 Overripe Bananas mashed
  • 1 Stick Unsalted Butter melted
  • 1 Tbsp. Unsalted Butter melted, for greasing the loaf pan
  • 1-¾ C. All Purpose Flour*
  • 1 C. Walnuts (or Pecans) roughly chopped and lightly toasted
  • ½ C. Granulated White Sugar
  • 1 tsp. Baking Soda
  • 1-½ tsp. Ground Cinnamon
  • ½ tsp. Table Salt
  • ¼ tsp. Grated Nutmeg
  • 2 Lg. Eggs at room temperature
  • ¼ C. Sour Cream
  • ½ C. Light Brown Sugar lightly packed
  • 1 Tbsp. Vanilla Extract

INSTRUCTIONS

Step 1: Preheat your oven to 350℉. Gather all of your ingredients, along with your loaf pan, mixing bowls, and utensils.

The 'spoon and sweep' method is the most accurate way to measure flour, aside from weighing it on a kitchen scale. Use your spoon to gently stir and fluff the flour in its container, then scoop the flour directly into the measuring cup, using the straight edge of the spoon to sweep away the excess flour once the cup is full.

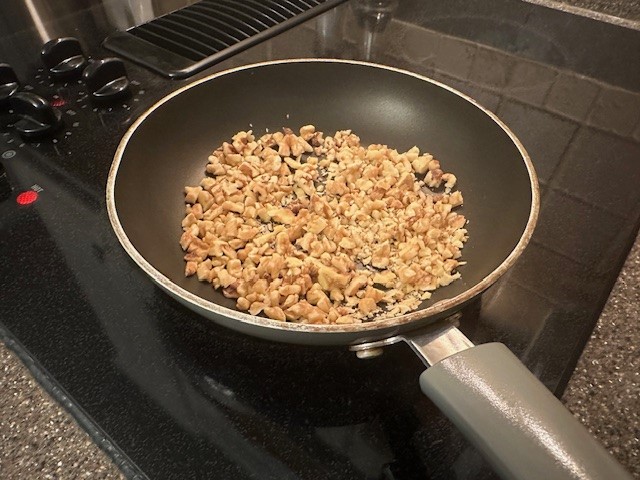
In a small sauté pan, lightly toast the walnuts (or pecans) over medium heat, just until they are warm.

Step 2: Using a paper towel, generously grease the bottom and sides of your loaf pan with the tablespoon of melted butter and set aside.

Chef's Tip: If you prefer, feel free to use a large piece of parchment paper that fully lines the bottom and up along the longest sides of the pan, as well as a little extra over the sides to help with lifting the baked bread out of the pan.

Step 3: Into the large mixing bowl, stir together the flour*, toasted nuts, granulated sugar, baking soda, cinnamon, salt and nutmeg. Set aside.

Step 4: In a smaller mixing bowl, whisk together the eggs, sour cream, light brown sugar and vanilla extract until fully emulsified. The color and texture will look similar to a light, yet rich caramel.

Step 5: Whisk the mashed bananas into the egg mixture and then fold into the dry ingredients, mixing until no dry ingredients remain.

Step 6: Pour the batter into the prepared loaf pan and smooth out the top so the bread bakes evenly. Bake in your preheated oven for approximately 1 hour, or until a toothpick inserted into the center of the bread comes out clean.

Step 7: Allow the bread to cool in the pan for about 15 minutes before attempting to remove it, to avoid sticking on the bottom. Turn out the bread and allow to cool completely on a wire rack.

After cooling completely, bread may be stored at room temperature for a few days if kept in a container with a tight-fitting lid, or, if preferred, wrapped tightly in plastic wrap and stored in the refrigerator.


Banana Nut Bread

Moist with a tender crumb, this banana bread is the perfect (and easy!) treat to make when you've got bananas on your counter that are past their prime!
No ratings yet
Print Pin
Course: Breakfast, Brunch
Cuisine: American
Keyword: Banana, Bread, Homemade Bread
Prep Time: 10 minutes minutes
Cook Time: 1 hour hour
Servings: 12 servings
Calories: 373kcal

Equipment

  • Measuring Cups and Spoons
  • Small Sauté Pan
  • 9"x5" Loaf Pan
  • Large Mixing Bowl
  • Medium Mixing Bowl
  • Wire Whisk
  • Rubber Spatula
  • Paper Towel
  • Cooling Rack

Ingredients

  • 4 Each Overripe Bananas mashed
  • 1 Stick Unsalted Butter melted
  • 1 Tbsp. Unsalted Butter melted, for greasing the loaf pan
  • 1-¾ C. All Purpose Flour*
  • 1 C. Walnuts (or Pecans) roughly chopped and lightly toasted
  • ½ C. Granulated White Sugar
  • 1 tsp. Baking Soda
  • 1-½ tsp. Ground Cinnamon
  • ½ tsp. Table Salt
  • ¼ tsp. Grated Nutmeg
  • 2 Lg. Eggs at room temperature
  • ¼ C. Sour Cream
  • ½ C. Light Brown Sugar lightly packed
  • 1 Tbsp. Vanilla Extract

Instructions

  • Preheat your oven to 350℉. Gather all of your ingredients, along with your loaf pan, mixing bowls, and utensils.
    *The 'spoon and sweep' method is the most accurate way to measure flour, aside from weighing it on a kitchen scale. Use your spoon to gently stir and fluff the flour in its container, then scoop the flour directly into the measuring cup, using the straight edge of the spoon to sweep away the excess flour once the cup is full.
    In a small sauté pan, lightly toast the walnuts (or pecans) over medium heat, just until they are warm.
  • Using a paper towel, generously grease the bottom and sides of your loaf pan with the tablespoon of melted butter and set aside.
  • Into the large mixing bowl, stir together the flour, toasted nuts, granulated sugar, baking soda, cinnamon, salt and nutmeg. Set aside.
  • In a smaller mixing bowl, whisk together the eggs, sour cream, light brown sugar and vanilla extract until fully emulsified. The color and texture will look similar to a rich caramel.
  • Whisk the mashed bananas into the egg mixture and then fold into the dry ingredients, mixing until no dry ingredients remain.
  • Pour the batter into the prepared loaf pan and smooth out the top so the bread bakes evenly. Bake in your preheated oven for approximately 1 hour, or until a toothpick inserted into the center of the bread comes out clean.
  • Allow the bread to cool in the pan for about 15 minutes before attempting to remove it, to avoid sticking. Turn out the bread and allow to cool completely on a wire rack.
    After cooling completely, bread may be stored at room temperature for a few days if kept in a container with a tight-fitting lid, or, if preferred, wrapped tightly in plastic wrap and stored in the refrigerator.

Nutrition

Serving: 1slice | Calories: 373kcal | Carbohydrates: 45g | Protein: 5.7g | Fat: 20g | Saturated Fat: 6.7g | Cholesterol: 54mg | Sodium: 120mg | Potassium: 259mg | Fiber: 2.9g | Sugar: 25g | Calcium: 47mg | Iron: 1mg

Strawberry Almond Rugelach

by

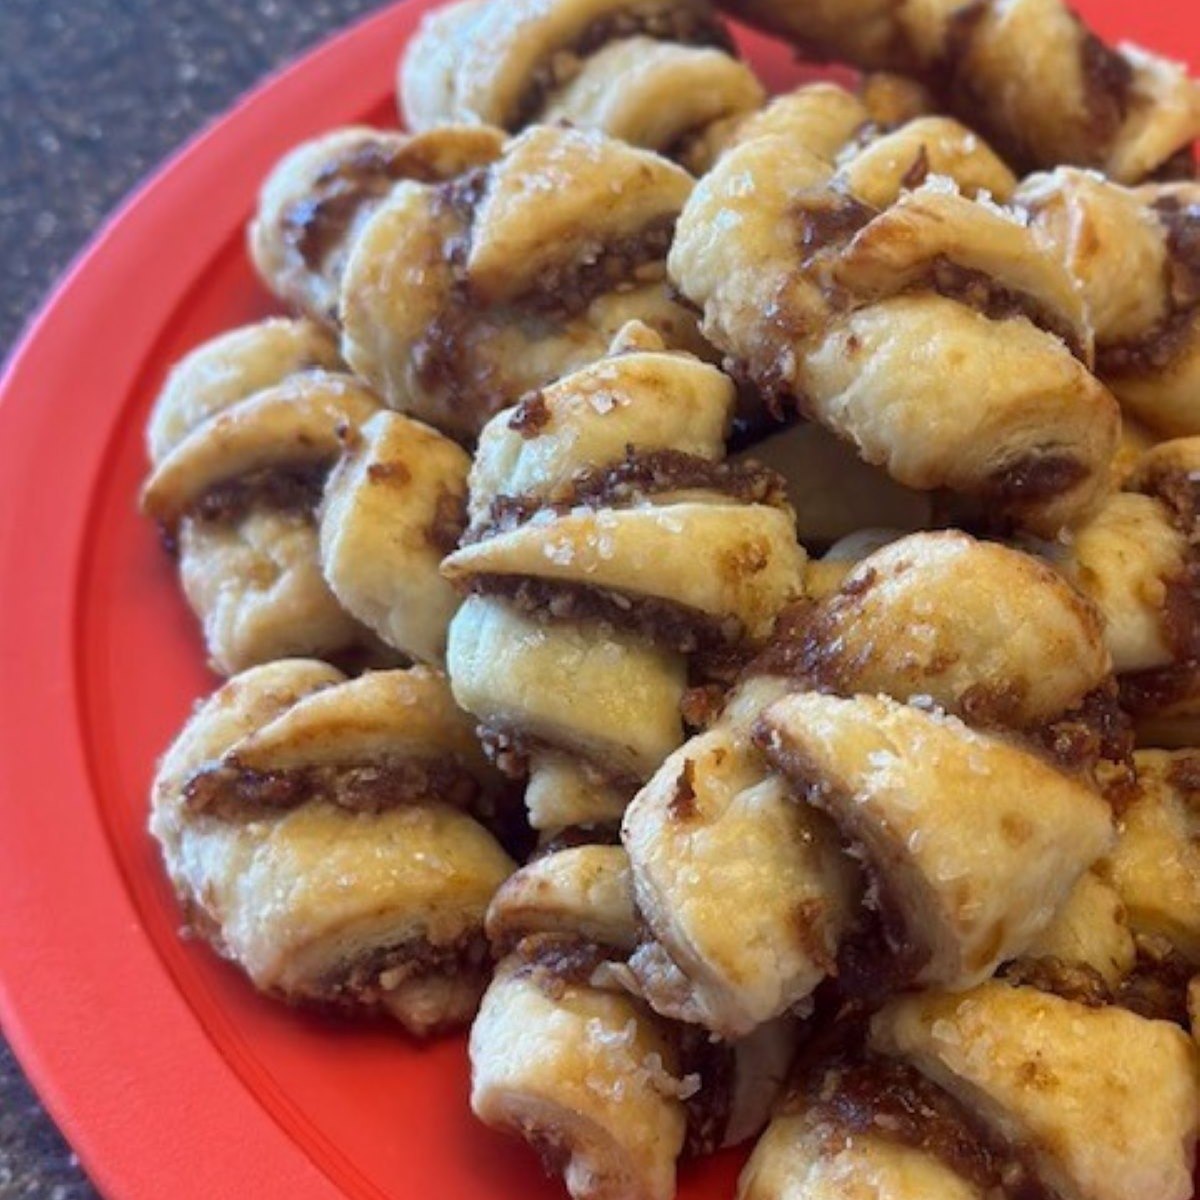
Rugalach is a tender, flaky cookie resembling a miniature crescent roll, filled with a versatile, sweet and nutty filling. This version uses seedless strawberry jam and a cinnamon-sugar almond mixture, the perfect balance of savory and sweet. I love making these cookies over the holidays, a unique treat that lends itself to changing up the flavors to whatever jam or nuts you have on hand.

INGREDIENTS

  • 2 C. All Purpose Flour plus a few extra tablespoons for dusting
  • 2 Sticks Unsalted Butter, Cold, Cubed
  • 8 oz Cream Cheese, Cubed
  • ⅓ C. Sour Cream
  • ¼ tsp. Kosher Salt
  • 1 C. Finely Ground Toasted Almonds
  • ¼ C. Granulated Sugar
  • ¼ C. Light Brown Sugar, Packed
  • 1 Tbsp. Cinnamon
  • ½ C. Seedless Strawberry Jam
  • 1 Lg. Egg, Slightly Beaten, mixed with water to make an egg wash
  • Sparkling Sugar optional

INSTRUCTIONS

Step 1: Gather all of your ingredients, including a food processor.

Step 2: Into the food processor, blend together the butter, cream cheese, sour cream, flour and salt into a cohesive, yet crumbly pastry dough.

Step 3: Remove the dough from the food processor, knead gently on a clean, lightly flour-dusted work surface, and divide the dough into 4 equal portions, pressing into a round shape. Wrap each portion of dough in plastic wrap, and place in the refrigerator for about an hour. Chilling the dough will yield a flakier texture for the rugelach.

Step 4: In the meantime, combine the ground almonds, both sugars and cinnamon in a small bowl until well blended. Set aside.

Step 5: Lightly dust a clean workstation with a little flour. Working with one portion of dough at a time (keep the other portions refrigerated until ready to use), roll out the dough to create a circle 9" in diameter.

Step 6: Spread a thin layer of strawberry jam over the surface of the dough, leaving a small border on the outside rim. Sprinkle the surface of the jam with the cinnamon-sugar almond mixture, being mindful not to be heavy handed (adding too much will likely cause the filling to ooze out during baking).

Step 7: Using a pizza cutter, or a Chef Knife, divide the dough into quarters by cutting a line right down the center horizontally, and then vertically. Each quarter is then to be divided into equal thirds, so you end up with 12 triangles.

Step 8: Starting from the widest end, roll each triangle towards the center, keeping the point at the top of the roll. Repeat with all twelve pieces, and place on a parchment lined baking sheet. Remove another round of dough from the refrigerator and repeat steps. In total, you will end up with 48 rugelach.

Place the prepared cookies back in the fridge to rest for an additional 30 minutes before baking.

Step 9: Preheat the oven to 350℉. Make an egg wash by mixing an egg with a little water in a small bowl and then brush the tops and sides of each rugelach lightly. Sprinkle with sparkling sugar.

Step 10: Bake rugelach for 20-25 minutes, or until the pastry is a pale, golden brown. Use a metal spatula to remove the cookies from the baking sheet and place on cooling racks.Repeat until all rugelach has been baked. Allow to cool before storing in an airtight container.


Strawberry Almond Rugelach

Flaky pastry, filled with seedless strawberry jam and a cinnamon-sugar almond mixture
No ratings yet
Print Pin
Course: Dessert
Cuisine: Polish
Keyword: Cookies, Pastry
Servings: 24 servings
Calories: 194kcal

Equipment

  • Food Processor
  • Small Mixing Bowl
  • Plastic Wrap
  • Fork
  • Parchment Lined Baking Sheets
  • Rolling Pin
  • Plastic Ruler
  • Pizza Cutter or Chef Knife
  • Pastry Brush
  • Small, Offset Spatula or Table Knife
  • Metal Spatula
  • Wire Cooling Racks

Ingredients

  • 2 C. All Purpose Flour plus a few extra tablespoons for dusting
  • 2 Sticks Unsalted Butter, Cold, Cubed
  • 8 oz Cream Cheese, Cubed
  • ⅓ C. Sour Cream
  • ¼ tsp. Kosher Salt
  • 1 C. Finely Ground Toasted Almonds
  • ¼ C. Granulated Sugar
  • ¼ C. Light Brown Sugar, Packed
  • 1 Tbsp. Cinnamon
  • ½ C. Seedless Strawberry Jam
  • 1 Lg. Egg, Slightly Beaten, mixed with water to make an egg wash
  • Sparkling Sugar optional

Instructions

  • Gather all of your ingredients, including a food processor.
  • Into the food processor, blend together the butter, cream cheese, sour cream, flour and salt into a cohesive, yet crumbly pastry dough.
  • Divide the dough into 4 equal portions, and press into a round shape. Wrap each portion of dough in plastic wrap, and place in the refrigerator for about an hour. Chilling the dough will yield a flakier texture for the rugelach.
  • In the meantime, combine the ground almonds, both sugars and cinnamon in a small bowl until well blended. Set aside.
  • Lightly dust a clean workstation with a little flour. Working with one portion of dough at a time (keep the other portions refrigerated until ready to use), roll out the dough to create a circle 9" in diameter.
  • Spread a thin layer of strawberry jam over the surface of the dough, leaving a small border on the outside rim. Sprinkle the surface of the jam with the cinnamon-sugar almond mixture, being mindful not to be heavy handed (adding too much will likely cause the filling to ooze out during baking).
  • Using a pizza cutter, or a Chef Knife, divide the dough into quarters by cutting a line right down the center horizontally, and then vertically. Each quarter is then to be divided into equal thirds, so you end up with 12 triangles.
  • Starting from the widest end, roll each triangle towards the center, keeping the point at the top of the roll. Repeat with all twelve pieces, and place on a parchment lined baking sheet. Remove another round of dough from the refrigerator and repeat steps. In total, you will end up with 48 rugelach.
    Place the prepared cookies back in the fridge to rest for an additional 30 minutes before baking.
  • Preheat the oven to 350℉.
    Make an egg wash by mixing an egg with a little water in a small bowl and then brush the tops and sides of each rugelach lightly. Sprinkle with sparkling sugar.
  • Bake rugelach for 20-25 minutes, or until the pastry is a pale, golden brown. Use a metal spatula to remove the cookies from the baking sheet and place on cooling racks.
    Repeat until all rugelach has been baked. Allow to cool before storing in an airtight container.

Notes

Rugelach is a great, make ahead cookie that will stay fresh for several days if stored in an airtight container at room temperature.  Otherwise, feel free to freeze after baking, and bring back to room temperature before serving.

Nutrition

Serving: 2Pieces | Calories: 194kcal | Carbohydrates: 20g | Protein: 2.7g | Fat: 12g | Saturated Fat: 6g | Cholesterol: 26mg | Sodium: 46mg | Potassium: 19mg | Fiber: 1.1g | Sugar: 9g | Calcium: 25mg | Iron: 0.3mg

Italian Butter Cookies

by

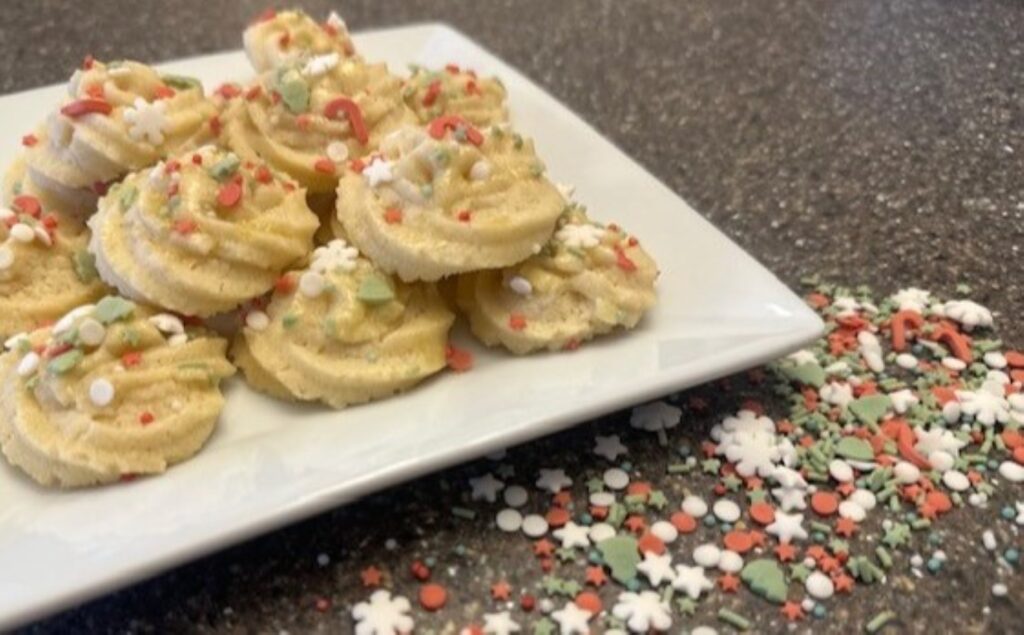
I have the fondest memories of going to the bakery with my Mom as a child and always being drawn to the light and airy butter cookies with their pretty swirls and fancy sprinkles. My version follows tradition of being buttery, crumbly, and lightly sweet, but keeps that melt-in-your-mouth texture.

INGREDIENTS

  • 2 Sticks Unsalted Butter
  • 1 C. Granulated Sugar
  • ¾ C. Mayonnaise
  • 1 Tbsp. Vanilla Extract
  • 2 Lg. Eggs, at Room temperature Plus additional egg for egg wash, mixed with water
  • 4-¼ C. All Purpose Flour
  • 1 tsp. Baking Powder
  • ¼ tsp. Table Salt

INSTRUCTIONS

Step 1: Gather all of your ingredients, including grabbing a mixing bowl.

Step 2: In a stand mixer fitted with the paddle attachment, cream together the butter and sugar.

Add the mayonnaise and vanilla extract, then eggs, one at a time, until you no longer see yellow streaks of yolk, and the mixture is fully blended.

Step 3: Using a fine mesh, metal strainer over a medium mixing bowl, sift together the flour, baking powder and salt.

Step 4: Slowly incorporate the dry ingredients into the stand mixer and blend. The mixture will appear similar to a cake batter.

Step 5: Move the mixture into a mixing bowl, cover with plastic wrap, and refrigerate for a minimum of one hour, but up to two hours, allowing the dough to chill.

Step 6: Preheat your oven to 350℉. Remove the dough from the fridge, and using a rubber spatula, spoon the dough directly into a large pastry bag fitted with a star tip. You may need to let the dough sit at room temperature for about 10 minutes so it's easier to work with, but you don't want it to get too soft, or your cookies may spread during baking.

Step 7: In a fluid, continuous motion beginning with the tip directly on the parchment, pipe a small ring, then, raising the tip slightly, pipe a second ring around on top of the base, and a third twist to make a point in the center. Leaving a few inches in between, repeat piping to fill each sheet pan with cookies.

Step 8: In a small bowl, make a quick egg wash by whisking an egg and a little water. Use a pastry brush to gently brush the egg wash over the tops of the unbaked cookies, which will help not only add a light golden brown during baking but will also help to adhere the decorate sprinkles.

Bake cookies in the preheated oven for 18-20 minutes, or until lightly golden brown.


Italian Butter Cookies

Swirls of light and airy, slightly sweet dough decorated with sprinkles will remind you of your favorite childhood bakery cookies!
No ratings yet
Print Pin
Course: Dessert
Cuisine: French
Keyword: Cookies
Prep Time: 15 minutes minutes
Cook Time: 20 minutes minutes
Chilling Time: 1 hour hour
Servings: 24 Servings
Calories: 237kcal

Equipment

  • Kitchen-Aid Mixer
  • Parchment Lined Sheet Pans
  • Measuring Cups and Spoons
  • Rubber Spatula
  • Pastry Bag with Star Tip
  • Medium Mixing Bowl
  • Small Bowl
  • Fine-Mesh Metal Strainer
  • Plastic Wrap
  • Pastry Brush

Ingredients

  • 2 Sticks Unsalted Butter
  • 1 C. Granulated Sugar
  • ¾ C. Mayonnaise
  • 1 Tbsp. Vanilla Extract
  • 2 Lg. Eggs, at Room temperature Plus additional egg for egg wash, mixed with water
  • 4-¼ C. All Purpose Flour
  • 1 tsp. Baking Powder
  • ¼ tsp. Table Salt

Instructions

  • Gather all of your ingredients, including grabbing a mixing bowl.
  • In a stand mixer fitted with the paddle attachment, cream together the butter and sugar.
  • Add the mayonnaise and vanilla extract, then eggs, one at a time, until you no longer see yellow streaks of yolk in the mixture.
  • Using a fine mesh, metal strainer over a medium mixing bowl, sift together the flour, baking powder and salt.
  • Slowly incorporate the dry ingredients into the stand mixer and blend. The mixture will appear similar to a cake batter.
  • Move the mixture into a mixing bowl, cover with plastic wrap, and refrigerate for a minimum of one hour, but up to two hours, allowing the dough to chill.
  • Preheat your oven to 350℉.
    Remove the dough from the fridge, and using a rubber spatula, spoon the dough directly into a large pastry bag fitted with a star tip. You may need to let the dough sit at room temperature for about 10 minutes so it's easier to work with, but you don't want it to get too soft, or your cookies may spread during baking.
  • In a fluid, continuous motion beginning with the tip directly on the parchment, pipe a small ring, then, raising the tip slightly, pipe a second ring around on top of the base, and a third twist to make a point in the center. Leaving a few inches in between, repeat piping to fill each sheet pan with cookies.
  • In a small bowl, make a quick egg wash by whisking an egg and a little water. Use a pastry brush to gently brush the egg wash over the tops of the unbaked cookies, which will help not only add a light golden brown during baking but will also help to adhere the decorate sprinkles.
  • Bake cookies in the preheated oven for 18-20 minutes, or until lightly golden brown.

Nutrition

Serving: 2Cookies | Calories: 237kcal | Carbohydrates: 26g | Protein: 2.9g | Fat: 13g | Saturated Fat: 5.5g | Cholesterol: 38mg | Sodium: 95mg | Potassium: 30mg | Fiber: 0.6g | Sugar: 9.6g | Calcium: 12mg | Iron: 0.3mg

Triple Chocolate Peppermint Bark

by

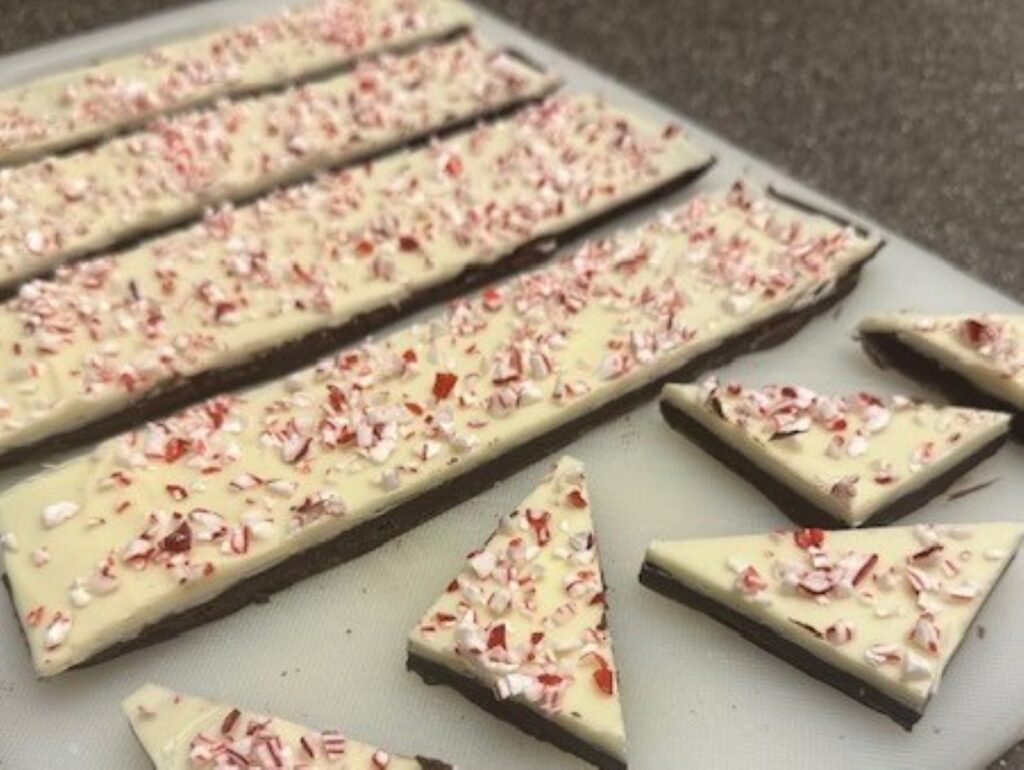
Triple Chocolate Peppermint Bark is the ultimate candy for the holiday season, with its delicious layers of dark, semi-sweet and white chocolate sprinkled with quintessential peppermint candies. While there is a little time involved setting each chocolate layer before adding the next, the process is actually quite simple and is well worth a little effort. It's important to use good quality chocolate for this recipe, such as Ghirardelli or Lindt, to ensure the texture of the chocolate is smooth and not grainy. It makes a beautiful gift for family and friends!


INGREDIENTS

  • 10 oz. Good Quality, Dark Chocolate, Chopped Not Chocolate Chips
  • 10 oz. Good Quality Semi-Sweet Chocolate such as Ghirardelli Chocolate Chips
  • 10 oz. Good Quality White Chocolate, Chopped such as Lindt
  • ⅓ C. Heavy Whipping Cream
  • ½ tsp. Peppermint Extract
  • ¼ C. Crushed Peppermint Candies

INSTRUCTIONS

Step 1: Gather all of your ingredients, and fill a small bowl with water, about ⅓ of the way up, so that the bottom of your metal does not touch the water when placed over the top of the bowl. Place the pot of water over medium heat and bring to a simmer.

Step 2: Place the dark chocolate pieces into the bowl and place the bowl over the simmering water. Using a rubber spatula and a potholder (or towel) to keep the bowl steady, stir continuously until the chocolate is smooth and has fully melted. When drizzled, there should be a steady ribbon running into the bowl and no pieces of chocolate remaining. Carefully remove the bowl from heat and turn off the burner.

Step 3: Using an offset spatula, create a thin layer of dark chocolate over the parchment lined sheet pan. Place the pan into the fridge and allow to set for about 15-20 minutes. Clean the bowl so you'll have it to use for the next chocolate layer.

Step 4: After 20 minutes, remove the pan and allow the dark chocolate layer to sit at room temperature while you prepare the next layer. You want the chocolate to be set, but not super cold when the semi-sweet chocolate layer is added. The color of the chocolate will change from super glossy (wet) to more of a matte finish (dry and set).

Step 5: Repeat Step 2, bringing the water in the pot to a simmer, adding the semi-sweet chocolate to the bowl, and slowly melting the chocolate. Once smooth and melted, add in the heavy whipping cream and the peppermint extract, stir until smooth and fully incorporated.

Step 6: Spread the semi-sweet, peppermint chocolate layer over the dark chocolate layer as evenly as you can. Place the pan back into the fridge to set, for about 30 minutes. Clean out the bowl so you'll have it to use for the final layer.

Step 7: Remove the semi-sweet, peppermint layer out of the fridge, melt the white chocolate following the same process as above, until the chocolate is perfectly smooth.

Step 8: Working quickly, spread the white chocolate layer over the semi-sweet, peppermint chocolate layer and then sprinkle the crushed peppermint candy over the surface of the white chocolate. Place in the fridge for 20 minutes to set.

Step 9: Once fully set, remove the pan from the fridge, and lift the bark out using the sides of the parchment paper. Use a pizza cutter (or large Chef knife) to divide the bark into 6 equally sized strips. Divide each strip into 4 squares, and then cut each square in half, corner-to-corner, making a triangle.

Store bark in an airtight container at room temperature.


Triple Chocolate Peppermint Bark

Layers of dark, semi-sweet and white chocolate sprinkled with crushed peppermint makes a delicious treat for the holidays, perfect for gifting!
No ratings yet
Print Pin
Course: Dessert
Cuisine: American
Keyword: Candy, Chocolate, Peppermint
Prep Time: 1 hour hour
Cook Time: 15 minutes minutes
Servings: 18 servings
Calories: 270kcal

Equipment

  • Parchment-Lined Sheet Pan
  • Small Pot
  • Water
  • Medium-Sized, metal bowl
  • Potholder or Kitchen Towel
  • Rubber Spatula
  • Offset Spatula
  • Pizza Cutter or Large Chef Knife

Ingredients

  • 10 oz. Good Quality, Dark Chocolate, Chopped Not Chocolate Chips
  • 10 oz. Good Quality Semi-Sweet Chocolate such as Ghirardelli Chocolate Chips
  • 10 oz. Good Quality White Chocolate, Chopped such as Lindt
  • ⅓ C. Heavy Whipping Cream
  • ½ tsp. Peppermint Extract
  • ¼ C. Crushed Peppermint Candies

Instructions

  • Gather all of your ingredients, and fill a small bowl with water, about ⅓ of the way up, so that the bottom of your metal does not touch the water when placed over the top of the bowl. Place the pot of water over medium heat and bring to a simmer.
  • Place the dark chocolate pieces into the bowl and place the bowl over the simmering water. Using a rubber spatula and a potholder (or towel) to keep the bowl steady, stir continuously until the chocolate is smooth and has fully melted. When drizzled, there should be a steady ribbon running into the bowl and no pieces of chocolate remaining. Carefully remove the bowl from heat and turn off the burner.
  • Using an offset spatula, create a thin layer of dark chocolate over the parchment lined sheet pan. Place the pan into the fridge and allow to set for about 15-20 minutes. Clean the bowl so you'll have it to use for the next chocolate layer.
  • After 20 minutes, remove the pan and allow the dark chocolate to sit at room temperature while you prepare the next layer. You want the chocolate to be set, but not super cold when the semi-sweet chocolate layer is added.
    Repeat Step 2, bringing the water in the pot to a simmer, adding the semi-sweet chocolate chips to the bowl, and slowly melting the chocolate. Once smooth and melted, add in the heavy whipping cream and the peppermint extract, stir until smooth and fully incorporated.
  • Spread the semi-sweet, peppermint chocolate layer over the dark chocolate layer as evenly as you can. Place the pan back into the fridge to set, for about 30 minutes. Clean out the bowl so you'll have it to use for the final layer.
  • Remove the semi-sweet, peppermint layer out of the fridge, melt the white chocolate following the same process as above, until the chocolate is perfectly smooth.
  • Working quickly, spread the white chocolate layer over the semi-sweet, peppermint chocolate layer and then sprinkle the crushed peppermint candy over the surface of the white chocolate. Place in the fridge for 20 minutes to set.
  • Once fully set, remove the pan from the fridge, and lift the bark using the sides of the parchment paper. Use a pizza cutter (or large Chef Knife) to divide the bark into 6 equally-sized strips. Divide each strip into 4 squares, and then cut each square in half, corner-to-corner, making a triangle.
    Store bark in an airtight container at room temperature.

Nutrition

Serving: 1square | Calories: 270kcal | Carbohydrates: 28g | Protein: 3.5g | Fat: 17g | Saturated Fat: 10g | Cholesterol: 5.4mg | Sodium: 20mg | Potassium: 115mg | Fiber: 2.8g | Sugar: 22g | Calcium: 56mg | Iron: 1.9mg

Chocolate-Dipped Coconut Macaroons

by

Coconut Macaroons are one of my favorite cookies. They look fancy, but are actually super simple to make, don't require you to chill the dough, and always bake beautifully. They make a lovely gift for the holidays and are a unique addition to any cookie platter.


INGREDIENTS

  • 14 oz. Shredded, Sweetened Coconut
  • ¾ C. Granulated Sugar
  • 6 Tbsp. All Purpose Flour
  • ¼ tsp. Kosher Salt
  • 4 Lg. Egg Whites
  • 2 tsp. Vanilla Extract
  • 1 C. Good Quality Dark Chocolate

INSTRUCTIONS

Step 1: Gather all of the ingredients and preheat your oven to 325℉. Line 2 baking sheets with parchment paper and set aside.

Step 2: In a stand mixer fitted with the wire whisk attachment, whip egg whites and vanilla extract until light and fluffy, and soft peaks form. The egg whites should hold their shape with a slight droop.

Step 3: In a separate mixing bowl, blend together the coconut, sugar, flour and salt. Gently fold in the whipped egg whites and stir to combine.

Step 4: Using a small cookie scoop, portion the mixture out onto prepared baking sheets. Cookies will not spread but leave a little space in between.

Step 5: Bake in your preheated oven for about 20 minutes, until the tops of the macaroons are lightly toasted golden brown. Remove macaroons from the baking pans* and allow to cool on a baking rack.

*Do not discard your parchment paper, as you'll need it for the next step.

Step 6: Once macaroons have cooled completely, melt your chocolate in the microwave in small increments (20-30 seconds, then stir) until smooth. Brush or dip a small layer of melted chocolate onto the bottom of each, then place, chocolate-side down, onto the same parchment-lined baking sheet.

Place the pan in the refrigerator for 10-15 minutes for the chocolate to set.

Macaroons should be stored in an air-tight container at room temperature for up to one week.

If making more than a week in advance, complete all steps (less dipping them in chocolate), and freeze, uncovered, on a baking sheet for about 30 minutes and up to one hour.  Move frozen macaroons to an airtight Ziploc bag and store in the freezer until ready to serve. Bring macaroons back to room temperature before dipping in chocolate and allow to set.  


Chocolate Dipped Coconut Macaroons

Reminiscent of snowballs, sweetened coconut flakes and fluffy meringue are combined, baked and dipped in decadent chocolate to make a delicious treat.
No ratings yet
Print Pin
Course: Dessert
Cuisine: French
Keyword: Coconut, Cookies, Macaroons
Prep Time: 15 minutes minutes
Cook Time: 20 minutes minutes
Set Time: 15 minutes minutes
Servings: 12 servings
Calories: 270kcal

Equipment

  • Kitchen-Aid Mixer with Wire Whisk Attachment
  • Medium Mixing Bowl
  • Rubber Spatula
  • 2 Parchment Lined Sheet Pans
  • Small Cookie Scoop
  • Baking Rack
  • Microwave Safe Glass Measuring Cup or Bowl
  • Pastry Brush optional

Ingredients

  • 14 oz. Shredded, Sweetened Coconut
  • ¾ C. Granulated Sugar
  • 6 Tbsp. All Purpose Flour
  • ¼ tsp. Kosher Salt
  • 4 Lg. Egg Whites
  • 2 tsp. Vanilla Extract
  • 1 C. Good Quality Dark Chocolate

Instructions

  • Gather all of the ingredients and preheat your oven to 325℉. Line 2 baking sheets with parchment paper and set aside.
  • In a stand mixer fitted with the wire whisk attachment, whip egg whites and vanilla extract until light and fluffy, and soft peaks form. The egg whites should hold their shape with a slight droop.
  • In a separate mixing bowl, blend together the coconut, sugar, flour and salt.
  • Gently fold in the whipped egg whites and stir to combine.
  • Using a small cookie scoop, portion the mixture out onto prepared baking sheets. Cookies will not spread but leave a little space in between.
  • Bake in your preheated oven for about 20 minutes, until the tops of the macaroons are lightly toasted golden brown. Remove macaroons from the baking pans* and allow to cool on a baking rack.
    *Do not discard your parchment paper, as you'll need it for the next step.
  • Once macaroons have cooled completely, melt your chocolate in the microwave in small increments (20-30 seconds, then stir) until smooth. Brush or dip a small layer of melted chocolate onto the bottom of each, then place, chocolate-side down, onto the same parchment-lined baking sheet.
    Place the pan in the refrigerator for 10-15 minutes for the chocolate to set.
  • Macaroons should be stored in an air-tight container at room temperature for up to one week.

Notes

If you are making these macaroons more than a week in advance, complete all steps (less dipping them in chocolate), and freeze, uncovered, on a baking sheet for about 30 minutes and up to one hour.  Move frozen macaroons to an airtight Ziploc bag and store in the freezer until ready to serve. Bring macaroons back to room temperature before dipping in chocolate.  

Nutrition

Serving: 2Macaroons | Calories: 270kcal | Carbohydrates: 27g | Protein: 2.7g | Fat: 16g | Saturated Fat: 12g | Cholesterol: 0.4mg | Potassium: 128mg | Sugar: 19g | Calcium: 17mg | Iron: 1.8mg

Carrot Cake Cupcakes

by

The first time I ever made a carrot cake was in culinary school, and I remember it being epic, baked in a tall, 10" cake pan. It was designed for restaurant service, of course, so turning the batter into cupcakes makes for a much more manageable recipe, perfect for baking at home. The cake itself is moist and delicious, loaded with yummy ingredients yet not at all dense, rounded out by a fluffy cream cheese frosting, fragranced by a hint of orange liqueur, brightening the overall dessert. The toasted pecans add a warm earthiness, a perfect balance for all that sweetness. Feel free to swap freshly squeezed orange juice for the liqueur in the frosting.

Cupcake Ingredients

  • 1-¼ C. Vegetable Oil
  • 1 C. Light Brown Sugar tightly packed
  • 1 C. White Granulated Sugar
  • 4 Large Eggs at room temperature
  • 1 C. All Purpose Flour using the 'spoon and sweep' method
  • 1 C. Whole Wheat Flour using the 'spoon and sweep' method
  • 1 tsp. Salt
  • 2 tsp. Baking Powder
  • 2 tsp. Baking Soda
  • 1 tsp. Cinnamon
  • 3 C. Grated Carrots (3-4 large carrots, peeled)
  • 8 oz. Crushed Pineapple drained
  • ½ C. Pecans, Finely Chopped toasted (feel free to use Walnuts, instead)

Frosting Ingredients

  • 8 oz. Cream Cheese
  • 2 Sticks Unsalted Butter at room temperature
  • 6 C. 10x Powdered Sugar
  • Pinch Kosher Salt
  • ¼ C. Heavy Cream
  • 1 Tbsp. Vanilla Extract
  • 2 Tbsp. Orange Liqueur such as Grand Marnier or Triple Sec, or freshly squeezed orange juice
  • 1-½ C. Pecans, Finely Chopped toasted (feel free to use Walnuts, instead)

Instructions

Step 1: Gather all of the ingredients to prepare the cake batter. Be sure to thoroughly drain your crushed pineapple and gently toast your pecans in a skillet over low-medium heat.

The 'spoon and sweep' method is the most accurate way to measure flour, aside from weighing it on a kitchen scale. Use your spoon to gently stir and fluff the flour in its container, then scoop the flour directly into the measuring cup, using the straight edge of the spoon to sweep away the excess flour once the cup is full.

Preheat oven to 350℉ and line 2 (or 3, if you have a third) cupcake pans with paper liners.

Note: You'll need toasted pecans for the cake batter as well as for decorating the frosting, so feel free to toast both cups, then portion out the ½ cup you'll need for the batter. Set aside the remaining 1-/2 cups for later.

Step 2: In the bowl of a stand mixer fitted with the paddle attachment, mix together the oil and both sugars until cohesive. Crack and add eggs, one at a time, until fully incorporated.

Step 3: Using a fine mesh strainer over a large mixing bowl, sift together both flours, salt, baking powder, baking soda, and cinnamon.

Step 4: Add flour mixture into the stand mixer and incorporate, making sure that there are no streaks of flour visible throughout the batter.

Step 5: Remove the bowl from the stand, and mix the shredded carrots, crushed pineapple and toasted pecans into the batter by hand.

Step 6: Fill each cupcake cavity at least half but no more than ⅔ of the way full of batter. This will ensure that each cupcake bakes with a perfect, slight dome and doesn't sink in the middle.

Step 7: Bake cupcakes in the preheated oven for approximately 15 minutes, or until a toothpick inserted into the center comes out clean. Bake the third pan of cupcakes. Allow cupcakes to cool completely while you prepare the icing.

Prepare the Frosting

Step 1: Clean out the bowl of your stand mixer and gather together all of the frosting ingredients.

Step 2: Cream together the softened cream cheese and butter, along with a pinch of kosher salt, until thoroughly mixed and smooth.

Step 3: With the mixer off, slowly begin to add the powdered sugar. Pulse to ensure that the powdered sugar mixes in and doesn't fly out of the bowl. Drizzle in the heavy cream and add the vanilla extract, mixing on medium low. Mix until the liquid has incorporated, but the mixture still feels stiff.

Step 4: Add in a few tablespoons of orange liqueur, keeping the speed on medium, and then increase the speed to full whip and incorporate air into the buttercream. Run the mixer for a minimum of five minutes.

Note: Feel free to replace the orange liqueur with freshly squeezed orange juice!

Step 5: When the cupcakes are cool enough to frost, place a large pastry tip into the point of a pastry bag. Snip the tip of the bag just enough that the pastry tip extends past the base of the bag but the rest remains securely in the bag. Fill the bag with whipped frosting, leaving enough room at the top of the bag so that you can twist the top and have plenty of room to hold.

Step 6: Pipe a desired amount of frosting over the top of each cupcake in a swirl pattern, starting by drawing a ring around the outer rim of the cupcake, working inwards towards the center.

With a bowl of toasted pecans available, gently begin pressing the nuts into the buttercream around the edges of the frosted cupcake, leaving the center clear. Repeat with all remaining cupcakes.

Store cupcakes either at room temperature or in the refrigerator, bringing back to room temperature before serving.


Carrot Cake Cupcakes

Moist and delicious, these carrot cake cupcakes are topped with an incredibly creamy, orange liqueur cream cheese frosting.
No ratings yet
Print Pin
Course: Dessert
Cuisine: French
Keyword: Carrot Cake, Cupcakes, Desserts
Prep Time: 30 minutes minutes
Cook Time: 15 minutes minutes
Servings: 3 Dozen
Calories: 276kcal

Equipment

  • Measuring Cups and Spoons
  • Liquid Measuring Cup
  • Food Processor or Hand Grater
  • Fine-Mesh Metal Strainer
  • Small Skillet
  • Kitchen-Aid Mixer with paddle attachment
  • Wire Whisk
  • Large Mixing Bowl
  • Rubber Spatula
  • 2-3 Cupcake Pans
  • 36 Regular-Sized Paper Cupcake Liners
  • Cookie Scoop optional, for filling cupcake liners
  • Pastry Bag and Large Tip

Ingredients

Cupcake Ingredients

  • 1-¼ C. Vegetable Oil
  • 1 C. Light Brown Sugar tightly packed
  • 1 C. White Granulated Sugar
  • 4 Large Eggs at room temperature
  • 1 C. All Purpose Flour using the 'spoon and sweep' method
  • 1 C. Whole Wheat Flour using the 'spoon and sweep' method
  • 1 tsp. Salt
  • 2 tsp. Baking Powder
  • 2 tsp. Baking Soda
  • 1 tsp. Cinnamon
  • 3 C. Grated Carrots 3-4 large carrots, peeled
  • 8 oz. Crushed Pineapple drained
  • ½ C. Pecans, Finely Chopped toasted (feel free to use Walnuts, instead)

Cream Cheese Frosting

  • 8 oz. Cream Cheese
  • 2 Sticks Unsalted Butter at room temperature
  • 6 C. 10x Powdered Sugar
  • Pinch Kosher Salt
  • ¼ C. Heavy Cream
  • 1 Tbsp. Vanilla Extract
  • 2 Tbsp. Orange Liqueur such as Grand Marnier or Triple Sec
  • 1-½ C. Pecans, Finely Chopped toasted (feel free to use Walnuts, instead)

Instructions

Prepare the Cake Batter

  • Gather all of the ingredients to prepare the cake batter. Be sure to thoroughly drain your crushed pineapple and gently toast your pecans in a skillet over low-medium heat.
    The 'spoon and sweep' method of measuring flour is the most accurate way to measure flour, aside from weighing it on a kitchen scale. Use your spoon to gently stir and fluff the flour in its container, then scoop the flour directly into the measuring cup, using the straight edge of the spoon to sweep away the excess flour once the cup is full.
    Preheat oven to 350℉ and line 2 (or 3, if you have a third) cupcake pans with paper liners.
    Note: You'll need pecans for the cake batter as well as for decorating the frosting, so feel free to toast both cups, then portion out the ½ cup you'll need for the batter. Set aside the remaining 1-/2 cups.
  • In the bowl of a stand mixer fitted with the paddle attachment, mix together the oil and both sugars. Crack and add eggs, one at a time, until fully incorporated.
  • Using a fine mesh strainer over a large mixing bowl, sift together both flours, salt, baking powder, baking soda, and cinnamon.
  • Add flour mixture into the stand mixer and incorporate, making sure that there are no streaks of flour visible throughout the batter.
  • Remove the bowl from the stand, and mix the shredded carrots, crushed pineapple and toasted pecans into the batter by hand.
  • Fill each cupcake cavity at least half but no more than ⅔ of the way full of batter. This will ensure that each cupcake bakes with a perfect dome and doesn't sink in the middle.
  • Bake cupcakes in the preheated oven for approximately 15 minutes, or until a toothpick inserted into the center comes out clean. Bake the third pan of cupcakes. Allow cupcakes to cool completely while you prepare the icing.

Prepare the Frosting

  • Clean out the bowl of your stand mixer and gather together all of the frosting ingredients.
  • Cream together the softened cream cheese and butter, along with a pinch of kosher salt, until thoroughly mixed and smooth.
  • With the mixer off, slowly begin to add the powdered sugar. Pulse to ensure that the powdered sugar mixes in and doesn't fly out of the bowl. Drizzle in the heavy cream and add the vanilla extract, mixing on medium low. Mix until the liquid has incorporated, but the mixture still feels stiff.
  • Add in a few tablespoons of orange liqueur, keeping the speed on medium, and then increase the speed to full whip and incorporate air into the buttercream. Run the mixer for a minimum of five minutes.
  • When the cupcakes are cool enough to frost, place a large pastry tip into the point of a pastry bag. Snip the tip of the bag just enough that the pastry tip extends past the base of the bag but the rest remains securely in the bag. Fill the bag with whipped frosting, leaving enough room at the top of the bag so that you can twist the top and have plenty of room to hold.
  • Pipe a desired amount of frosting over the top of each cupcake in a swirl pattern, starting by drawing a ring around the outer rim of the cupcake, working inwards towards the center.
  • With a bowl of toasted pecans available, gently begin pressing the nuts into the buttercream around the edges of the frosted cupcake, leaving the center clear. Repeat with all remaining cupcakes.
    Store cupcakes either at room temperature or in the refrigerator, bringing back to room temperature before serving.

Nutrition

Serving: 1Cupcake | Calories: 276kcal | Carbohydrates: 41g | Protein: 2.1g | Fat: 12g | Saturated Fat: 4.8g | Cholesterol: 38mg | Sodium: 115mg | Potassium: 83mg | Fiber: 0.7g | Sugar: 34g | Calcium: 37mg | Iron: 0.5mg

All American Apple Pie

by

While pumpkin pie may be the quintessential dessert of Thanksgiving, my favorite will always be apple pie. I love the sweet and tart pairing of the apples, the warming scent of cinnamon and nutmeg, that flaky, buttery crust. Making your own pastry dough from scratch is actually a lot easier than most people think, and it's definitely worth the extra effort. Using firm apples will yield an overall better pie, so I usually opt for Honeycrisp and Pink Lady, along with Granny Smith to balance out the flavors. It's best to avoid softer varieties of apples that will turn to applesauce, such as golden delicious or red delicious. While the interwoven crisscross top crust make look a bit daunting at first, it's also incredibly easy, going step by step, one pastry strip at time. This showstopping apple pie will be a favorite at your holiday table!

INGREDIENTS

Pastry Crust

  • 2-½ Cups Unbleached, All-Purpose Flour 300 g
  • ½ tsp. Kosher Salt
  • 2 Sticks Cold, Unsalted Butter, cut into a small dice 227 g (keep refrigerated)
  • ½ Cup Ice Water 119 g

Pie Filling

  • 8 Large Apples, Peeled, Cored and Sliced (I used Honeycrisp, Granny Smith and Pink Lady). Use a variety of apples, but don't opt for Golden or Red Delicious, as these are soft and will turn to mush.
  • ⅓ Cup Granulated Sugar 66 g
  • ⅓ Cup Brown Sugar, Packed Tightly 71 g
  • ¼ Cup Unbleached, All-Purpose Flour 30 g
  • 2 tsp. Ground Cinnamon
  • ⅛ tsp. Freshly Grated Nutmeg

Pie Assembly

  • 1 Large Egg (white only, to make egg wash)
  • 2 Tbsp. Sparkling Sugar or Sugar in the Raw (regular sugar will melt)
  • Splash of Water

INSTRUCTIONS

Step 1: Prepare the crust. Measure out the flour and stir in the salt.

Step 2: Add in the cold butter and toss thoroughly in the flour to ensure each piece is well coated. Using clean hands, break up the butter into smaller, pea-sized pieces. Work quickly to keep the butter as cold as possible. Alternatively, feel free to use a pastry blender to cut the butter into the flour.

Step 3: Add in the cold water, and using a wooden spoon, fold the mixture together until a shaggy dough forms. Try to avoid stirring as to not overwork the dough.

Step 4: Switch to using your hands and incorporate any loose dry ingredients settled at the bottom of the bowl into the dough.

Step 5: Press the dough into a round disk, wrap tightly in plastic wrap, and set in the refrigerator for a minimum of 30 minutes (but best for an hour) to rest. This will allow the butter to harden, the dough to rehydrate and the gluten in the flour to relax.

Alternatively, if preferred, you can divide the dough into 2 separate disks and wrap separately. You'll need both for a top and bottom crust.

Step 6: While the dough is resting, gather all of the ingredients for the filling. If you haven't peeled and sliced your apples, do so now.

In a mixing bowl, stir together the sugar, brown sugar, flour, salt, cinnamon and freshly grated nutmeg.

Step 7: Toss together to fully coat the prepared apples. Set aside. The spices will help keep the apples from oxidizing and turning brown.

Step 8: Preheat your oven to 400℉.

Clean your work surface and dust lightly with flour. Remove the dough from the refrigerator and unwrap. Using a bench scraper or knife, divide the dough into two, even separate pieces. You'll also need a rolling pin to form the dough.

Step 9: Using your rolling pin, gently rock back and forth across the dough, moving the pin across the length of the dough without rolling. Rotate the dough and repeat. This will help loosen and gently stretch the dough, keeping its round shape, without warming up the butter. Flip the dough over, dust lightly with flour and repeat. Make sure the dough is not sticking to the work surface.

Begin rolling out the dough, starting from the center and pressing upwards, then rolling out towards the upper corners. Carefully (and this is where a bench scraper comes in handy) rotate the dough so that the bottom is now at the top. You may need to add another light dusting of flour. Repeat rolling upwards and out. From here, use the rolling pin to roll up and back along the full length of the dough, then side to side, corner to corner, creating a thin, even layer. Don't worry about making it perfectly round, so long as your final dough circle is large enough to fit over the entire circumference of your pie plate with some overhanging.

Step 10: Lightly dust your rolling pin, then gently roll the top edge of the pie dough onto the pin, fold over, and place the dough over the pie pan. With light fingers, gently press the dough along the bottom and sides of the pan so that there are no gaps of air between the pan and the dough.

Step 11: Place a ring of apple slices around the bottom edge of the pie plate, pressing tightly into the corners of the pan. Fill the pan with the remaining apples (don't pour them from the bowl directly, as this avoids adding in the excess liquid syrup that will have collected in the bottom of the bowl), pressing down to ensure that there are no gaps or holes in the mix, which could cause the top crust to collapse during baking. Using a pair of scissors, trim up the sides all around the pan. Fold over the remaining crust inward (towards the pie) and crimp gently with your fingers. Set aside while you prepare the top crust.

Step 12: Lightly dust your work surface with additional flour and then roll out the dough following the same instruction as above. For the top crust, you'll actually want to make sure the circumference of the rolled dough is 12" in diameter, so make sure you have your ruler handy.

Step 13: Lay the ruler lengthwise across the dough, and using your bench scraper (or a knife) mark lines equally at 1" intervals along the top of the dough. Turn the ruler over, and mark indentations into the bottom of the dough, equally spaced. You should be making twelve, even, 1" strips.

Using a pizza cutter (or a knife), cut your strips.

Step 14: Lay six strips of pastry over the apples, horizontally, leaving space in between. Fold over opposite strips (essentially the second, fourth and sixth strips) from the center towards the left. Add another strip, vertically, in the center, and then place the folded strips back over that strip.

On the opposite side, fold over the opposite strips (the first, third, and fifth) towards the right. Lay down another vertical strip to the left of the center strip and place the folded strips back down. Repeat these steps, going from left to right, and alternating which strips to fold over, until the entire pie has been interwoven in a crosshatch pattern.

Step 15: Using kitchen scissors or a paring knife, trim the excess length of the pastry strips, then tuck those into or under the bottom crust around the rim of the pie plate. Pinch to seal.

Step 16: Make a quick egg wash by mixing the egg yolk and a light splash of water. Using a pastry brush, gently brush a thin layer of egg wash over the top and sides of the prepared pie crust. Sprinkle with decorator sugar.

Note: If you don't have Sparkling Sugar or Sugar in the Raw, just skip this step. Regular, granulated sugar will melt and burn. It won't affect the outcome of the pie!

Step 17: Bake the pie, uncovered, for one hour, or until the pie crust is a deep golden- brown color and the filling is actively bubbling. This is what is known as "piping", as used in the term "piping hot". Small bubbles in the pie are just the moisture leaving the apples and butter, so look for larger bubbles to indicate doneness and to avoid the dreaded pie crust with a "soggy bottom". If you prefer less browning on top, feel free to add a layer of aluminum foil over top of the pie, not wrapped, to finish baking without excess browning.

Allow the pie to cool at room temperature, uncovered, on a wire baking rack, for a minimum of two hours before serving, to avoid a runny filling.

Pie can always be reheated later if you wish to serve it warm, 10-15 minutes at 350℉.


All American Apple Pie

This classic, all-American dessert is loaded with a variety of fresh apples, spiced with cinnamon sugar, and surrounded by a flaky, buttery pie crust.
No ratings yet
Print Pin
Course: Dessert
Cuisine: American
Keyword: Apple Pie, Desserts, Fruit Desserts, Pie
Prep Time: 45 minutes minutes
Cook Time: 1 hour hour
Servings: 8 Servings
Calories: 423kcal

Equipment

  • Large Mixing Bowl
  • 2 Medium Mixing Bowl
  • Small Mixing Bowl
  • Vegetable Peeler
  • Cutting Board
  • Chef Knife
  • Measuring Cups and Spoons
  • Rubber Spatula
  • Wooden Spoon
  • Microplane Hand-Held Grater
  • Metal Bench Scraper
  • Kitchen Scissors or small paring knife
  • Plastic Ruler
  • Pizza Cutter
  • 8 or 9-Inch Pie Plate
  • Pastry Brush
  • Metal Cooling Rack
  • Plastic Wrap

Ingredients

Crust Ingredients

  • 2-½ Cups Unbleached, All-Purpose Flour 300 g
  • ½ tsp. Kosher Salt
  • 2 Sticks Cold, Unsalted Butter, cut into a small dice 227 g (keep refrigerated)
  • ½ Cup Ice Water 119 g

Pie Filling

  • 8 Large Apples, Peeled, Cored and Sliced (I used Honeycrisp, Granny Smith and Pink Lady). Use a variety of apples, but don't opt for Golden or Red Delicious, as these are soft and will turn to mush.
  • ⅓ Cup Granulated Sugar 66 g
  • ⅓ Cup Brown Sugar, Packed Tightly 71 g
  • ¼ Cup Unbleached, All-Purpose Flour 30 g
  • 2 tsp. Ground Cinnamon
  • ⅛ tsp. Freshly Grated Nutmeg Ground is fine if you don't have whole nutmeg

Assembly

  • 1 Large Egg (to make egg wash)
  • 2 Tbsp. Sparkling Sugar or Sugar in the Raw (regular sugar will melt)
  • Splash of Water

Instructions

  • Prepare the crust. Measure out the flour, add to a mixing bowl and stir in the salt.
  • Add in the cold butter and toss thoroughly in the flour to ensure each piece is well coated. Using clean hands, break up the butter into smaller, pea-sized pieces. Work quickly to keep the butter as cold as possible. Alternatively, feel free to use a pastry blender to cut the butter into the flour.
  • Add in the cold water, and using a wooden spoon, fold the mixture together until a shaggy dough forms. Try to avoid stirring as to not overwork the dough.
  • Switch to using your hands and incorporate any loose dry ingredients settled at the bottom of the bowl into the dough.
  • Press the dough into a round disk, wrap tightly in plastic wrap, and set in the refrigerator for a minimum of 30 minutes (but best for an hour) to rest. This will allow the butter to harden, the dough to rehydrate and the gluten in the flour to relax.
    Alternatively, if preferred, you can divide the dough into 2 separate disks and wrap separately. You'll need both for a top and bottom crust.
  • While the dough is resting, gather all of the ingredients for the filling.
  • In a mixing bowl, stir together the sugar, brown sugar, flour, salt, cinnamon and freshly grated nutmeg.
  • Toss together to fully coat the prepared apples. Set aside. The spices will help keep the apples from oxidizing and turning brown.
  • Preheat your oven to 400℉.
  • Clean your work surface and dust lightly with flour. Remove the dough from the refrigerator and unwrap. Using a bench scraper or knife, divide the dough into two, even separate pieces. You'll also need a rolling pin to form the dough.
  • Using your rolling pin, gently rock back and forth across the dough, moving the pin across the length of the dough without rolling. Rotate the dough and repeat. This will help loosen and gently stretch the dough, keeping its round shape, without warming up the butter. Flip the dough over, dust lightly with flour and repeat. Make sure the dough is not sticking to the work surface.
  • Begin rolling out the dough, starting from the center and pressing upwards, then rolling out towards the upper corners. Carefully (and this is where a bench scraper comes in handy) rotate the dough so that the bottom is now at the top. You may need to add another light dusting of flour. Repeat rolling upwards and out. From here, use the rolling pin to roll up and back along the full length of the dough, then side to side, corner to corner, creating a thin, even layer. Don't worry about making it perfectly round, so long as your final dough circle is large enough to fit over the entire circumference of your pie plate with some overhanging.
  • Lightly dust your rolling pin, then gently roll the top edge of the pie dough onto the pin, fold over, and place the dough over the pie pan. With light fingers, gently press the dough along the bottom and sides of the pan so that there are no gaps of air between the pan and the dough.
  • Place a ring of apple slices around the bottom edge of the pie plate, pressing tightly into the corners of the pan. Fill the pan with the remaining apples (don't pour them from the bowl directly, as this avoids adding in the excess liquid syrup that will have collected in the bottom of the bowl), pressing down to ensure that there are no gaps or holes in the mix, which could cause the top crust to collapse during baking. Using a pair of scissors, trim up the sides all around the pan. Fold over the remaining crust inward (towards the pie) and crimp gently with your fingers. Set aside while you prepare the top crust.
  • Lightly dust your work surface with additional flour and then roll out the dough following the same instruction as above. For the top crust, you'll actually want to make sure the circumference of the rolled dough is 12" in diameter, so make sure you have your ruler handy.
  • Lay the ruler lengthwise across the dough, and using your bench scraper (or a knife) mark lines equally at 1" intervals along the top of the dough. Turn the ruler over, and mark indentations into the bottom of the dough, equally spaced. You should be making twelve, even, 1" strips.
  • Using a pizza cutter (or a knife), cut your strips.
  • Lay six strips of pastry over the apples, horizontally, leaving space in between. Fold over opposite strips (essentially the second, fourth and sixth strips) from the center towards the left. Add another strip, vertically, in the center, and then place the folded strips back over that strip.
  • On the opposite side, fold over the opposite strips (the first, third, and fifth) towards the right. Lay down another vertical strip to the left of the center strip and place the folded strips back down. Repeat these steps, going from left to right, and alternating which strips to fold over, until the entire pie has been interwoven in a crosshatch pattern.
  • Using kitchen scissors or a paring knife, trim the excess length of the pastry strips, then tuck those into or under the bottom crust around the rim of the pie plate. Pinch to seal.
  • Make a quick egg wash by mixing the egg yolk and a light splash of water. Using a pastry brush, gently brush a thin layer of egg wash over the top and sides of the prepared pie crust. Sprinkle with decorator sugar.
    Note: If you don't have Sparkling Sugar or Sugar in the Raw, feel free to skip this step. Regular, granulated sugar will melt and burn. It won't affect the outcome of the pie!
  • Bake the pie, uncovered, for one hour, or until the pie crust is a deep golden- brown color and the filling is actively bubbling.
    This is what is known as "piping", as used in the term "piping hot". Small bubbles in the pie are just the moisture leaving the apples and butter, so look for larger bubbles to indicate doneness and to avoid the dreaded pie crust with a "soggy bottom". If you prefer less browning on top, feel free to add a layer of aluminum foil over top of the pie, not wrapped, to finish baking without excess browning.
  • Allow the pie to cool at room temperature, uncovered, on a wire baking rack, for a minimum of two hours before serving, to avoid a runny filling. Pie can always be reheated later if you wish to serve it warm, 10-15 minutes at 350℉.

Nutrition

Serving: 1Slice | Calories: 423kcal | Carbohydrates: 78g | Protein: 4.2g | Fat: 11g | Saturated Fat: 7.1g | Cholesterol: 30mg | Sodium: 63mg | Potassium: 208mg | Fiber: 6.3g | Sugar: 32g | Calcium: 21mg | Iron: 1.9mg

Orange Glazed Sweet Rolls

by

Popping open a can of ready-to-bake dough is a quick and easy choice for busy mornings, but when I have the time, I always prefer baking from scratch. These orange glazed sweet rolls are bursting with bright flavor, thanks to using orange zest in both the filling and the glaze. Another of Jim's favorite treats, these are perfect for lazy weekend brunches or a delicious evening treat with a cup of hot tea. If stored well in an airtight container, they'll last several days (if they last that long!) and make a great, grab-and-go breakfast on the way to work. Give yourself a few hours to make these, since they'll require two separate rises, or make them the night before, store in the fridge overnight, and bake in the morning.


INGREDIENTS

Dough

  • ½ + ⅔ Cup Whole Milk Divided
  • 324 grams Unbleached Bread Flour Divided (2-½ Cups, 3 Tbsp.)
  • 1 tsp. Kosher Salt
  • 25 grams Granulated White Sugar about 2 Tablespoons
  • 2-¼ tsp. Instant Yeast
  • 4 Tbsp. Unsalted Butter, at Room Temperature

Filling

  • 1 Tbsp. Unsalted Butter, Melted
  • ¾ Cup Light Brown Sugar, Packed
  • ¼ Cup Unbleached Bread Flour, sifted
  • 1-½ Tbsp. Cinnamon
  • 1 Pinch Kosher Salt
  • 1 Orange, Zest and Juice

Icing Glaze

  • 4 Tbsp. Butter Divided (2 Tbsp. and 2 Tbsp.)
  • 4 oz. Cream Cheese, Softened
  • 3 Cups Powdered Sugar, sifted
  • Orange, Zest and Juice
  • ½ tsp. Vanilla Extract

Other

Cooking Spray, such as Pam

INSTRUCTIONS

Make sure to read through instructions fully before beginning the recipe so you don't miss any steps, and you measure out all of your ingredients correctly!

Step 1: Gather all of your dough ingredients, along with measuring cups and spoons, a digital kitchen scale, a large mixing bowl, whisk, a small pot and a stand mixer.

In two separate liquid measuring cups, measure out ½ cup milk and ⅔ cup milk.

Step 2: Place your mixing bowl onto the scale, set measurement to grams, and press tare to zero out the weight of the bowl itself.

Weigh 324 grams of unbleached bread flour. Scoop out 3 tablespoons of the flour and place in a small, separate bowl. This should leave you with 300 grams of flour remaining.

Note: If you don't have a scale, portion out 2-½ cups by first stirring the flour, then use a spoon to fill the measuring cups, using the handle of the spoon to level and sweep away excess. Separately, measure out 3 tablespoons of the flour and place in a small bowl.

Step 3: To the larger mixing bowl with the flour, add 6 grams of kosher salt (about 1 tsp), 25 grams of sugar (about 2 Tablespoons), and 2-¼ tsp. of instant yeast (if using a packet of dry yeast, this will be the exact amount you need.) Whisk the ingredients together and set aside.

Step 4: In a small pot over medium low heat, mix together the ½ cup of milk and the 3 tablespoons of reserved bread flour. Stir using a wooden spoon until the mixture comes together to form a thick paste, and there are no visible lumps, about 2-3 minutes. Add this mixture to the bowl of your stand mixer.

Step 5: Add the flour mixture, ⅔ cup of milk and 4 tablespoons of softened butter into the stand mixer bowl, fitted with the dough hook attachment. Run the mixer for about 10 minutes, scraping down the sides and pulling the dough from the hook midway through.

You may also want to use a plastic bench scraper to pull up any unworked dough on the bottom of the bowl.

Step 6: Remove the dough from the mixing bowl, knead lightly with your hands to form into a ball, and place in a medium, glass mixing bowl sprayed lightly with cooking spray (to avoid sticking), and cover tightly with plastic wrap.

Place the bowl in a warm, draft-free area of your kitchen. If your oven has a proof setting, or even an inside light, place it here. Allow your dough to rise about 90 minutes, or just until it has about doubled in size.

Step 7: In the meantime, begin preparing the filling. Melt 1 tablespoon of butter and add ¾ cup of tightly packed light brown sugar, ¼ cup of bread flour, a pinch of salt, a teaspoon of vanilla extract, and 1-½ tablespoons of cinnamon. Add the zest of an entire orange, slice in half, and then add in the juice of just one half, either by hand or using a citrus reamer. Mix everything together using a fork until the mixture comes together like heavy, wet sand. Cover and set aside.

Step 8: After the dough has proofed, doubling in size, spray a clean work surface lightly with cooking spray. Place the dough directly onto the surface, and using your fingertips, gently begin pressing the dough into a rectangle. The dough should be very soft and pillowy, spreading easily and not bouncing back.

Use a rolling pin to gently roll out the dough to a 12x10 inch rectangle (the full length of a standard ruler on the long end, and just a few inches shy in depth.

Step 9: Sprinkle the surface of the dough with the filling mixture, leaving a small border around the outside. To begin rolling, start with light fingertips along the long end of the dough, gently pressing forward from the middle out towards the ends and keeping the dough tightly sealed without pressing too firmly down.

Once the dough is fully rolled, lightly tap the ends in to ensure the roll still measures about 12 inches in length.

Step 10: Using a knife or your bench scraper, carefully mark the dough in the center, mark each half in the center again, and again, so that you have 8 equal portions. Grab a portion of dental floss, long enough that it can fit around the dough and still have plenty of room. Carefully run the floss underneath until you've reached the center mark. Cross the floss in an 'X' and pull tight. The dough will divide into two equal portions. Repeat until you have cut all 8 rolls.

Step 11: Spray a parchment lined baking sheet with cooking spray, then place rolls onto the pan, leaving about an inch of space in between each (approximately the width of two fingers).

Cover the pan with plastic wrap and allow an additional hour for the final proofing. After 45 minutes, set the oven to 325℉ so that it will be hot about the same time that your rolls are ready for baking.

Note: If you are making these ahead and want to bake your rolls in the morning, you can do a slow rise by placing them into refrigerator overnight, and then taking them out about 90 minutes to 2 hours before baking to allow the rolls to come back to room temperature and finish proofing.

Step 12: After the second proof, your rolls should have puffed up and will be soft to the touch. Bake for 15-20 minutes, depending on your oven. When fully baked, rolls will be pale in color, not golden brown, to keep them light and fluffy.

Step 13: While your rolls are baking, place 2 tablespoons of butter into a small, microwave safe bowl and set aside. This will be used to brush onto the hot rolls as soon as they come out of the oven.

Step 14: Gather all of the ingredients to prepare the glaze.

In a stand mixer fitted with the paddle attachment, blend together the cream cheese and remaining 2 Tbsp. of butter, and a pinch of salt. Once smooth, add in the powdered sugar. Once the mixture comes together, mix in the orange juice and zest, and vanilla extract. Blend everything together until you have a silky, ribbon-like glaze.

Step 15: Just before the rolls have finished baking, melt the small portion of reserved butter, then immediately brush directly onto the hot rolls after you have taken them out of the oven. Allow to cool slightly.

Step 16: Use a spoon to drizzle warm rolls with the prepared glaze and allow a few minutes to set before serving.


Orange Glazed Sweet Rolls

No ratings yet
Print Pin
Course: Breakfast, Brunch
Cuisine: American
Keyword: Breakfast, Brunch, Cinnamon Rolls, Pastry
Prep Time: 40 minutes minutes
Cook Time: 15 minutes minutes
Proofing Time: 1 hour hour 30 minutes minutes
Servings: 8 servings
Calories: 355kcal

Equipment

  • KitchenAid Stand Mixer with Dough Hook and Paddle Attachments
  • Digital Kitchen Scale
  • Measuring Cups and Spoons
  • Liquid Measuring Cups
  • Large Bowl
  • Small Pot
  • Medium Glass Bowl
  • Small, microwave-safe bowl
  • Wire Whisk
  • Wooden Spoon
  • Plastic Bench Scraper
  • Fork
  • FruitReamer (Citrus Juicer)
  • Rolling Pin
  • Plastic Ruler optional
  • Sheet Pan
  • Parchment Paper
  • Plastic Wrap
  • Dental Floss, Unflavored
  • Zester
  • Rubber Spatula
  • Pastry Brush
  • Spoon

Ingredients

Dough

  • ½ + ⅔ Cup Whole Milk Divided
  • 324 grams Unbleached Bread Flour Divided (2-½ Cups, 3 Tbsp.)
  • 1 tsp. Kosher Salt
  • 25 grams Granulated White Sugar about 2 Tablespoons
  • 2-¼ tsp. Instant Yeast
  • 4 Tbsp. Unsalted Butter, at Room Temperature

Orange Cinnamon Filling

  • 1 Tbsp. Unsalted Butter, Melted
  • ¾ Cup Light Brown Sugar, Packed
  • ¼ Cup Unbleached Bread Flour
  • 1-½ Tbsp. Cinnamon
  • 1 Pinch Kosher Salt
  • 1 Orange Zest and Juice

Icing Glaze

  • 4 Tbsp. Butter Divided (2 Tbsp. and 2 Tbsp.)
  • 4 oz. Cream Cheese, Softened
  • 3 Cups Powdered Sugar
  • Orange Zest and Juice from Half
  • ½ tsp. Vanilla Extract

Other

  • Cooking Spray

Instructions

  • Make sure to read through instructions fully before beginning the recipe so you don't miss any steps, and you measure out all of your ingredients correctly!
  • Gather all of your dough ingredients, along with measuring cups and spoons, a digital kitchen scale, a large mixing bowl, whisk, a small pot and a stand mixer.
  • In two separate liquid measuring cups, measure out ½ cup milk and ⅔ cup milk.
    Place your mixing bowl onto the scale, set measurement to grams, and press tare to zero out the weight of the bowl itself. Weigh 324 grams of unbleached bread flour. Scoop out 3 tablespoons of the flour and place in a small, separate bowl. This should leave you with 300 grams of flour remaining.
    Note: If you don't have a scale, portion out 2-½ cups by first stirring the flour, then use a spoon to fill the measuring cups, using the handle of the spoon to level and sweep away excess. Separately, measure out 3 tablespoons of the flour and place in a small bowl.
  • To the larger mixing bowl with the flour, add 6 grams of kosher salt (about 1 tsp), 25 grams of sugar (about 2 Tablespoons), and 2-¼ tsp. of instant yeast (if using a packet of dry yeast, this will be the exact amount you need.) Whisk the ingredients together and set aside.
  • In a small pot over medium low heat, mix together the ½ cup of milk and the 3 tablespoons of reserved bread flour. Stir using a wooden spoon until the mixture comes together to form a paste, and there are no visible lumps, about 2-3 minutes. Add this mixture to the bowl of your stand mixer.
  • Add the flour mixture, ⅔ cup of milk and 4 tablespoons of softened butter into the stand mixer bowl, fitted with the dough hook attachment. Run the mixer for about 10 minutes, scraping down the sides and pulling the dough from the hook midway through. You may also want to use a plastic bench scraper to pull up any unworked dough on the bottom of the bowl.
    Remove the dough from the mixing bowl, knead lightly with your hands to form into a ball, and place in a medium, glass mixing bowl sprayed lightly with cooking spray (to avoid sticking), and cover tightly with plastic wrap.
    Place the bowl in a warm, draft-free area of your kitchen. If your oven has a proof setting, or even an inside light, place it here. Allow your dough to rise about 90 minutes, or just until it has about doubled in size.
  • In the meantime, begin preparing the filling. Melt 1 tablespoon of butter and add ¾ cup of tightly packed light brown sugar, ¼ cup of bread flour, a pinch of salt, a teaspoon of vanilla extract, and 1-½ tablespoons of cinnamon. Add the zest of an entire orange, slice in half, and then add in the juice of just one half, either by hand or using a citrus reamer. Mix everything together using a fork until the mixture comes together like heavy, wet sand. Cover and set aside.
  • After the dough has proofed, spray a clean work surface lightly with cooking spray. Place the dough directly onto the surface, and using your fingertips, gently begin pressing the dough into a rectangle. The dough should be very soft and pillowy, spreading easily and not bouncing back.
  • Use a rolling pin to gently roll out the dough to a 12x10 inch rectangle (the full length of a standard ruler on the long end, and just a few inches shy in depth.
    Sprinkle the surface of the dough with the filling mixture, leaving a small border around the outside.
  • To begin rolling, start with light fingertips along the long end of the dough, gently pressing forward from the middle out towards the ends and keeping the dough tightly sealed without pressing too firmly down.
  • Once the dough is fully rolled, lightly tap the ends in to ensure the roll still measures about 12 inches in length.
    Using a knife or your bench scraper, carefully mark the dough in the center, mark each half in the center again, and again, so that you have 8 equal portions.
    Grab a portion of dental floss, long enough that it can fit around the dough and still have plenty of room. Carefully run the floss underneath until you've reached the center mark. Cross the floss in an 'X' and pull tight. The dough will divide into two equal portions. Repeat until you have cut all 8 rolls.
  • Spray a parchment lined baking sheet with cooking spray, then place rolls onto the pan, leaving about an inch of space in between each (approximately the width of two fingers). Cover the pan with plastic wrap and allow an additional hour for the final proofing.
    After 45 minutes, set the oven to 325℉ so that it will be hot about the same time that your rolls are ready for baking.
    Note: If you are making these ahead, and want to bake your rolls in the morning, you can do a slow rise by placing them into refrigerator overnight, and then taking them out about 90 minutes to 2 hours before baking to allow the rolls to come back to room temperature and finish proofing.
  • After the second proof, your rolls should have puffed up and will be soft to the touch.
    Bake for 15-20 minutes, depending on your oven. When fully baked, rolls will be pale in color, not golden brown, to keep them light and fluffy.
  • While your rolls are baking, place 2 tablespoons of butter into a small, microwave safe bowl and set aside. This will be used to brush onto the hot rolls as soon as they come out of the oven.
    Gather all of the ingredients to prepare the glaze. In a stand mixer fitted with the paddle attachment, blend together the cream cheese and remaining 2 Tbsp. of butter, and a pinch of salt. Once smooth, add in the powdered sugar. Once the mixture comes together, mix in the orange juice and zest, and vanilla extract. Blend everything together until you have a silky, ribbon-like glaze.
  • Just before the rolls have finished baking, melt the small portion of reserved butter, then immediately brush directly onto the hot rolls after you have taken them out of the oven. Allow to cool slightly.
  • Use a spoon to drizzle warm rolls with the prepared glaze and allow a few minutes to set before serving.

Notes

These orange cinnamon rolls will keep a few days if stored at room temperature in an air-tight container. If freezing, wrap each individual roll after they have cooled completely, and then store in an airtight container or Ziploc Freezer bag.

Nutrition

Serving: 1Roll | Calories: 355kcal | Carbohydrates: 51g | Protein: 6.7g | Fat: 12.9g | Saturated Fat: 8.3g | Cholesterol: 37.5mg | Sodium: 257mg | Potassium: 10.8mg | Fiber: 1.4g | Sugar: 20g | Vitamin C: 2.6mg | Calcium: 28.6mg | Iron: 2mg

Glazed Apple Fritters

by

It's finally starting to feel like fall around here in Southern Maryland! Despite temperatures still being in the 70's during the day, nights are getting cooler, leaves have been changing, and all of this means that apple (dessert) season is upon us! With Jim's favorite being apple fritters, I spent a bit of time recipe testing to create this delicious treat. If you've ever attempted to make them that fry up like softballs or have weird, alien-like tentacles, the ratio of ingredients in this recipe along with a little trick using parchment paper will ensure a perfect apple fritter.

INGREDIENTS

Apple Fritter Batter

  • 1-½ Cups AP Flour, sifted
  • ¼ Cup Granulated White Sugar
  • 1-½ tsp. Baking Powder
  • ¼ tsp. Kosher Salt
  • 2 tsp. Cinnamon
  • ½ Cup Milk, Whole
  • ½ Cup Apple Cider
  • 2 tsp. Vanilla Extract
  • 1 Honeycrisp Apple
  • 1 Granny Smith Apple
  • Vegetable or Canola Oil, for frying
  • Cooking Spray, for parchment paper

Glaze

  • 1-½ Cups Powdered Sugar
  • 2 Tbsp. Milk, Whole
  • 1 Tbsp. Apple Cider
  • 1 tsp. Vanilla Extract
  • 1 tsp. Cinnamon
  • Pinch Kosher Salt

INSTRUCTIONS

Step 1: Gather all of your ingredients. Line a sheet pan with parchment paper, and top with a metal rack.

Step 2: In a large mixing bowl, whisk together the dry ingredients. In a measuring cup (or medium bowl), stir together the milk, apple cider and vanilla. Set aside.

Step 3: Peel and chop apples into a small dice. With the apple upright, cut the apple into 4 sections, leaving the core. Cut each section into slices, each slice in half, and dice.

Step 4: Combine wet and dry ingredients, mix well, and then stir in the apples. Rest the batter in the fridge while you prepare the cooking oil.

Step 5: In a deep cast iron skillet (or fryer), heat the oil to 350℉. Make sure to set up your prepared sheet pan nearby. While the oil is heating, cut a large square of parchment paper and spray lightly with cooking spray. Use an instant-read or candy thermometer to ensure you've reached the correct temperature.

Note: If you don't have a thermometer, you'll be able to estimate the temperature by sticking the end of a wooden spoon directly into the oil. Small bubbles will form as the temperature rises and will increase to a full boil around the spoon as it reaches 350℉.

Step 6: When the oil has reached the proper temperature, remove the batter from the refrigerator. Using a ¼ C. measuring cup, portion a scoop of batter directly onto the center of the parchment square.

Step 7: CAREFULLY submerge the parchment square with the batter directly into the hot oil and flip, so that the batter is in the oil and the parchment is laying on top. Wait about 15-30 seconds, and then, use a pair of stainless steel tongs to lift the parchment away.

Fry each fritter for 2-3 minutes on each side, and then flip to the reverse side. The color should be a dark golden brown to ensure that the batter inside is fully cooked through.

Using the tongs, remove the fritter from the hot oil and place onto the rack. Repeat.

Note: Every so often, re-check your temperature. If the oil has gotten too hot, you may opt to add a little more oil to cool it down, or just move it from the burner for a few minutes.

Step 8: While your fritters are cooling, gather the ingredients to make the glaze. In a small mixing bowl, whisk powdered sugar with milk and cider, vanilla, cinnamon and a pinch of salt.

With a spoon, drizzle the glaze directly onto each apple fritter. When ready to serve, move to a serving platter.

Notes

Apple Fritters are best served the day they are made, but if you are making ahead or have leftovers, store them in an airtight container at room temperature.


Glazed Apple Fritters

Apple Fritters are the perfect treat to celebrate the Fall season!
No ratings yet
Print Pin
Course: Breakfast, Brunch, Dessert
Cuisine: American
Keyword: Apples, Brunch, Doughnuts, Fritters
Prep Time: 10 minutes minutes
Cook Time: 1 hour hour
Servings: 12 servings
Calories: 226kcal

Equipment

  • Deep Cast Iron Skillet or Fryer
  • Large Mixing Bowl
  • Small Mixing Bowl
  • Sheet Pan with Wire Rack
  • Parchment Paper
  • Stainless Steel Tongs
  • Chef Knife
  • Cutting Board
  • Fruit and Vegetable Peeler
  • Whisk
  • Rubber Spatula
  • Measuring Cups and Spoons
  • Liquid Measuring Cups
  • Wooden Spoon
  • Instant-Read or Candy Thermometer
  • Tablespoon

Ingredients

Fritters

  • 1-½ Cups AP Flour, sifted
  • ¼ Cup Granulated White Sugar
  • 1-½ tsp. Baking Powder
  • ¼ tsp. Kosher Salt
  • 2 tsp. Cinnamon
  • ½ Cup Milk, Whole
  • ½ Cup Apple Cider
  • 2 tsp. Vanilla Extract
  • 1 Honeycrisp Apple
  • 1 Granny Smith Apple
  • Vegetable or Canola Oil, for Frying
  • Cooking Spray

Glaze

  • 1-½ Cups Powdered Sugar
  • 2 Tbsp. Milk, Whole
  • 1 Tbsp. Apple Cider
  • 1 tsp. Vanilla Extract
  • 1 tsp. Cinnamon
  • Pinch Kosher Salt

Instructions

  • Gather all of your ingredients. Line a sheet pan with parchment paper, and top with a metal rack.
  • In a large mixing bowl, whisk together the dry ingredients. In a measuring cup (or medium bowl), stir together the milk, apple cider and vanilla. Set aside.
  • Peel and chop apples into a small dice. With the apple upright, cut the apple into 4 sections, leaving the core. Slice each section into slices, each slice in half, and dice.
  • Add liquid ingredients into dry, mix well, and then stir in the apples. Rest the batter in the fridge while you prepare the cooking oil.
  • In a deep cast iron skillet (or fryer), heat the oil to 350℉. Make sure to set up your prepared sheet pan nearby. While the oil is heating, cut a large square of parchment paper and spray lightly with cooking spray. Use an instant-read or candy thermometer to ensure you've reached the correct temperature.
    Note: If you don't have a thermometer, you'll be able to estimate the temperature by sticking the end of a wooden spoon directly into the oil. Small bubbles will form as the temperature rises and will increase to a full boil around the spoon as it reaches 350℉.
  • When the oil has reached the proper temperature, remove the batter from the refrigerator. Using a ¼ C. measuring cup, portion a scoop of batter directly onto the center of the parchment square.
    CAREFULLY, submerge the parchment square with the batter directly into the hot oil and flip, so that the batter is in the oil and the parchment is laying on top. Wait about 15-30 seconds, and then, use a pair of stainless-steel tongs to lift the parchment away.
  • Fry each fritter for 2-3 minutes on each side, and then flip to the reverse side. The color should be a dark golden brown to ensure that the batter inside is fully cooked through. Using the tongs, remove the fritter from the hot oil and place onto the rack.
    Repeat until all of the fritters have been made.
    Note: Every so often, re-check your temperature. If the oil has gotten too hot, you may opt to add a little more oil to cool it down, or just move it from the burner.
  • While your fritters are cooling, gather the ingredients to make the glaze. In a small mixing bowl, whisk powdered sugar with milk and cider, vanilla, cinnamon and a pinch of salt.
  • With a spoon, drizzle the glaze directly onto each apple fritter.

Notes

Apple Fritters are best served the day they are made, but if you are making ahead or have leftovers, store them in an airtight container at room temperature.

Nutrition

Serving: 1Fritter | Calories: 226kcal | Carbohydrates: 22g | Protein: 2g | Fat: 15g | Saturated Fat: 1.2g | Cholesterol: 1mg | Sodium: 46mg | Potassium: 123mg | Fiber: 1.3g | Sugar: 12.4g | Calcium: 47mg | Iron: 0.3mg

Coconut Almond Chocolate Bites

by

Energy bites have become a popular treat option over the past few years, especially those loaded with healthy ingredients. Instead of just mixing the ingredients together, a food processor blends them together, yielding a softer, creamier texture. Nutrient-dense and packed with flavor, these bites are a perfect grab-and-go treat.

INGREDIENTS

  • 10 Pitted Dates
  • 1-½ Cups Quick Oats
  • ¼ tsp. Ground Cinnamon
  • 1 Cup Sweetened Coconut
  • ⅓ Cup Almond (or Peanut) Butter
  • ½ Cup Dark (or Semi-Sweet) Chocolate, Chopped
  • 1 tsp. Vanilla Extract
  • 2 Scoops Vanilla Protein Powder Optional
  • 1 pinch Kosher Salt
  • A few drops of water, only if needed

INSTRUCTIONS

Step 1: Gather all of your ingredients.

Step 2: In a food processor, grind the oats and the cinnamon until pulverized into a fine flour.

Step 3: To the oat flour, add the shredded coconut, protein powder, and dates; blend until combined. The mixture will be dry and crumbly.

Next, process in the almond butter, vanilla extract and chocolate. If the mixture easily holds it shape, it's ready to be scooped into bites. If not, add in a few drops of water and pulse a few times until absorbed.

Step 4: Using a small cookie scoop, portion and roll into individual balls. Each batch yields about 22, one-ounce bites. Let the bites rest in the fridge for a few hours, allowing the flavors to meld. Keep refrigerated and enjoy cold.

Coconut Almond Chocolate Bites

These delicious bites are packed with healthy ingredients and come together in minutes using a food processor. They're a perfect grab-and-go treat.
No ratings yet
Print Pin
Course: Snack
Cuisine: American
Keyword: Chocolate, Oatmeal
Prep Time: 5 minutes minutes
Servings: 22 Bites
Calories: 225kcal

Equipment

  • Food Processor
  • Small Cookie Scoop https://amzn.to/3XI9DGw

Ingredients

  • 10 Pitted Dates
  • 1-½ Cups Quick Oats
  • ¼ tsp. Ground Cinnamon
  • 1 Cup Sweetened Coconut
  • ⅓ Cup Almond (or Peanut) Butter
  • ½ Cup Dark (or Semi-Sweet) Chocolate, Chopped
  • 1 tsp. Vanilla Extract
  • 2 Scoops Vanilla Protein Powder
  • 1 pinch Kosher Salt

Instructions

  • Gather all of your ingredients.
  • In a food processor, grind the oats and the cinnamon until pulverized into a fine flour.
  • To the oat flour, add the shredded coconut, protein powder, and dates, blend until combined. The mixture will be dry and crumbly.
    Next, process in the almond butter, vanilla extract and chocolate. If the mixture easily holds it shape, it's ready to be scooped into bites. If not, add in a few drops of water and pulse a few times until absorbed.
  • Using a small cookie scoop, portion and roll into individual balls. Each batch yields about 22, one-ounce bites. Let the bites rest in the fridge for a few hours, allowing the flavors to meld. Keep refrigerated and enjoy cold.

Nutrition

Serving: 58g | Calories: 225kcal | Carbohydrates: 33g | Protein: 5.3g | Fat: 9.5g | Saturated Fat: 4.4g | Cholesterol: -1mg | Sodium: 96mg | Potassium: 204mg | Fiber: 4.7g | Sugar: 21g | Calcium: 42mg | Iron: 1.2mg

Petite Tea Party Scones

by

A few months ago, I bought my niece this cute little porcelain tea set for when she comes over to visit, and I couldn't wait to throw us a tea party. In addition to traditional finger sandwiches and pretty, bite-sized desserts served on tiered stands, every proper tea party needs scones. Classic varieties tend to be dry, crumbly, and studded with dried fruit, and probably not a hit among most five-year olds. I wanted to make something she'd love; fun, colorful and a bit sweeter than the average teatime staple. These petite tea party scones are loaded with rainbow sprinkles and taste a bit like birthday cake- perfect for the pickiest of tea party guests of all ages!

INGREDIENTS

  • 2-½ Cups Unbleached, All-Purpose Flour plus about ¼ cup extra, reserved
  • 3 Tbsp. Granulated White Sugar
  • 2 tsp. Baking Powder
  • ¾ tsp. Kosher Salt
  • ¾ Cup Rainbow Sprinkles
  • 1-½ Cups Heavy Cream, Cold plus 2-3 extra Tablespoons (reserved)
  • 1 tsp. Pure Vanilla Extract
  • ½ tsp. Pure Almond Extract
  • 1 Tbsp. Sparkling Finishing Sugar or granulated white sugar, sugar in the raw, etc.

Glaze Ingredients

  • 1 Cup Powdered Sugar
  • ½ tsp. Vanilla Extract
  • ¼ tsp. Almond Extract
  • Scant pinch of Salt
  • 3-4 Tbsp. Heavy Cream

INSTRUCTIONS

Step 1: Preheat your oven to 400℉ and gather your ingredients.

Step 2: In a large mixing bowl, whisk together the dry ingredients, starting with the flour, then adding in the granulated sugar, salt, and baking powder.

Step 3: Stir in the rainbow sprinkles, tossing everything together.

Step 4: Add both extracts into the heavy cream and pour into the flour.

Using a rubber spatula, gently begin to fold in the flavored cream, scraping from the bottom and cutting through the dough to full incorporate all of the ingredients. Switch over to using a flexible bench scraper after all of the wet ingredients have been incorporated. This makes forming a cohesive ball of dough a little easier, although it will still be shaggy (rough and sticky), not smooth.

Step 5: Add the dough to a clean work surface dusted with flour. Dust the surface of the dough with additional flour, then lay a piece of parchment paper on top. Use a rolling pin to evenly press the dough into an approximately 10" diameter. You'll want your scones to be the same thickness so that they are consistently the same size and bake evenly, and the parchment will protect your dough from sticking directly to the rolling pin. Remove and discard the parchment.

Step 6: Grab a small bowl filled with a few tablespoons of flour. Dipping the cutter into the flour will make cutting out the individual scones easier.

Step 7: Place scones onto a parchment lined sheet pan. One batch will yield approximately 44 scones, using a 1-inch cookie cutter.

Using your reserved heavy cream, gently brush the tops of each unbaked scone.

Step 8: Bake scones for approximately 18-20 minutes, just until they are light and golden brown in color. When fully baked, remove the scones from the oven and allow to cool.

Step 9: In the meantime, prepare the glaze. In a medium mixing bowl, whisk together the powdered sugar, both extracts, a pinch of salt and a few tablespoons of heavy cream, adding in additional cream as needed to get the correct consistency. The glaze shouldn't be too thick or too thin.

If you drizzle the glaze back into the bowl, it should run smoothly from your whisk like a thin ribbon that doesn't immediately disappear into the rest of the glaze.

Drizzle glaze over each scone, and sprinkle with sparkling sugar. The glaze will harden as it sets, allowing the scones to be stacked.


Petite Tea Party Scones

Sweeter than the classic, these bite-sized scones are loaded with colorful sprinkles and drizzled with a sparkly sugar glaze- perfect for any party!
5 from 1 vote
Print Pin
Course: Breakfast, Brunch
Cuisine: British
Keyword: Afternoon Tea, Brunch, High Tea, Scones
Prep Time: 10 minutes minutes
Cook Time: 20 minutes minutes
Servings: 22 servings
Calories: 125kcal

Equipment

  • Large Mixing Bowl
  • Medium Mixing Bowl
  • Whisk
  • Rubber Spatula
  • Flexible Bench Scraper
  • Sheet Pan
  • Parchment Paper
  • Rolling Pin
  • Small, Round Cookie Cutter
  • Small Bowl
  • Pastry Brush

Ingredients

  • 2-½ Cups Unbleached, All-Purpose Flour plus about ¼ C. extra, reserved
  • 3 Tbsp. Granulated White Sugar
  • 2 tsp. Baking Powder
  • ¾ tsp. Kosher Salt
  • ¾ Cup Rainbow Sprinkles
  • 1-½ Cups Heavy Cream, Cold plus 2-3 extra Tablespoons (reserved)
  • 1 tsp. Pure Vanilla Extract
  • ½ tsp. Pure Almond Extract
  • Tbsp. Sparkling Sugar or granulated white sugar

Glaze

  • 1 Cup Powdered Sugar
  • ½ tsp. Vanilla Extract
  • ¼ tsp. Almond Extract
  • Scant pinch of Salt
  • 3-4 Tbsp. Heavy Cream

Instructions

  • Preheat your oven to 400℉ and gather your ingredients.
  • In a large mixing bowl, whisk together the dry ingredients, starting with the flour, then adding in the granulated sugar, salt, and baking powder.
  • Stir in the rainbow sprinkles, tossing everything together.
  • Add both extracts into the heavy cream and pour into the flour.
  • Using a rubber spatula, gently begin to fold in the flavored cream, scraping from the bottom and cutting through the dough to full incorporate all of the ingredients. Switch over to using a flexible bench scraper after all of the wet ingredients have been incorporated. This makes forming a cohesive ball of dough a little easier, although it will still be shaggy (rough and sticky), not smooth.
  • Add the dough to a clean work surface dusted with flour. Dust the surface of the dough with additional flour, then lay a piece of parchment paper on top. Use a rolling pin to evenly press the dough into an approximately 10" diameter.
    You'll want your scones to be the same thickness so that they are consistently the same size and bake evenly, and the parchment will protect your dough from sticking directly to the rolling pin. Remove and discard the parchment.
  • Grab a small bowl filled with a few tablespoons of flour. Dipping the cutter into the flour will make cutting out the individual scones easier. Place scones onto a parchment lined sheet pan. One batch will yield approximately 44 scones, using a 1-inch cookie cutter.
  • Using your reserved heavy cream, gently brush the tops of each unbaked scone.
  • Bake scones for approximately 18-20 minutes, just until they are light and golden brown in color. When fully baked, remove the scones from the oven and allow to cool.
  • In the meantime, prepare the glaze. In a medium mixing bowl, whisk together the powdered sugar, both extracts, a pinch of salt and a few tablespoons of heavy cream, adding in additional cream as needed to get the correct consistency. The glaze shouldn't be too thick or too thin.
  • drizzle glaze over each scone, and sprinkle with sparkling sugar. The glaze will harden as it sets, allowing the scones to be stacked.

Notes

If making ahead, scones can be frozen either before or after baking. Just hold off on adding the glaze until the day you are planning to serve them. 

Nutrition

Serving: 32grams | Calories: 125kcal | Fat: 4.4g | Saturated Fat: 3.2g | Cholesterol: 9.3mg | Sodium: 68mg | Potassium: 69mg | Fiber: 0.4g | Sugar: 4.6g | Calcium: 27mg | Iron: 0.2mg

Blueberry Cream Scones

by

I love scones, but not particularly when they are dry and crumbly, and certainly not when they taste a bit like cardboard studded with fruit. This recipe is the opposite of all of those things, with an airy, delicate crumb, modestly sweet and can be enjoyed alongside a cup of tea, no dunking required! These scones come together quickly in just a few minutes, making them a perfect choice to pop in the oven while you prepare the rest of your weekend breakfast or brunch menu, and will be ready to serve in less than 30 minutes. They're also easily customizable, so next time, feel free to try a different flavor by incorporating other dried fruits, chocolate, citrus zest, etc. But these are still my favorite, simple and classic!


INGREDIENTS

  • 2 ½ Cups Unbleached All-Purpose Flour
  • 2 Tablespoon Granulated White Sugar
  • 2 Teaspoons Baking Powder
  • ¾ Teaspoon Salt
  • 1 oz Dried Blueberries
  • 1-½ Cups Heavy Cream, Cold, plus 2-3 Tablespoons (reserved)
  • 1 Tablespoon Sparkling Sugar (or additional granulated white sugar)

INSTRUCTIONS

Step 1: Preheat your oven to 400℉ and gather your ingredients.

Step 2: In a large mixing bowl, whisk together the dry ingredients, starting with the flour, then adding in the granulated sugar, salt, and baking powder.

Step 3: Add in the dried blueberries, tossing together to coat thoroughly with the flour mixture. This will ensure that the berries do not sink to the bottom of the dough.

Step 4: Pour in the heavy cream.

Using a rubber spatula, gently begin to fold in the heavy cream, scraping from the bottom and cutting through the dough to full incorporate all of the ingredients. You want a shaggy mixture that comes together to form a rough ball but is not smooth. You may wish to switch to your flexible bench scraper mid-way through mixing.

Step 5: Place the scone dough onto the center of a parchment-lined baking sheet. Gently knead the dough with clean, lightly floured hands and press to form a circle, approximately 6" in diameter.

Step 6: Using either a metal bench scraper or a large chef's knife, cut the dough into two even halves, first vertically, then horizontally. Cut each half in half again, creating eight (8) even triangles.

Step 7: Gently separate the scones so that they have room to bake freely and are not touching one another.

Step 8: Using your reserved heavy cream, gently brush the tops of each unbaked scone and sprinkle generously with sparkling (or granulated) sugar.

Step 9: Bake scones for approximately 18-20 minutes, just until they are light and golden brown in color. When fully baked, remove the scones from the oven and allow to cool slightly. Scones may be served warm or at room temperature.


Blueberry Cream Scones

Blueberry Scones with an airy, delicate crumb, modestly sweet and can be enjoyed alongside your favorite cup of tea.
No ratings yet
Print Pin
Course: Breakfast, Brunch
Cuisine: British
Keyword: Afternoon Tea, Blueberries, Blueberry, Breakfast, Brunch, High Tea, Scones
Prep Time: 10 minutes minutes
Cook Time: 20 minutes minutes
Servings: 8 servings
Calories: 236kcal

Equipment

  • Large Mixing Bowl
  • Whisk
  • Rubber Spatula
  • Flexible Bench Scraper
  • Sheet Pan
  • Parchment Paper
  • Metal Bench Scraper or Large Chefs Knife
  • Small Bowl
  • Pastry Brush

Ingredients

  • 2-½ Cups Unbleached, All-Purpose Flour
  • 2 Tbsps. Granulated White Sugar
  • 2 tsp. Baking Powder
  • ¾ tsp. Kosher Salt
  • 1 oz. Dried Blueberries
  • 1-½ Cups Heavy Cream, Cold plus 2-3 extra Tablespoons (reserved)
  • 1 Tbsp. Sparkling Sugar or granulated white sugar

Instructions

  • Preheat your oven to 400℉ and gather your ingredients.
  • In a large mixing bowl, whisk together the dry ingredients, starting with the flour, then adding in the granulated sugar, salt, and baking powder.
  • Add in the dried blueberries, tossing together to coat thoroughly with the flour mixture. This will ensure that the berries do not sink to the bottom of the dough.
  • Pour in the heavy cream.
    Using a rubber spatula, gently begin to fold in the heavy cream, scraping from the bottom and cutting through the dough to full incorporate all of the ingredients. You want a shaggy mixture that comes together to form a rough ball but is not smooth. You may wish to switch to your flexible bench scraper mid-way through mixing.
  • Place the scone dough onto the center of a parchment-lined baking sheet. Gently knead the dough with clean, lightly floured hands and press to form a circle, approximately 6" in diameter.
  • Using either a metal bench scraper or a large chef's knife, cut the dough into two even halves, first vertically, then horizontally. Cut each half in half again, creating 8 even triangles.
  • Gently separate the scones so that they have room to bake freely and are not touching one another.
  • Using your reserved heavy cream, gently brush the tops of each unbaked scone and sprinkle generously with sparkling (or granulated) sugar.
  • Bake scones for approximately 18-20 minutes, just until they are light and golden brown in color. When fully baked, remove the scones from the oven and allow to cool slightly. Scones may be served warm or at room temperature.

Nutrition

Serving: 68grams | Calories: 236kcal | Carbohydrates: 35g | Protein: 4.6g | Fat: 8.6g | Saturated Fat: 5.2g | Cholesterol: 25mg | Sodium: 307mg | Potassium: 69mg | Fiber: 1.3g | Sugar: 6.3g | Calcium: 81mg | Iron: 0.5mg

Fresh Strawberry Popsicles

by

There's just something fun and nostalgic about eating a popsicle on a hot summer day and making them from scratch makes you feel good about knowing what ingredients are going into them! We recently launched our new boat out on the water for the first time this season, and considering it was almost 100 degrees outside that day, these refreshing popsicles were the perfect treat to celebrate our maiden voyage and beat the heat while cruising around the bay.


INGREDIENTS

  • 2 Pints Fresh Strawberries, rinsed thoroughly and hulled (stems removed)
  • ½ C. Simple Syrup (recipe here)
  • A Splash of Water, if needed

INSTRUCTIONS

Step 1: Gather your ingredients. If you haven't yet made a batch of classic simple syrup, you can check out the recipe here. You'll typically want to make this ahead, just so your syrup is nice and cold before making your popsicles.
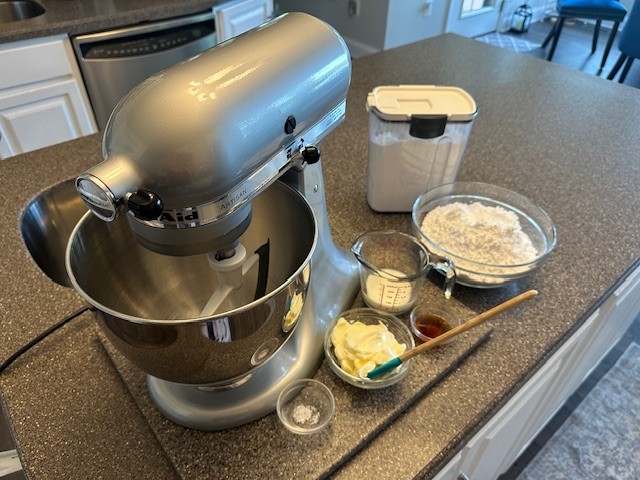
Step 2: Puree strawberries in a blender until smooth. Add a little water, if necessary, to get the fruit blended.

Step 3: Place a strainer over a medium size bowl, and using a rubber spatula, press the pureed strawberries through to sift out the seeds.

Continuing pressing all of the puree through until all that remains are the seeds, which can be discarded.

Step 4: Add simple syrup into the strained strawberry puree and whisk well to incorporate.

Step 5: Pour mixture into a large measuring cup with a spout to make it easier to pour into the popsicle molds.

Carefully fill each cavity of your popsicle molds, leaving a small gap at the top to allow room for the mixture to expand as it freezes.

I love these Silicone Popsicle Molds that are much easier to use than other popsicle molds I've had in the past, and the classic shape and design adds to the nostalgia. The set also comes with wooden popsicle sticks and bags.

Step 6: Once filled, cover your popsicle molds (like this one) or top with the individual 2-in-1 lid and stick combo. For these, we'll add a stick through the top of the lid, being mindful not to push the sticks too far down so there's plenty of room to hold.

Place the popsicle mold into the freezer and allow to set for several hours or overnight.


Step 7: Once fully frozen, your popsicles are ready to be enjoyed. You can take them out of the molds one by one as you need them, or individually bag and store them in the freezer until they're ready to be served.

Removing your popsicles from the mold can be tricky, and technique may vary, depending on the type of mold. For these silicone molds, I've found wiggling each cavity and then pushing up from the bottom is an easy method, but some of the hard plastic molds may require you to run them quickly under warm (never too hot!) water to release them.

This simple bag sealer looks a lot like a small hair straightening iron, but it actually just seals the bottom of your popsicle bag to make them easier to store in the freeze and give them that professional look. Just plug it in, wait just a couple of minutes, and it'll be hot enough to seal.

Step 8: If using a sealer, carefully place your popsicle into the bag, stick side up. Clamp the sealer along the bottom from both sides to ensure a full seal, and you're done!


Fresh Strawberry Popsicles

These simple and easy three-ingredient strawberry popsicles are a delicious way to use fresh strawberries this summer!
No ratings yet
Print Pin
Course: Dessert
Cuisine: American
Keyword: Popsicles, Strawberries
Prep Time: 10 minutes minutes
Freeze Time: 5 hours hours
Servings: 10 Servings
Calories: 177kcal

Equipment

  • Popsicle Mold
  • Blender
  • Fine-Mesh Metal Strainer
  • Medium Mixing Bowl
  • Rubber Spatula
  • Small Bag Sealer

Ingredients

  • 2 Pints Fresh Strawberries hulled, and rinsed thoroughly
  • ½ Cup Simple Syrup
  • Splash of Water if needed

Instructions

  • Gather your ingredients. If you haven't yet made a batch of classic simple syrup, you can check out the recipe linked above. You'll typically want to make this ahead, just so your syrup is nice and cold before making your popsicles but should at least be room temperature.
  • Puree strawberries in a blender until smooth. Add a little water, if necessary, to get the fruit blended.
  • Place a strainer over a medium size bowl, and using a rubber spatula, press the pureed strawberries through to sift out the seeds.
  • Continuing pressing all of the puree through until all that remains are the seeds, which can be discarded.
  • Add simple syrup into the strained strawberry puree and whisk well to incorporate.
  • Pour mixture into a large measuring cup with a spout to make it easier to pour into the popsicle molds.
    Carefully fill each cavity of your popsicle molds, leaving a small gap at the top to allow room for the mixture to expand as it freezes.
  • Once filled, cover your popsicle molds (like this one) or top with the individual 2-in-1 lid and stick combo. For these, we'll add a stick through the top of the lid, being mindful not to push the sticks too far down so there's plenty of room to hold.
    Place the popsicle mold into the freezer and allow to set for several hours or overnight.
  • Once fully frozen, your popsicles are ready to be enjoyed. You can take them out of the molds one by one as you need them, or individually bag and store them in the freezer until they're ready to be served.
    Removing your popsicles from the mold can be tricky, and technique may vary, depending on the type of mold. For these silicone molds, I've found wiggling each cavity and then pushing up from the bottom is an easy method, but some of the hard plastic molds may require you to run them quickly under warm (never too hot!) water to release them.
    The simple bag sealer linked in the recipe looks a lot like a small hair straightening iron, but it actually just seals the bottom of your popsicle bag to make them easier to store in the freeze and give them that professional look. Just plug it in, wait just a couple of minutes, and it'll be hot enough to seal.
  • If using a sealer, carefully place your popsicle into the bag, stick side up. Clamp the sealer along the bottom from both sides to ensure a full seal, and you're done!

Nutrition

Serving: 1Popsicle | Calories: 177kcal | Carbohydrates: 45g | Protein: 0.5g | Fat: 0.3g | Sodium: 1.1mg | Potassium: 110mg | Fiber: 1.4g | Sugar: 43g | Calcium: 12mg | Iron: 0.3mg

Homemade Vanilla Ice Cream with Dark Chocolate and Morello Cherries

by

This decadent vanilla egg custard serving as the base for this delicious ice cream was the one we learned during phase one of culinary school. The recipe uses an equal blend of milk and cream, and the high volume of egg yolks provides its richness and creaminess, setting it leagues apart from anything purchased in a carton from the grocery store. I haven't met one person who has tried this ice cream (my personal favorite!) who hasn't said it's one of the best they've ever had. The dark chocolate adds a delicious, bittersweet bite while the morello cherries swirled throughout bring a beautiful pop of color, along with a sweet and tart burst of flavor.


INGREDIENTS

  • 2 Cups Whole Milk
  • 2 Cups Heavy Whipping Cream
  • 10 Large Egg Yolks
  • 1-¼ Cup Granulated Sugar
  • 1 Tbsp. Pure Vanilla Extract
  • 4 oz. Chopped, Good Quality Dark Chocolate such as Ghirardelli
  • ¼ Cup Tart Morello Cherry Preserves
  • Ice to set up the ice bath

INSTRUCTIONS

Note: If you are using an ice cream maker that requires the canister to be fully frozen prior to use, make sure to put it in your freezer at least 48 hours beforehand. The ice cream maker I use here at home, noted below, does not require pre-freezing. Its fully automatic and has a commercial-quality compressor built in, which allows you to make batch after batch. If you enjoy making homemade ice cream, it's definitely worth the investment!


Step 1: Gather all of your ingredients.

Step 2: In a large, non-stick pot, heat milk and heavy whipping cream, careful to bring just to a simmer and not to a boil. The mixture should steam lightly, and you'll see small bubbles forming along the rim of the liquid.

Step 3: Meanwhile, separate egg yolks from whites. (Save your egg whites for a different dish, either an omelet, angel food cake or meringues!)

Step 4: In a large, heat-proof bowl, whisk yolks with sugar thoroughly. Once the sugar has fully dissolved into the egg yolks, the mixture will be pale yellow in color. Set aside.

Step 4: Once your milk and cream mixture is hot, but not boiling, it's time to temper the eggs. This will heat the eggs slowly, bringing them up to the same temperature as the milk and cream, but ensuring you are not making scrambled eggs.

VERY SLOWLY drizzle small amounts of the hot liquid into the egg mixture, whisking constantly, before adding additional liquid. As you repeat this step, little by little, feel the side of the bowl. It should begin to feel warm to the touch. If not, continue adding small increments of the hot milk and cream liquid. There should be no curdling.

Step 5: Once warm, combine the egg yolk and sugar mixture by pouring the bowl directly into the pot with the remaining milk and cream mixture; continue whisking. This egg custard becomes what is referred to as an ice cream base.

Step 6: Adjust the temperature to medium and swap your whisk for a rubber spatula. Continue cooking and stirring frequently. Avoid letting your custard base boil. The consistent stirring will help ‘cool’ the mixture as it cooks and incorporates air. Be mindful to scrape the sides and the bottom of the pot with each pass.

Step 7: Cooking times will vary, but you are looking for a thickened custard, but not thick like pudding. As the mixture thickens, switch to using a wooden spoon. You should be able to draw your finger across the back of the spoon and see a visible line that does not run.

This is a crucial step- not cooking your base long enough runs the risk of an ice cream that may not fully set.

Don't worry if your custard is a little grainy or has small curdles of egg in the mixture. This is why we take the extra step of straining it through a fine metal sieve.

Step 8: Once your custard has finished cooking, turn off the heat. Set up a strainer over a heat-proof bowl with at least a 2-Quart capacity, and a cooling station. You’ll need a large bowl filled with ice and water, large enough to nestle (but not submerge) the smaller bowl.

Step 9: Place your strainer over the smaller bowl you’ll be nestling into your ice bath. Pour your custard through the strainer, capturing the strained ice cream base, stirring with your rubber spatula to ensure all the smooth liquid goes through.

Step 10: Place the bowl with the ice cream base into the ice bath. Add a little water if you need to, which may help keep the bowl balanced. You can now whisk the ice cream base to expedite the cooling process.

Step 11: Add in the vanilla extract. Waiting to add the extract after the base has cooled slightly ensures that the alcohol does not burn off during the cooking process, which affects not only the flavor of the final product but also keeps the ice cream from freezing solid.

Step 12: Once the ice cream base has cooled to at least room temperature, it must be refrigerated to set for at least 6 hours, but ideally overnight. The colder your base, the faster it will freeze and the better consistency you’ll have with your final ice cream. Move your mixture into a bowl with a tight-fitting lid and put it in the refrigerator.

Step 13: Prepare your chocolate by first breaking apart the squares, placing them onto the cutting board and rocking your Chef's knife back and forth until you have small pieces. The pieces do not have to be uniform in size, however, you don't want any pieces that are too large.

Step 14: Take an extra few seconds to sift the chopped chocolate to remove the chocolate 'dust' shavings that you don't need to be mixed into your ice cream. Save these, however, for another use! Store the chopped chocolate until you are ready to assemble your ice cream.


Step 14: Whether the next day or several hours later, after your ice cream base has fully set, remove the bowl from refrigeration and give it a good stir using a rubber spatula. The mixture should now be much thicker, yet still pourable.

Step 15: Remove your ice cream freezer canister when you are ready to begin churning, and not beforehand. Following your ice cream maker’s directions, pour the ice cream base into the maker’s canister. This custard recipe yields approximately 1 quart of ice cream base but freezing will expand the finished ice cream to 1.5 quarts. Most ice cream makers take approximately 40-60 minutes to go through a full churn process but may take less time depending on the temperature and thickness of your ice cream base.

As noted above, I'm a huge fan of the Cuisinart ICE-100 1.5-Quart Ice Cream and Gelato Maker, Fully Automatic with a Commercial Quality Compressor, and would highly recommend it to anyone who enjoys making homemade ice cream, gelato or sorbet regularly. There's no need to freeze the canister, the machine works simply by plugging it in and can make batch after batch.

Don't rely exclusively on the timer. Typically, once the machine starts to slow, it's because it's almost done. Keep a close eye on it at this stage. Once it starts to struggle a little, it's as frozen as it can get during the churning process, signaling that your ice cream is done, and it's time to turn off the machine.

Make sure to have your container, your prepared chocolate and your morello cherry preserves ready to go, so that you can work quickly once your ice cream is done and ready.

Step 16: Once the ice cream has gone through the full churning cycle, it will be the consistency of soft serve and will need to be put into the freezer quickly to set before it melts. Work quickly. Spoon your ice cream into your freezer-safe container, swirling in the chocolate and small amounts of the preserves throughout the layers.

Your delicious, homemade vanilla ice cream with dark chocolate and morello cherries will be fully frozen and ready to enjoy in about 4 hours.


Vanilla Ice Cream with Dark Chocolate and Morello Cherry

One taste of this creamy, vanilla ice cream with rich, dark chocolate and swirls of morello cherry jam will give you every reason to make your own homemade ice cream.
No ratings yet
Print Pin
Course: Dessert
Cuisine: American, French
Keyword: Ice Cream
Prep Time: 45 minutes minutes
Cook Time: 30 minutes minutes
Refrigeration Time: 8 hours hours
Servings: 12 Servings
Calories: 284kcal

Equipment

  • Ice Cream Maker (1.5-Quart minimum capacity)
  • Heavy-bottomed, non-stick Pot
  • Whisk
  • Rubber Spatula
  • Wooden Spoon
  • Large, Heat-Proof Bowl (For ice bath)
  • Medium, Heat-Proof Bowl (2 Quart capacity, for ice cream base)
  • Fine-Mesh Metal Strainer
  • Cutting Board
  • Chef's Knife
  • Small glass bowls for ice cream mix-ins
  • Plastic Wrap
  • Ice Cream Container

Ingredients

  • 2 Cups Whole Milk
  • 2 Cups Heavy Whipping Cream
  • 10 Large Egg Yolks
  • 1-¼ Cup Granulated Sugar
  • 1 Tbsp. Pure Vanilla Extract
  • 4 oz. Chopped, Good Quality Dark Chocolate Such as Ghirardelli
  • ¼ Cup Tart Morello Cherry Preserves
  • Ice to set up the ice bath

Instructions

  • Note: Make sure to freeze your ice cream canister for at least 48 hours prior to making ice cream.
  • Gather all of your ingredients.
  • In a large, non-stick pot, heat milk and heavy whipping cream, careful to bring just to a simmer and not to a boil. The mixture should steam lightly, and you'll see small bubbles forming along the rim of the liquid.
  • Meanwhile, separate egg yolks from whites. (Save your egg whites for a different dish, either an omelet, angel food cake or meringues!)
  • In a large, heat-proof bowl, whisk yolks with sugar thoroughly. Once the sugar has fully dissolved into the egg yolks, the mixture will be pale yellow in color. Set aside.
  • Once your milk and cream mixture is hot, but not boiling, it's time to temper the egg mixture. This will heat the eggs slowly, bringing them up to the same temperature as the milk and cream but ensuring you are not making scrambled eggs.
    VERY SLOWLY drizzle small amounts of the hot liquid into the egg mixture, whisking constantly, before adding additional liquid. As you repeat this step, little by little, feel the side of the bowl. It should begin to feel warm to the touch. If not, continue adding small increments of the hot milk and cream liquid. There should be no curdling.
  • Once warm, combine the egg yolk and sugar mixture by pouring the bowl directly into the into the pot with the remaining milk and cream mixture; continue whisking. This egg custard becomes what is referred to as an ice cream base.
  • Adjust the temperature to medium and swap your whisk for a rubber spatula. Continue cooking and stirring frequently. Avoid letting your custard base boil. The consistent stirring will help ‘cool’ the mixture as it cooks and incorporates air. Be mindful to scrape the sides and the bottom of the pot with each pass.
  • Cooking times will vary, but you are looking for a thickened custard, but not thick like pudding. You should be able to draw your finger across the back of the spoon and see a visible line that does not run.
    This is a crucial step- not cooking your base long enough runs the risk of an ice cream that may not fully set.
    Don't worry if your custard is a little grainy or has small curdles of egg in the mixture. This is why we take the extra step of straining it through a fine metal sieve.
  • Once your custard has finished cooking, turn off the heat. Set up a strainer over a heat-proof bowl with at least a 2-Quart capacity, and a cooling station. You’ll need a large bowl filled with ice and water, large enough to nestle (but not submerge) the smaller bowl.
  • Place your strainer over the smaller bowl you’ll be nestling into your ice bath. Pour your custard through the strainer, capturing the strained ice cream base, stirring with your rubber spatula to ensure all the smooth liquid goes through.
  • Place the bowl with the ice cream base into the ice bath. Add a little water if you need to, which may help keep the bowl balanced. You can now whisk the ice cream base to expedite the cooling process.
  • Add in the vanilla extract. Waiting to add the extract after the base has cooled slightly ensures that the alcohol does not burn off during the cooking process, which affects not only the flavor of the final product but also keeps the ice cream from freezing solid.
  • Once the ice cream base has cooled to at least room temperature, it must be refrigerated to set for at least 6 hours, but ideally overnight. The colder your base, the faster it will freeze and the better consistency you’ll have with your final ice cream. Move your mixture into a bowl with a tight-fitting lid and put it in the refrigerator.
  • Prepare your chocolate by first breaking apart the squares, placing them onto the cutting board and rocking your Chef's knife back and forth until you have small pieces. The pieces do not have to be uniform in size, however, you don't want any pieces that are too large.
  • Take an extra few seconds to sift the chopped chocolate to remove the chocolate 'dust' shavings that you don't need to be mixed into your ice cream. Save these, however, for another use! Store the chopped chocolate until you are ready to assemble your ice cream.
  • Whether the next day or several hours later, after your ice cream base has fully set, remove the bowl from refrigeration and give it a good stir using a rubber spatula. The mixture should now be much thicker, yet still pourable.
  • Remove your ice cream freezer canister when you are ready to begin churning, and not beforehand. Following your ice cream maker’s directions, pour the ice cream base into the maker’s canister. This custard recipe yields approximately 1 quart of ice cream base but freezing will expand the finished ice cream to 1.5 quarts. Most ice cream makers take approximately 40-60 minutes to go through a full churn process but may take less time depending on the temperature and thickness of your ice cream base.
    Don't rely exclusively on the timer. Typically, once the machine starts to slow, it's because it's almost done. Keep a close eye on it at this stage. Once it starts to struggle a little, it's as frozen as it can get during the churning process, signaling that your ice cream is done, and it's time to turn off the machine.
    Make sure to have your container, your prepared chocolate and your morello cherry preserves ready to go, so that you can work quickly once your ice cream is done and ready.
  • Once the ice cream has gone through the full churning cycle, it will be the consistency of soft serve and will need to be put into the freezer quickly to set before it melts. Work quickly. Spoon your ice cream into your freezer-safe container, swirling in the chocolate and small amounts of the preserves throughout the layers.
  • Your delicious, homemade vanilla ice cream with dark chocolate and morello cherries will be fully frozen and ready to enjoy in about 4 hours.

Notes

Homemade ice cream does not have any of the same additives that 
store-bought ice cream has, so it will be very hard straight from the freezer. Allow it
to sit at room temperature for just a few minutes to soften to a scoopable
consistency and return unused portion to the freezer.

Nutrition

Serving: 4oz | Calories: 284kcal | Carbohydrates: 34g | Protein: 4.5g | Fat: 15g | Cholesterol: 181mg | Sodium: 41mg | Potassium: 90mg | Sugar: 32g | Calcium: 86mg | Iron: 0.7mg

Decadent Homemade Chocolate Raspberry Gelato

by

In the summertime, we love taking Jet Ski rides out through Breton Bay and over to the local wharf, where this cute little ice cream shop called Frog Town serves delicious hand dipped treats alongside gorgeous, waterfront views and spectacular sunsets. My favorite flavor by far has been their chocolate raspberry ice cream, so here's my version using a gelato base, a creamy blend of cocoa and bittersweet dark chocolate swirled with tart, fresh raspberry puree. You'll need an ice cream maker, but well worth the investment if you enjoy making homemade ice cream, gelato and sorbets like we do. Plan a day ahead to ensure your gelato base has plenty of time to chill before churning, and a minimum of six hours of freezing afterwards before enjoying!

INGREDIENTS

Gelato

  • 2 ¼ Cups Whole Milk
  • ⅓ Cup Heavy Cream
  • ½ Cup Unsweetened Cocoa Powder
  • 2 oz. Good Quality Bittersweet Chocolate, 60-70%, Chopped (NOT Chocolate Chips)
  • 4 Large Egg Yolks
  • ½ Cup Granulated White Sugar
  • 1 Tbsp. Pure Vanilla Extract
  • 1 Scant Pinch of Salt

Fresh Raspberry Puree

  • 1 ½ Cups Fresh (or Frozen) Raspberries
  • 3 Tbsp. Granulated White Sugar (more if needed to adjust sweetness)

DIRECTIONS

Step 1: Before beginning this recipe, make sure your ice cream maker bowl has been placed into the freezer. It will need to have been in the freezer a minimum of 24 hours to ensure it is cold enough to properly churn the gelato base, so plan accordingly.

This 2-Quart Capacity Ice Cream Maker from Cuisinart is a great choice or, if you have a KitchenAid Stand Mixer, this Ice Cream Maker Attachment is also a great option. If you want to skip the step of having to freeze your ice cream bowl every time you want to make homemade frozen treats, I absolutely love my fully automatic Cuisinart ICE-100 1.5-Quart Ice Cream and Gelato Maker, which comes with two different paddles, doesn't require any pre-freezing and can churn out batch after batch. You just plug it in, set the timer and you're ready to go.

Step 2: Gather all of your gelato ingredients.

Step 3: In a heavy- bottomed saucepan, warm the milk and heavy cream to a light simmer, but do not allow to boil.

Step 4: Carefully whisk in cocoa powder and scant pinch of salt until blended.

Step 5: Add the chocolate and whisk until fully melted. Remove the pot from heat, stirring occasionally.

Step 6: Separate 4 large eggs, and reserve the yolks for another recipe, if you wish. Add the sugar and whisk together to blend.

Step 7: Continuing whisking the egg mixture until pale in color. This will ensure that the sugar has completely dissolved.

Step 8: Give the chocolate mixture a good whisk. Begin tempering the eggs by slowly adding in small amounts of the warm chocolate mixture and whisking thoroughly, a little bit at a time, until blended, and repeat several times.

Step 9: Feel the bottom and sides of the bowl. If warm to the touch, your eggs are properly tempered, and you can add the remaining chocolate mixture into the egg mixture. Doing so beforehand may result in creating chocolatey scrambled eggs, so don't rush this step. Be sure to run your spatula along the bottom and sides of the pot to ensure there are no traces of remaining chocolate.

Step 10: Pour the chocolate gelato base back to the pot and return to medium heat, stirring consistently using a wooden spoon. As the base cooks, the color of the mixture will go from pale and creamy to richer and darker as it thickens.

Step 11: Continue stirring until the base thickens to the point where you can run your finger along the back of the wooden spoon and you can easily see a definitive line, around 20 minutes. If the mixture is too thin and runs back over the trail, continue cooking. Don't rush this step, as you want to ensure that your base is thoroughly cooked.

Step 12: Place a wire sieve (or fine metal strainer) over a medium sized heat-proof bowl, and pour the cooked gelato base through, using a rubber spatula to scrape the mixture through. This will ensure that your gelato is smooth. Make sure to use your spatula to scrape along the bottom of the sieve.

Step 13: Whisk to cool slightly and then add in the vanilla extract. Doing this step after removing the base from heat avoids cooking off the alcohol, which keeps the finished gelato from freezing solid. It also adds depth of flavor.

Step 14: Set up a cooling station by filling a large bowl with ice, and then placing the bowl with the gelato base in the center. Be careful that the ice cubes or water from the melted ice does not get into the center bowl. Whisk to help cool down the base as quickly as possible.

Step 15: Once the gelato base has cooled enough to be handled (it does not need to be fully cooled), carefully remove the bowl from the ice bath and dry the bottom on a towel. Whisk to scrape down the sides of the bowl.

Step 16: Cover the bowl either with a lid, or tightly with plastic wrap. Place in the fridge and refrigerate for a minimum of several hours, but overnight will yield the best results for the flavors to fully develop and allow the mixture to get as cold as possible for churning.

Step 17: In the meantime, prepare the raspberry puree by adding the raspberries, sugar and scant pinch of salt to a small saucepan over medium low heat.

Step 18: Cook down the fruit slowly, stirring every so often until the raspberries have broken down. Taste the fruit to see if any adjustments need to be made to the sweetness.

Step 19: Place a fine metal strainer over a medium sized bowl, and begin pressing the fruit puree through, separating out the seeds. Be sure to scrape the bottom of the sieve from the underside frequently to capture more of the raspberries. Discard the seeds. Stir the vanilla extract into the raspberry puree, cover and refrigerate.


Step 20: When ready to churn, remove the gelato base from the refrigerator. Use a rubber spatula to give the mixture a good stir, scraping the bottom and sides of the bowl. The base should be thick, smooth and creamy.

Step 21: Following the instructions for your ice cream maker, prepare the freezer core by inserting the paddle attachment into position and pour your gelato base directly into the machine.

Step 22: Turn the machine on and allow the gelato to churn. Depending on your machine, it could take anywhere from 20-45 minutes to process. You'll know your gelato is ready once the machine starts to slow down.

Step 23: Turn off the machine and grab your raspberry puree. Using a rubber spoon, firm rubber spatula or wooden spoon (avoid using any metal utensils) scoop the gelato from the machine and place directly into the ice cream tub, swirling ribbons of the raspberry puree throughout the layers. Work quickly as the gelato will be soft and melt easily.

Step 24: Seal up your container and immediately move the gelato into the freezer for minimum of 6 hours or until set. I love these ice cream containers from Tovolo with a tight-sealing, easy-fit rubber lid.

You may wish to allow the gelato to sit at room temperature for a few minutes for easier scooping before serving. Recipe yields approximately 1 Quart. Enjoy!


Decadent Homemade Chocolate Raspberry Gelato

Decadent and creamy homemade chocolate gelato pairs perfectly with fresh, sweet, tart raspberries in this summertime treat.
No ratings yet
Print Pin
Course: Dessert
Cuisine: American
Keyword: Chocolate, Desserts, Gelato, Ice Cream
Prep Time: 9 hours hours
Cook Time: 30 minutes minutes
Freeze Time: 6 hours hours
Servings: 4 Servings
Calories: 407kcal

Equipment

  • Ice Cream Maker Minimum 1.5 Quart Capacity
  • Heavy- Bottomed Saucepan
  • Small Saucepan
  • Measuring Cups and Spoons
  • Wire Whisk
  • Rubber Spatula
  • Large, Heat-Proof Mixing Bowl
  • Medium, Heat-Proof Mixing Bowl Preferably with Lid
  • Medium Bowls
  • Wooden Spoon
  • Fine Mesh Metal Sieve Or Strainer
  • Ice Cream Scoop
  • Ice Cream Tub
  • Plastic Wrap (if mixing bowls do not have lids)

Ingredients

Chocolate Gelato

  • 2 ¼ Cups Whole Milk
  • ⅓ Cup Heavy Cream
  • ½ Cup Unsweetened Cocoa Powder
  • 2 Oz. Good Quality Bittersweet Chocolate, Chopped 60-70% (NOT Chocolate Chips!)
  • 4 Large Egg Yolks
  • ½ Cup Granulated White Sugar
  • 1 Tbsp. Pure Vanilla Extract
  • 1 Pinch Kosher Salt

Raspberry Puree

  • 1 ½ Cups Fresh (or Frozen) Raspberries
  • 3 Tbsp. Granulated Sugar (more if needed to adjust sweetness)
  • 1 Pinch Kosher Salt

Ice Bath

  • Ice Cubes

Instructions

  • Before beginning this recipe, make sure your ice cream maker bowl has been placed into the freezer. It will need to have been in the freezer a minimum of 24 hours to ensure it is cold enough to properly churn the gelato base, so plan accordingly.
  • Gather all of your gelato ingredients.
  • In a heavy- bottomed saucepan, warm the milk and heavy cream to a light simmer, but do not allow to boil.
  • Carefully whisk in cocoa powder and scant pinch of salt until blended.
  • Add the chocolate and whisk until fully melted. Remove the pot from heat, stirring occasionally.
  • Separate 4 large eggs, and reserve the yolks for another recipe, if you wish. Add the sugar and whisk together to blend.
  • Continuing whisking the egg mixture until pale in color. This will ensure that the sugar has completely dissolved.
  • Give the chocolate mixture a good whisk. Begin tempering the eggs by slowly adding in small amounts of the warm chocolate mixture and whisking thoroughly, a little bit at a time, until blended, and repeat several times.
  • Feel the bottom and sides of the bowl. If warm to the touch, your eggs are properly tempered, and you can add the remaining chocolate mixture into the egg mixture. Doing so beforehand may result in creating scrambled eggs, so don't rush this step. Be sure to run your spatula along the bottom and sides of the pot to ensure there are no traces of remaining chocolate.
  • Move the chocolate gelato base back to the pot and return to medium heat, stirring consistently using a wooden spoon. As the base cooks, the color of the mixture will go from pale and creamy to richer and darker as it thickens.
  • Continue stirring until the base thickens to the point where you can run your finger along the back of the wooden spoon and you can easily see a definitive line, around 20 minutes. Don't rush this step, as you want to ensure that your base is thoroughly cooked.
  • Place a fine metal strainer over a medium sized heat-proof bowl, and pour the cooked gelato base through, using a rubber spatula to scrape the mixture through. This will ensure that your gelato is smooth.
  • Whisk to cool slightly and then add in the vanilla extract. Doing this step after removing the base from heat avoids cooking off the alcohol, which keeps the finished gelato from freezing solid. It also adds depth of flavor.
  • Set up a cooling station by filling a large bowl with ice, and then placing the bowl with the gelato base in the center. Be careful that the ice cubes or water from the melted ice does not get into the center bowl. Whisk to help cool down the base as quickly as possible.
  • Once the gelato base has cooled enough to be handled (it does not need to be fully cooled), remove the bowl from the ice bath and dry the bottom on a towel. Whisk to scrape down the sides of the bowl.
  • Cover the bowl either with a lid, or tightly with plastic wrap. Place in the fridge and refrigerate for a minimum of several hours, but overnight will yield the best results for the flavors to fully develop and allow the mixture to get as cold as possible for churning.
  • In the meantime, prepare the raspberry puree by adding the raspberries, sugar and scant pinch of salt to a small saucepan over medium low heat.
  • Cook down the fruit slowly, stirring every so often until the raspberries have broken down. Taste the fruit to see if any adjustments need to be made to the sweetness.
  • Place a fine metal strainer over a medium sized bowl, and begin pressing the fruit puree through, separating out the seeds. Be sure to scrape the bottom of the sieve from the underside frequently to capture more of the raspberries. Discard the seeds. Stir the vanilla extract into the raspberry puree, cover and refrigerate.
  • When ready to churn, remove the gelato base from the refrigerator. Use a rubber spatula to give the mixture a good stir, scraping the bottom and sides of the bowl. The base should be thick, smooth and creamy.
  • Following the instructions for your ice cream maker, prepare the freezer core by inserting the paddle attachment into position and pour your gelato base directly into the machine.
  • Turn the machine on and allow the gelato to churn. Depending on your machine, it could take anywhere from 20-45 minutes to process. You'll know your gelato is ready once the machine starts to slow down.
  • Turn off the machine and grab your raspberry puree. Using a rubber spoon, firm rubber spatula or wooden spoon (avoid using any metal utensils) scoop the gelato from the machine and place directly into the ice cream tub, swirling ribbons of the raspberry puree throughout the layers. Work quickly as the gelato will be soft and melt easily.
  • Seal up your container and immediately move the gelato into the freezer for minimum of 6 hours or until set. You may wish to allow the gelato to sit at room temperature for a few minutes for easier scooping before serving. Recipe yields approximately 1 Quart. Enjoy!

Nutrition

Serving: 263g | Calories: 407kcal | Carbohydrates: 46g | Protein: 9.1g | Fat: 22g | Saturated Fat: 12g | Cholesterol: 221mg | Sodium: 74mg | Potassium: 294mg | Sugar: 39g | Calcium: 202mg | Iron: 3.6mg

Grilled Peaches with Berries, Yogurt, and Honey

by

Looking for a gorgeous, healthy summertime dish that's perfect for either breakfast or dessert? Grilled peaches with fresh berries, creamy vanilla yogurt, a drizzle of honey and a dash of cinnamon is easy, quick and delicious! I visited my close friend Melissa last week, and we always love cooking when we get together. This checked all the boxes, something sweet while also light and guilt-free. You could easily swap sweetened whipped cream for the yogurt, if you prefer.

INGREDIENTS

  • 2 Fresh Peaches
  • 1 Tbsp. of Olive Oil
  • 2 Tbsps. Vanilla Greek Yogurt
  • Fresh Berries (Raspberries, Blueberries, Strawberries, etc.)
  • Drizzle of Honey
  • Dash of Cinnamon

DIRECTIONS

Step 1: Gather your ingredients. Make sure you have thoroughly, yet gently, cleaned the peaches.

Step 2: Preheat your grill pan over medium high heat. I love this pre-seasoned, cast-iron grill pan from Lodge!

Step 3: Slice peaches in half, twist and remove the pit. Drizzle or brush olive oil directly onto the fruit. This olive oil spray bottle I purchased from Amazon is a must have the kitchen!

Step 4: Using a pair of tongs, gently lay the fruit, cut side down, directly onto the hot grill. Wait two to three minutes, rotate the fruit, and lay back down onto the grill for another few minutes. This will ensure you have perfect grill marks.

Step 5: Remove the peaches from the grill and place on the cutting board.

Step 6: Top each peach half with a dollop of yogurt and drizzle with honey.

Step 7: Transfer peaches to a plate, add fresh berries, sprinkle on a dash of cinnamon, and serve immediately while peaches are still warm.


Grilled Peaches with Berries, Yogurt, and Honey

Looking for a gorgeous, healthy summertime dish that's perfect for either breakfast OR dessert? Grilled peaches with fresh berries, creamy vanilla yogurt, a drizzle of honey and a dash of cinnamon is easy, quick and delicious!
No ratings yet
Print Pin
Course: Breakfast, Dessert
Cuisine: American
Keyword: Breakfast, Brunch, Fruit Desserts, Healthy Desserts, Peaches
Prep Time: 5 minutes minutes
Cook Time: 5 minutes minutes
Servings: 2 servings
Calories: 129kcal

Equipment

  • Small Cutting Board
  • Paring Knife
  • Cast Iron Grill Pan
  • Rubber Tongs

Ingredients

  • 2 Each Fresh, Peaches
  • 1 Tbsp. Olive Oil
  • 2 Tbsp. Vanilla Greek Yogurt
  • Fresh Berries (Strawberries, Blueberries, Raspberries, etc.)
  • Honey
  • Cinnamon

Instructions

  • Gather your ingredients, and preheat your grill pan over medium high heat.
  • Slice peaches in half, twist and remove the pit. Drizzle or brush olive oil directly onto the fruit.
  • Using a pair of tongs, gently lay the fruit, cut side down, directly onto the hot grill. Wait two to three minutes, rotate the fruit, and lay back down onto the grill for another few minutes. This will ensure you have perfect grill marks.
  • Remove the peaches from the grill and place on the cutting board.
  • Top each peach half with a dollop of yogurt and drizzle with honey.
  • Transfer peaches to a plate, add fresh berries, sprinkle a dash a cinnamon and serve immediately, while still warm.

Nutrition

Serving: 189g | Calories: 129kcal | Carbohydrates: 26g | Protein: 2.9g | Fat: 2.5g | Saturated Fat: 0.3g | Sodium: 25mg | Potassium: 208mg | Fiber: 3g | Sugar: 22g | Calcium: 23mg | Iron: 0.6mg

Rate This Recipe

Your vote:


A rating is required
A name is required
An email is required