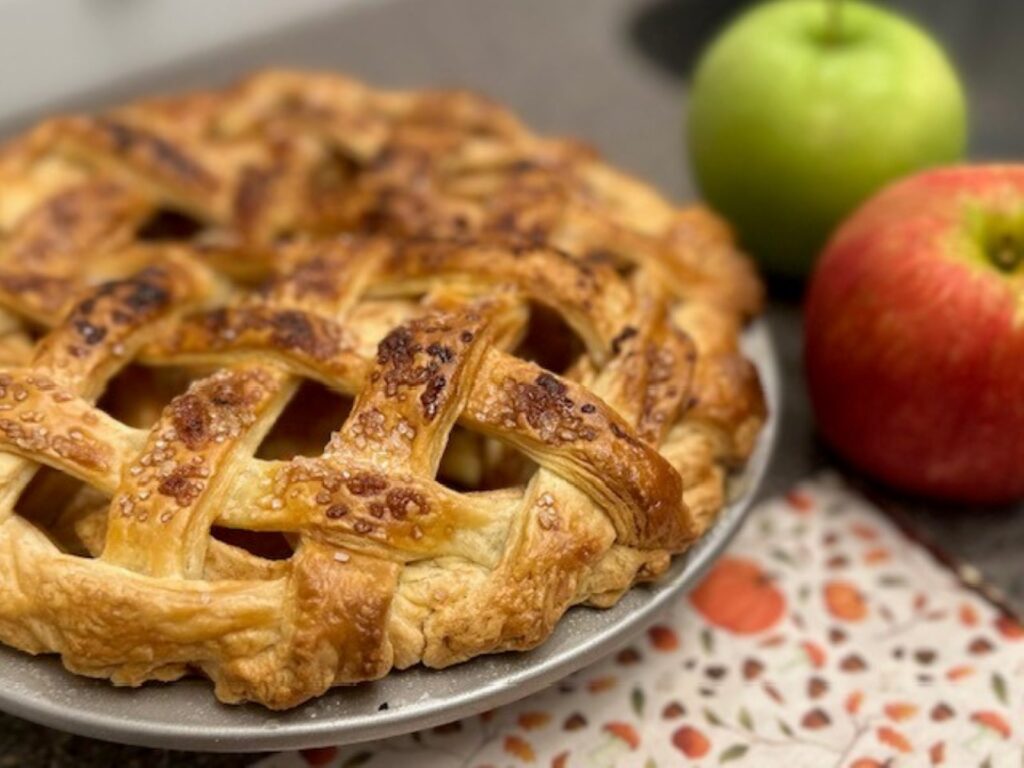
While pumpkin pie may be the quintessential dessert of Thanksgiving, my favorite will always be apple pie. I love the sweet and tart pairing of the apples, the warming scent of cinnamon and nutmeg, that flaky, buttery crust. Making your own pastry dough from scratch is actually a lot easier than most people think, and it's definitely worth the extra effort. Using firm apples will yield an overall better pie, so I usually opt for Honeycrisp and Pink Lady, along with Granny Smith to balance out the flavors. It's best to avoid softer varieties of apples that will turn to applesauce, such as golden delicious or red delicious. While the interwoven crisscross top crust make look a bit daunting at first, it's also incredibly easy, going step by step, one pastry strip at time. This showstopping apple pie will be a favorite at your holiday table!
INGREDIENTS
Pastry Crust
- 2-½ Cups Unbleached, All-Purpose Flour 300 g
- ½ tsp. Kosher Salt
- 2 Sticks Cold, Unsalted Butter, cut into a small dice 227 g (keep refrigerated)
- ½ Cup Ice Water 119 g
Pie Filling
- 8 Large Apples, Peeled, Cored and Sliced (I used Honeycrisp, Granny Smith and Pink Lady). Use a variety of apples, but don't opt for Golden or Red Delicious, as these are soft and will turn to mush.
- ⅓ Cup Granulated Sugar 66 g
- ⅓ Cup Brown Sugar, Packed Tightly 71 g
- ¼ Cup Unbleached, All-Purpose Flour 30 g
- 2 tsp. Ground Cinnamon
- ⅛ tsp. Freshly Grated Nutmeg
Pie Assembly
- 1 Large Egg (white only, to make egg wash)
- 2 Tbsp. Sparkling Sugar or Sugar in the Raw (regular sugar will melt)
- Splash of Water
INSTRUCTIONS
Step 1: Prepare the crust. Measure out the flour and stir in the salt.
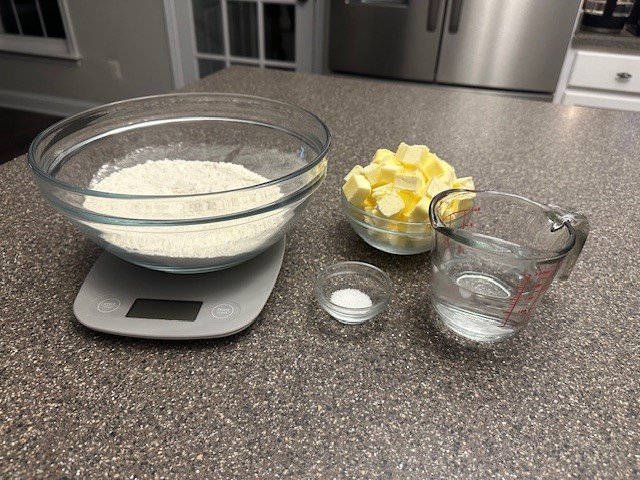
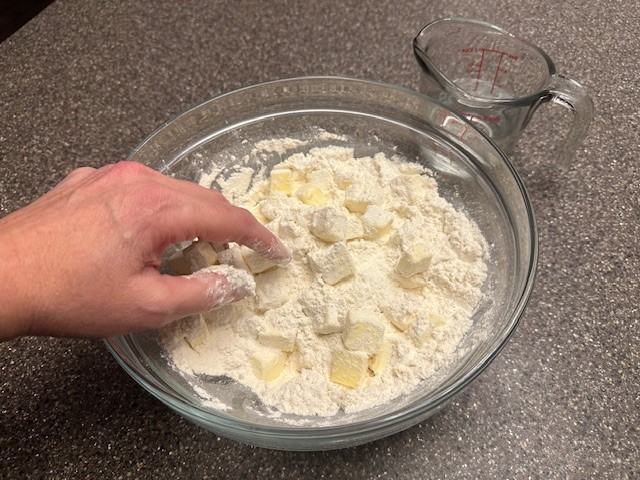
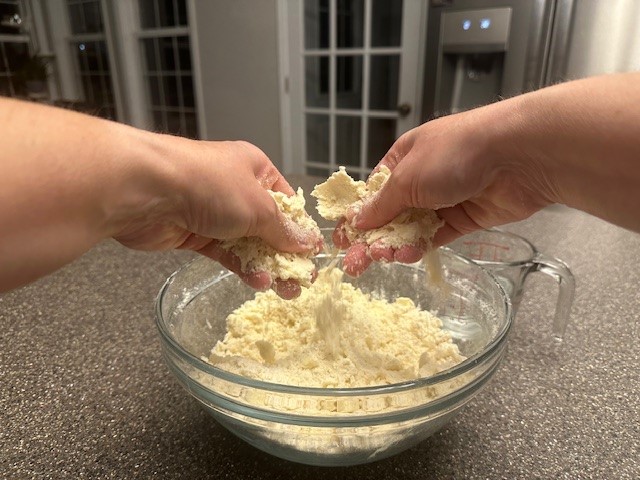
Step 2: Add in the cold butter and toss thoroughly in the flour to ensure each piece is well coated. Using clean hands, break up the butter into smaller, pea-sized pieces. Work quickly to keep the butter as cold as possible. Alternatively, feel free to use a pastry blender to cut the butter into the flour.
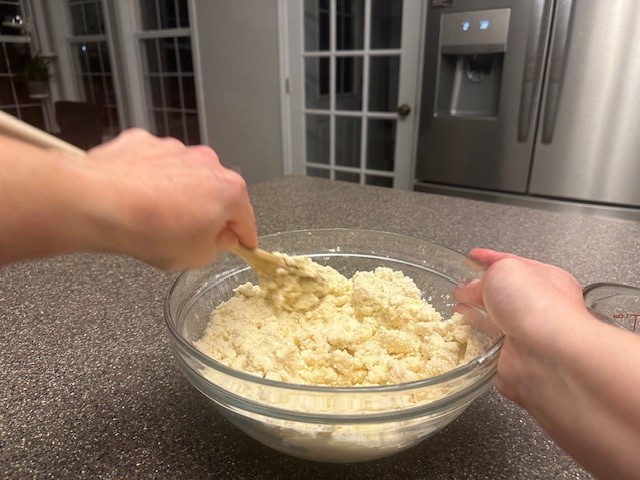
Step 3: Add in the cold water, and using a wooden spoon, fold the mixture together until a shaggy dough forms. Try to avoid stirring as to not overwork the dough.
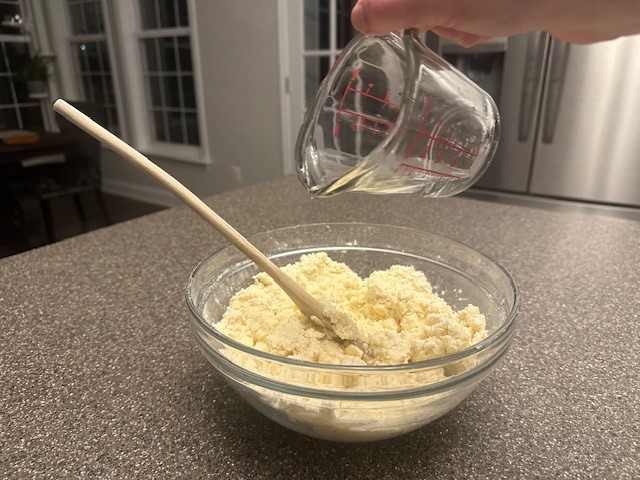
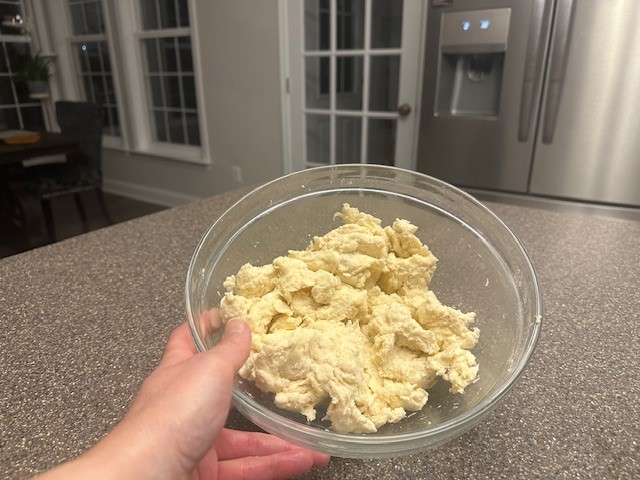
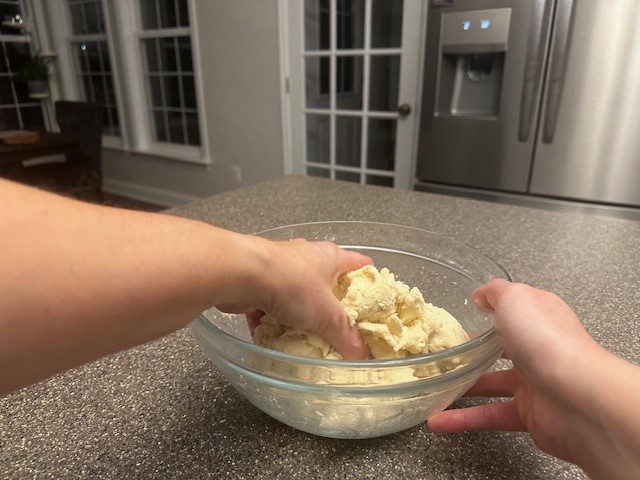
Step 4: Switch to using your hands and incorporate any loose dry ingredients settled at the bottom of the bowl into the dough.
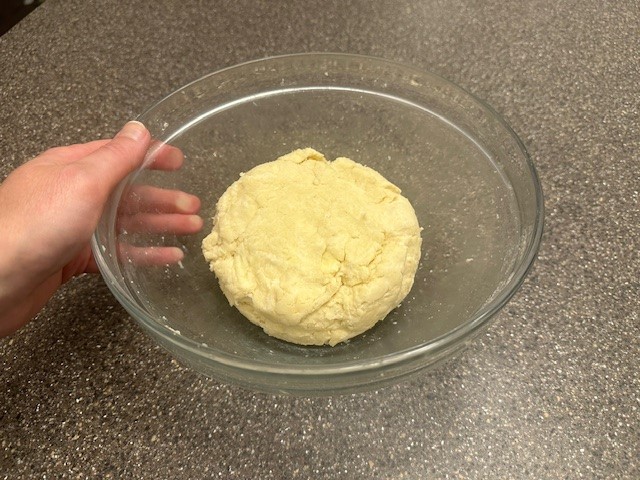
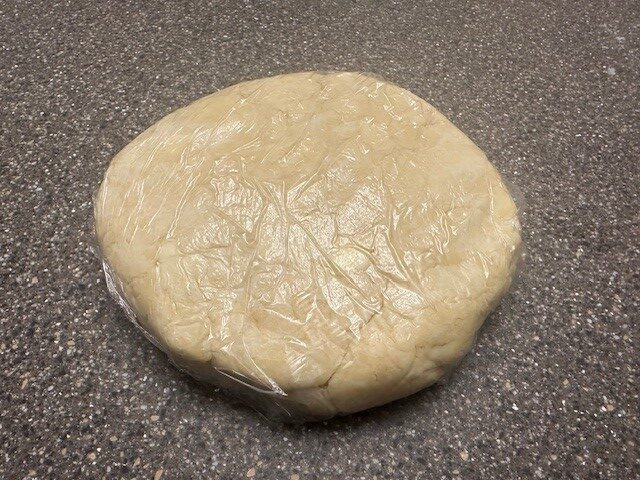
Step 5: Press the dough into a round disk, wrap tightly in plastic wrap, and set in the refrigerator for a minimum of 30 minutes (but best for an hour) to rest. This will allow the butter to harden, the dough to rehydrate and the gluten in the flour to relax.
Alternatively, if preferred, you can divide the dough into 2 separate disks and wrap separately. You'll need both for a top and bottom crust.
Step 6: While the dough is resting, gather all of the ingredients for the filling. If you haven't peeled and sliced your apples, do so now.

In a mixing bowl, stir together the sugar, brown sugar, flour, salt, cinnamon and freshly grated nutmeg.

Step 7: Toss together to fully coat the prepared apples. Set aside. The spices will help keep the apples from oxidizing and turning brown.

Step 8: Preheat your oven to 400℉.
Clean your work surface and dust lightly with flour. Remove the dough from the refrigerator and unwrap. Using a bench scraper or knife, divide the dough into two, even separate pieces. You'll also need a rolling pin to form the dough.

Step 9: Using your rolling pin, gently rock back and forth across the dough, moving the pin across the length of the dough without rolling. Rotate the dough and repeat. This will help loosen and gently stretch the dough, keeping its round shape, without warming up the butter. Flip the dough over, dust lightly with flour and repeat. Make sure the dough is not sticking to the work surface.
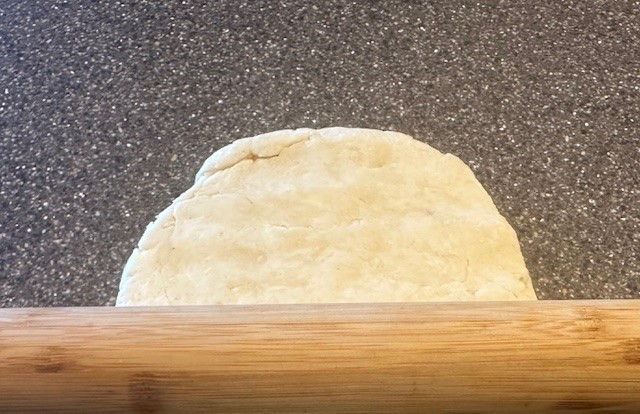
Begin rolling out the dough, starting from the center and pressing upwards, then rolling out towards the upper corners. Carefully (and this is where a bench scraper comes in handy) rotate the dough so that the bottom is now at the top. You may need to add another light dusting of flour. Repeat rolling upwards and out. From here, use the rolling pin to roll up and back along the full length of the dough, then side to side, corner to corner, creating a thin, even layer. Don't worry about making it perfectly round, so long as your final dough circle is large enough to fit over the entire circumference of your pie plate with some overhanging.

Step 10: Lightly dust your rolling pin, then gently roll the top edge of the pie dough onto the pin, fold over, and place the dough over the pie pan. With light fingers, gently press the dough along the bottom and sides of the pan so that there are no gaps of air between the pan and the dough.


Step 11: Place a ring of apple slices around the bottom edge of the pie plate, pressing tightly into the corners of the pan. Fill the pan with the remaining apples (don't pour them from the bowl directly, as this avoids adding in the excess liquid syrup that will have collected in the bottom of the bowl), pressing down to ensure that there are no gaps or holes in the mix, which could cause the top crust to collapse during baking. Using a pair of scissors, trim up the sides all around the pan. Fold over the remaining crust inward (towards the pie) and crimp gently with your fingers. Set aside while you prepare the top crust.


Step 12: Lightly dust your work surface with additional flour and then roll out the dough following the same instruction as above. For the top crust, you'll actually want to make sure the circumference of the rolled dough is 12" in diameter, so make sure you have your ruler handy.

Step 13: Lay the ruler lengthwise across the dough, and using your bench scraper (or a knife) mark lines equally at 1" intervals along the top of the dough. Turn the ruler over, and mark indentations into the bottom of the dough, equally spaced. You should be making twelve, even, 1" strips.

Using a pizza cutter (or a knife), cut your strips.

Step 14: Lay six strips of pastry over the apples, horizontally, leaving space in between. Fold over opposite strips (essentially the second, fourth and sixth strips) from the center towards the left. Add another strip, vertically, in the center, and then place the folded strips back over that strip.
On the opposite side, fold over the opposite strips (the first, third, and fifth) towards the right. Lay down another vertical strip to the left of the center strip and place the folded strips back down. Repeat these steps, going from left to right, and alternating which strips to fold over, until the entire pie has been interwoven in a crosshatch pattern.


Step 15: Using kitchen scissors or a paring knife, trim the excess length of the pastry strips, then tuck those into or under the bottom crust around the rim of the pie plate. Pinch to seal.

Step 16: Make a quick egg wash by mixing the egg yolk and a light splash of water. Using a pastry brush, gently brush a thin layer of egg wash over the top and sides of the prepared pie crust. Sprinkle with decorator sugar.
Note: If you don't have Sparkling Sugar or Sugar in the Raw, just skip this step. Regular, granulated sugar will melt and burn. It won't affect the outcome of the pie!


Step 17: Bake the pie, uncovered, for one hour, or until the pie crust is a deep golden- brown color and the filling is actively bubbling. This is what is known as "piping", as used in the term "piping hot". Small bubbles in the pie are just the moisture leaving the apples and butter, so look for larger bubbles to indicate doneness and to avoid the dreaded pie crust with a "soggy bottom". If you prefer less browning on top, feel free to add a layer of aluminum foil over top of the pie, not wrapped, to finish baking without excess browning.
Allow the pie to cool at room temperature, uncovered, on a wire baking rack, for a minimum of two hours before serving, to avoid a runny filling.

Pie can always be reheated later if you wish to serve it warm, 10-15 minutes at 350℉.

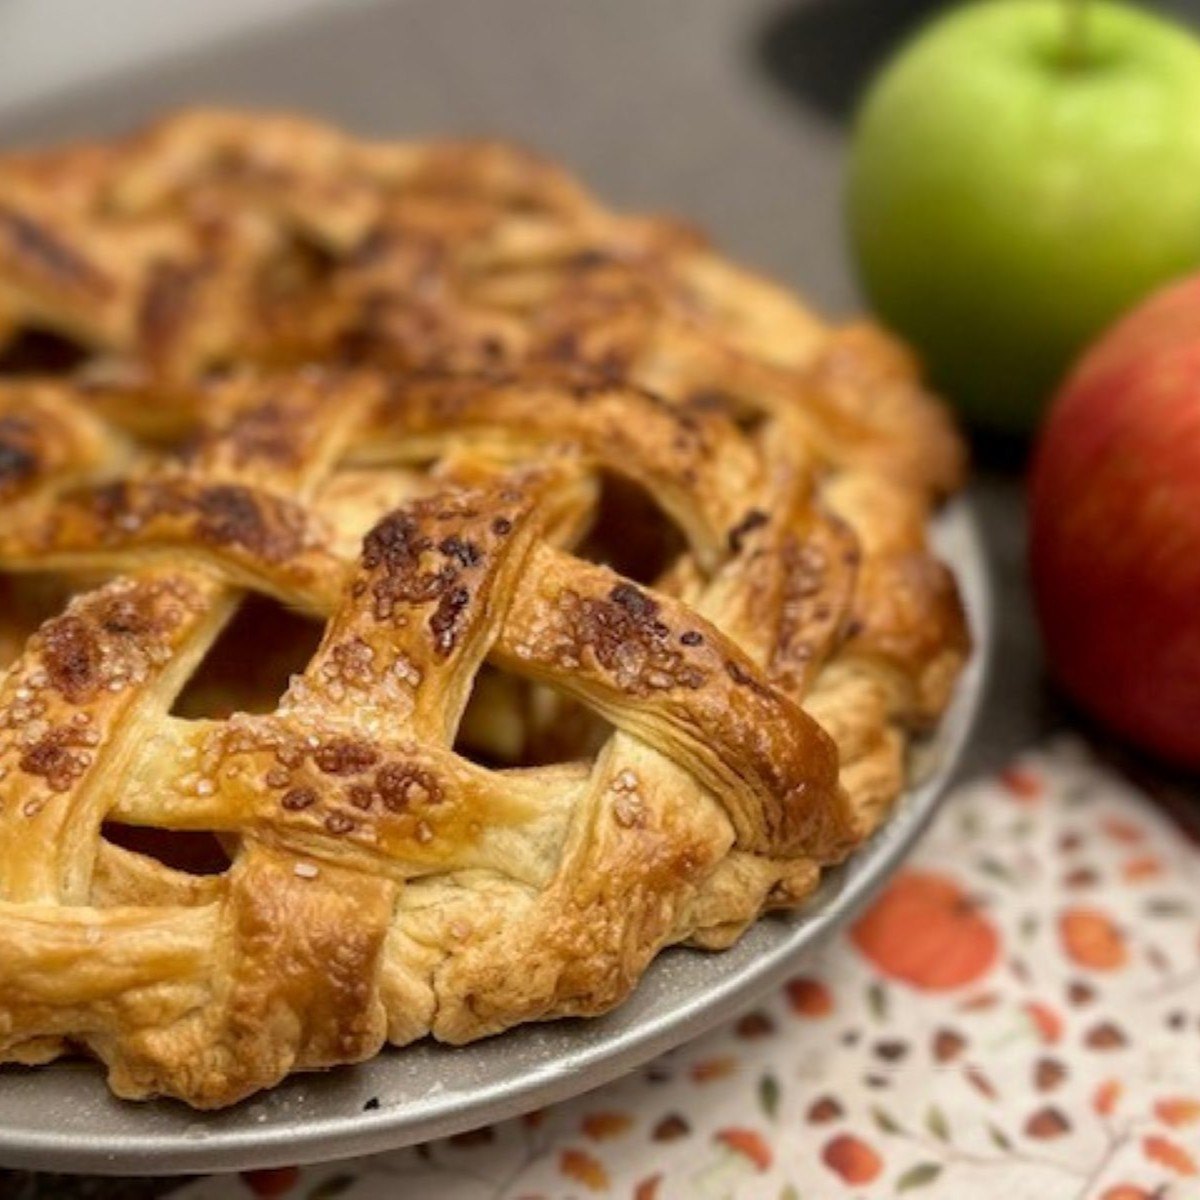
All American Apple Pie
Equipment
- Large Mixing Bowl
- 2 Medium Mixing Bowl
- Small Mixing Bowl
- Vegetable Peeler
- Cutting Board
- Chef Knife
- Measuring Cups and Spoons
- Rubber Spatula
- Wooden Spoon
- Metal Bench Scraper
- Kitchen Scissors or small paring knife
- Plastic Ruler
- Pizza Cutter
- 8 or 9-Inch Pie Plate
- Pastry Brush
- Metal Cooling Rack
- Plastic Wrap
Ingredients
Crust Ingredients
- 2-½ Cups Unbleached, All-Purpose Flour 300 g
- ½ tsp. Kosher Salt
- 2 Sticks Cold, Unsalted Butter, cut into a small dice 227 g (keep refrigerated)
- ½ Cup Ice Water 119 g
Pie Filling
- 8 Large Apples, Peeled, Cored and Sliced (I used Honeycrisp, Granny Smith and Pink Lady). Use a variety of apples, but don't opt for Golden or Red Delicious, as these are soft and will turn to mush.
- ⅓ Cup Granulated Sugar 66 g
- ⅓ Cup Brown Sugar, Packed Tightly 71 g
- ¼ Cup Unbleached, All-Purpose Flour 30 g
- 2 tsp. Ground Cinnamon
- ⅛ tsp. Freshly Grated Nutmeg Ground is fine if you don't have whole nutmeg
Assembly
- 1 Large Egg (to make egg wash)
- 2 Tbsp. Sparkling Sugar or Sugar in the Raw (regular sugar will melt)
- Splash of Water
Instructions
- Prepare the crust. Measure out the flour, add to a mixing bowl and stir in the salt.
- Add in the cold butter and toss thoroughly in the flour to ensure each piece is well coated. Using clean hands, break up the butter into smaller, pea-sized pieces. Work quickly to keep the butter as cold as possible. Alternatively, feel free to use a pastry blender to cut the butter into the flour.
- Add in the cold water, and using a wooden spoon, fold the mixture together until a shaggy dough forms. Try to avoid stirring as to not overwork the dough.
- Switch to using your hands and incorporate any loose dry ingredients settled at the bottom of the bowl into the dough.
- Press the dough into a round disk, wrap tightly in plastic wrap, and set in the refrigerator for a minimum of 30 minutes (but best for an hour) to rest. This will allow the butter to harden, the dough to rehydrate and the gluten in the flour to relax. Alternatively, if preferred, you can divide the dough into 2 separate disks and wrap separately. You'll need both for a top and bottom crust.
- While the dough is resting, gather all of the ingredients for the filling.
- In a mixing bowl, stir together the sugar, brown sugar, flour, salt, cinnamon and freshly grated nutmeg.
- Toss together to fully coat the prepared apples. Set aside. The spices will help keep the apples from oxidizing and turning brown.
- Preheat your oven to 400℉.
- Clean your work surface and dust lightly with flour. Remove the dough from the refrigerator and unwrap. Using a bench scraper or knife, divide the dough into two, even separate pieces. You'll also need a rolling pin to form the dough.
- Using your rolling pin, gently rock back and forth across the dough, moving the pin across the length of the dough without rolling. Rotate the dough and repeat. This will help loosen and gently stretch the dough, keeping its round shape, without warming up the butter. Flip the dough over, dust lightly with flour and repeat. Make sure the dough is not sticking to the work surface.
- Begin rolling out the dough, starting from the center and pressing upwards, then rolling out towards the upper corners. Carefully (and this is where a bench scraper comes in handy) rotate the dough so that the bottom is now at the top. You may need to add another light dusting of flour. Repeat rolling upwards and out. From here, use the rolling pin to roll up and back along the full length of the dough, then side to side, corner to corner, creating a thin, even layer. Don't worry about making it perfectly round, so long as your final dough circle is large enough to fit over the entire circumference of your pie plate with some overhanging.
- Lightly dust your rolling pin, then gently roll the top edge of the pie dough onto the pin, fold over, and place the dough over the pie pan. With light fingers, gently press the dough along the bottom and sides of the pan so that there are no gaps of air between the pan and the dough.
- Place a ring of apple slices around the bottom edge of the pie plate, pressing tightly into the corners of the pan. Fill the pan with the remaining apples (don't pour them from the bowl directly, as this avoids adding in the excess liquid syrup that will have collected in the bottom of the bowl), pressing down to ensure that there are no gaps or holes in the mix, which could cause the top crust to collapse during baking. Using a pair of scissors, trim up the sides all around the pan. Fold over the remaining crust inward (towards the pie) and crimp gently with your fingers. Set aside while you prepare the top crust.
- Lightly dust your work surface with additional flour and then roll out the dough following the same instruction as above. For the top crust, you'll actually want to make sure the circumference of the rolled dough is 12" in diameter, so make sure you have your ruler handy.
- Lay the ruler lengthwise across the dough, and using your bench scraper (or a knife) mark lines equally at 1" intervals along the top of the dough. Turn the ruler over, and mark indentations into the bottom of the dough, equally spaced. You should be making twelve, even, 1" strips.
- Using a pizza cutter (or a knife), cut your strips.
- Lay six strips of pastry over the apples, horizontally, leaving space in between. Fold over opposite strips (essentially the second, fourth and sixth strips) from the center towards the left. Add another strip, vertically, in the center, and then place the folded strips back over that strip.
- On the opposite side, fold over the opposite strips (the first, third, and fifth) towards the right. Lay down another vertical strip to the left of the center strip and place the folded strips back down. Repeat these steps, going from left to right, and alternating which strips to fold over, until the entire pie has been interwoven in a crosshatch pattern.
- Using kitchen scissors or a paring knife, trim the excess length of the pastry strips, then tuck those into or under the bottom crust around the rim of the pie plate. Pinch to seal.
- Make a quick egg wash by mixing the egg yolk and a light splash of water. Using a pastry brush, gently brush a thin layer of egg wash over the top and sides of the prepared pie crust. Sprinkle with decorator sugar.Note: If you don't have Sparkling Sugar or Sugar in the Raw, feel free to skip this step. Regular, granulated sugar will melt and burn. It won't affect the outcome of the pie!
- Bake the pie, uncovered, for one hour, or until the pie crust is a deep golden- brown color and the filling is actively bubbling. This is what is known as "piping", as used in the term "piping hot". Small bubbles in the pie are just the moisture leaving the apples and butter, so look for larger bubbles to indicate doneness and to avoid the dreaded pie crust with a "soggy bottom". If you prefer less browning on top, feel free to add a layer of aluminum foil over top of the pie, not wrapped, to finish baking without excess browning.
- Allow the pie to cool at room temperature, uncovered, on a wire baking rack, for a minimum of two hours before serving, to avoid a runny filling. Pie can always be reheated later if you wish to serve it warm, 10-15 minutes at 350℉.

