
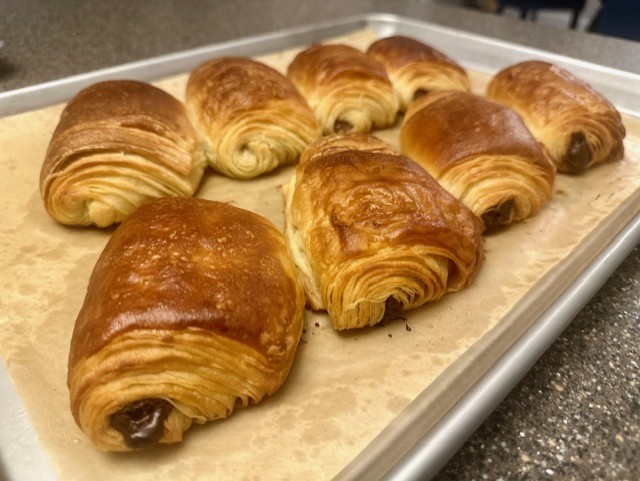
The scent of Pain Au Chocolat, otherwise known as Chocolate Croissants, wafted through the air of L'Academie's halls and classrooms every morning during culinary school. The pastry students, who's day started even earlier than the culinary program, gifted these French pastries to us, kickstarting our day with buttery, flaky, chocolate filled deliciousness.
Making Pain Au Chocolat at home will take some time, so schedule your day accordingly. If you prefer to spread your prep and baking over two days, see the notes below to follow the Overnight Method.
The recipe starts with a classic croissant dough, and a few helpful hints will prepare you well for creating these French Patisserie favorites at home. Make sure to purchase the highest quality European style butter you have available, such as Plugra, Kerrygold, or even Cabot, all which have 82-83% butterfat. Be sure to check the label. More common varieties of American style butter, including grocery store brands, typically have more water in their composition, yielding only about 80% butterfat. Those are perfectly fine for most uses, but don't skimp when it comes to making pastry. While it may seem like an insignificant difference, the structure of all of these flaky, delicate layers relies on the extra butterfat, yielding a more tender, delicious bite. You'll find you probably have most of the other ingredients you'll need already on hand, so go ahead and splurge a few extra dollars on that high quality butter!
I personally prefer using chocolate batons, narrow bars of chocolate that can be trimmed to the width of your dough, but feel free to use chocolate chips. Use milk, semi-sweet or dark, whatever you like, or make a few of each.
Also to note, use a ruler. Don't estimate. There are a lot of exact measurements outlined in these steps, all of which have been laid out carefully with plenty of pictures to make it easier to follow along. There are a lot of stages to preparing the dough, from incorporating the butter, to creating the lamination, to chilling the dough, so it may be helpful to print a copy of the recipe and physically check off each stage as you work, marking each step as completed so you know where you've left off. Set yourself up for delicious success!
Joyeuse pâtisserie! (that's Happy baking in Français!)
INGREDIENTS:
Dough
- 65 g Whole Milk, Cold
- 121 g Ice Water
- 8 g Instant Yeast
- 375 g Bread Flour plus an additional few tablespoons for dusting a clean worksurface (All Purpose Flour may be substituted)
- 37 g Granulated Sugar
- 8 g Kosher Salt
- 37 g Unsalted Butter, cut into small cubes
Butter Block
- 185 g High Quality Butter, High Butterfat Content, 82-83%, unsalted and kept refrigerated
- 2-3 Tbsp. Light Dusting of Flour
Chocolate
- 2 oz Chocolate Batons (.25 oz each) or 8 Tbsp. chocolate chips
Egg Wash
- 1 Lg. Egg
- 1 Tbsp. Water at Room Temperature
- Scant Pinch of Kosher Salt
INSTRUCTIONS:
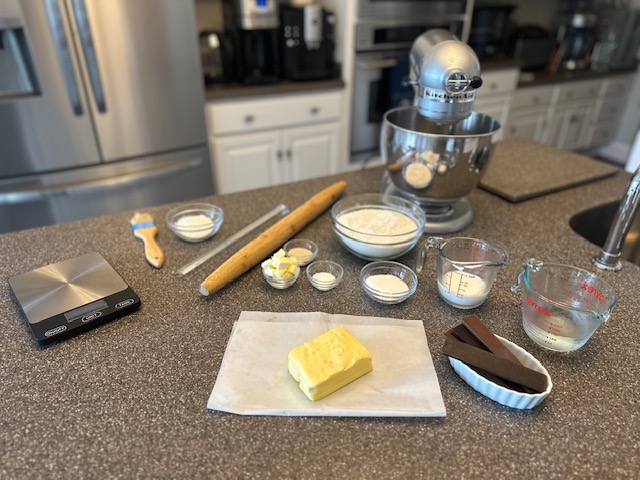
Step 1: Gather and weigh all of your ingredients carefully using a kitchen scale.
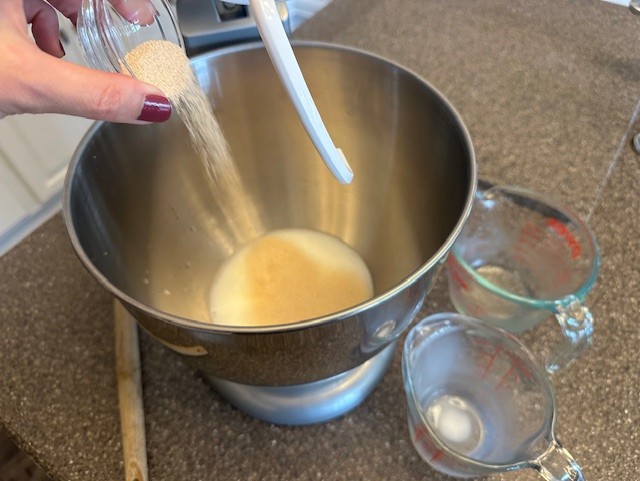
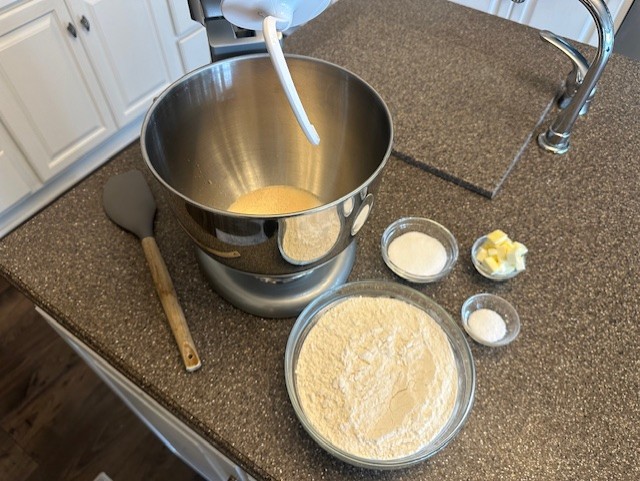
Step 2: Into the bowl of a stand mixer, add both the water and the milk, along with the yeast. Next, add the flour, sugar, salt and lastly, the butter. Mix on the lowest setting for about 5 minutes, stopping the machine after about 4 minutes to scrape down any dough that may stick to the bottom or sides of the bowl.

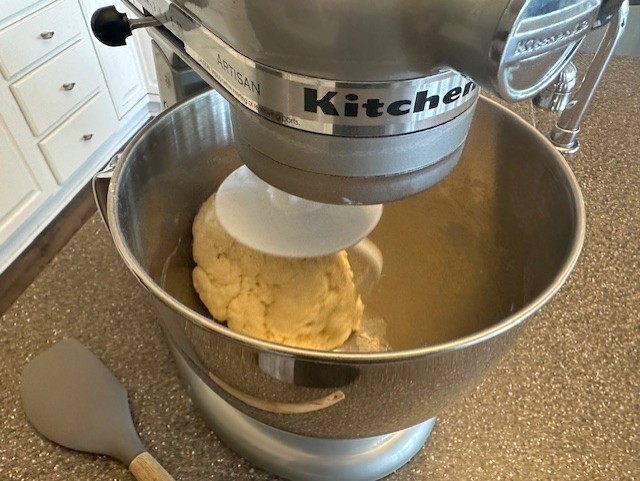
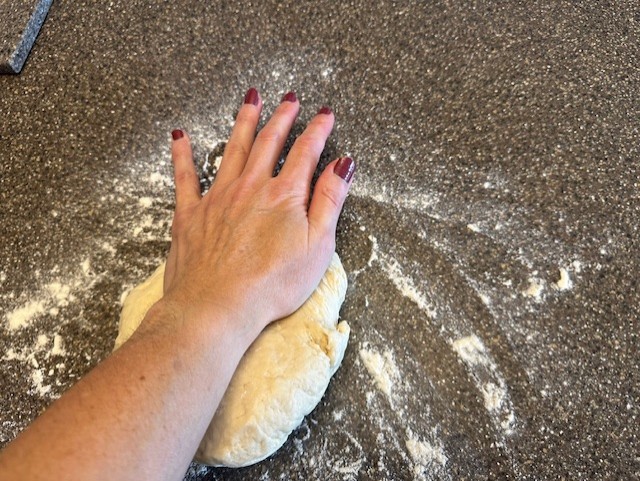
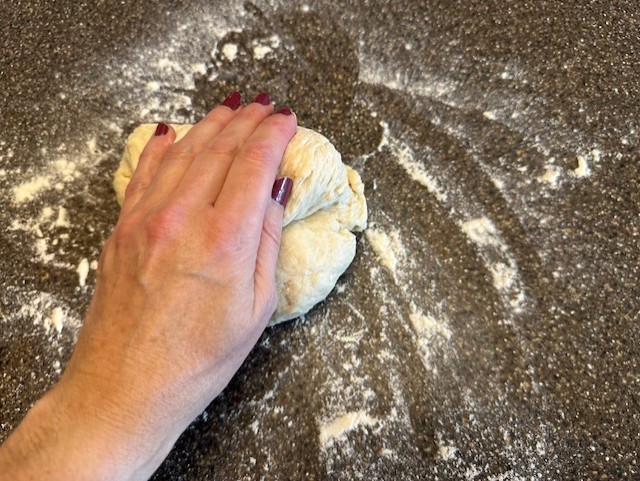
Step 3: Lightly dust a clean worksurface with a little flour, then remove the dough from the mixer and place it on top. The dough will appear a big shaggy. Using the palm of your hand, gently press the dough down and away, then fold the top over, drawing your hand back and rolling the dough towards yourself. Rotate the dough and repeat this step, 3 or 4 times, just until the dough is cohesive and begins to form a ball.
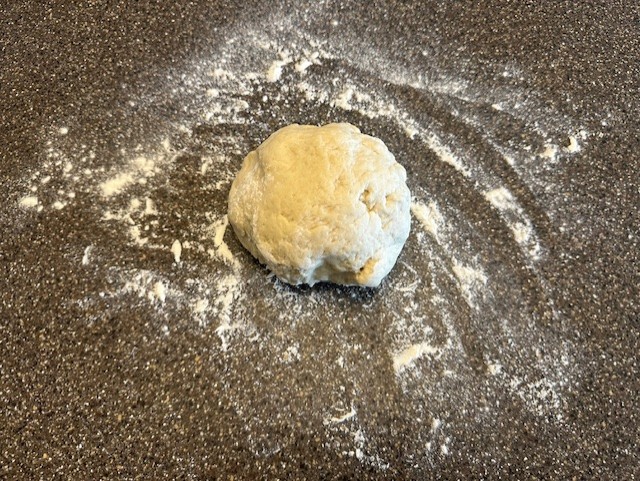
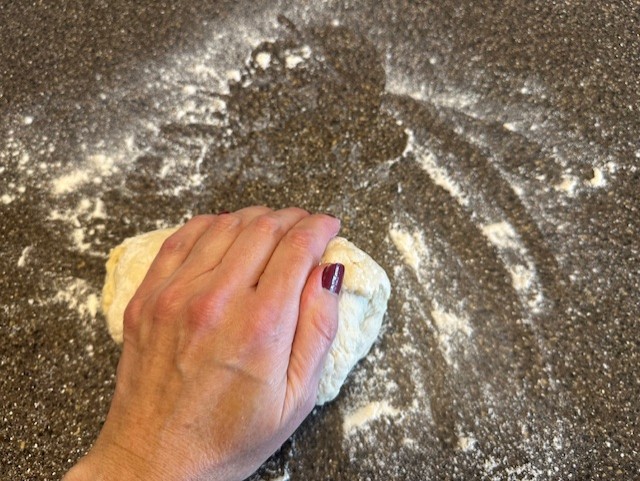

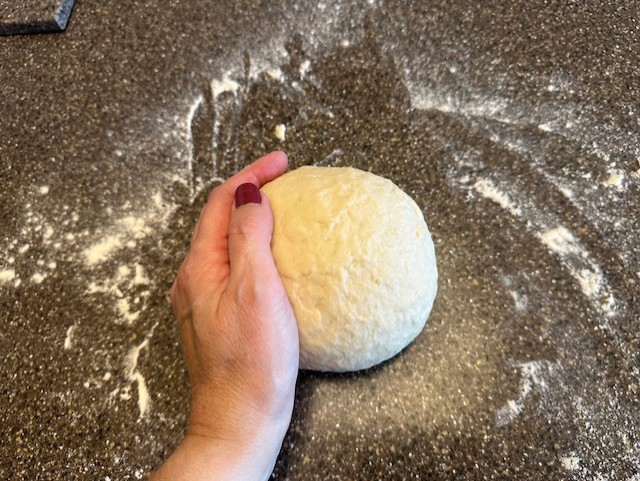
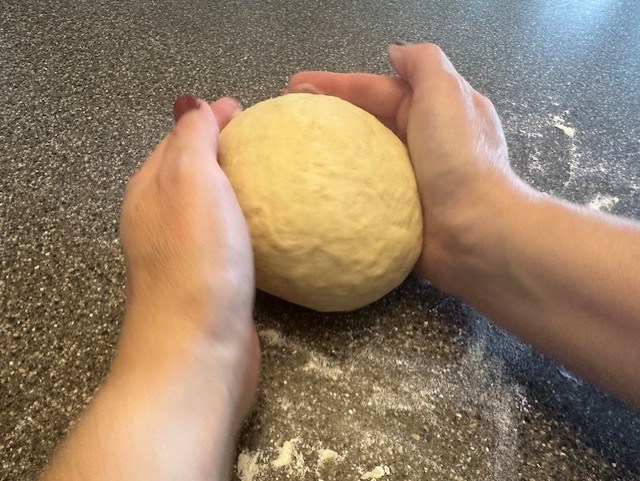
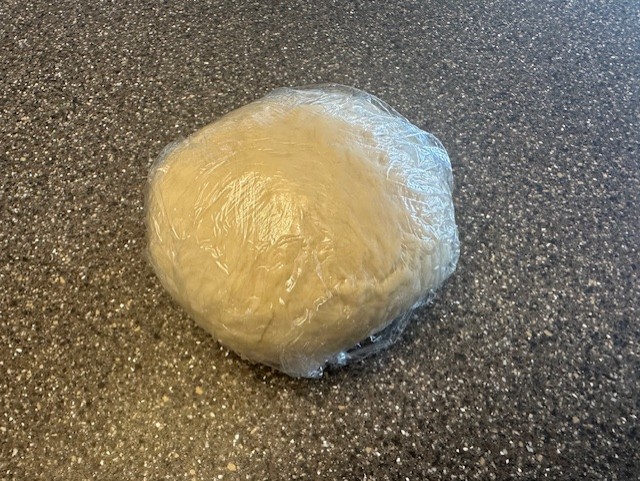
Using both hands, tuck palms under the bottom of the dough and rotate in a circle, gently pulling the dough in towards the center as you shape it into a round ball. Wrap the dough tightly with plastic wrap and place into the fridge to rest for at least 30 minutes, but up to two hours.
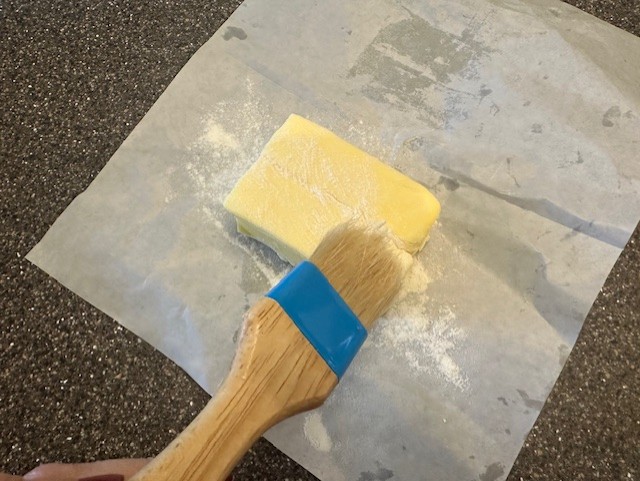
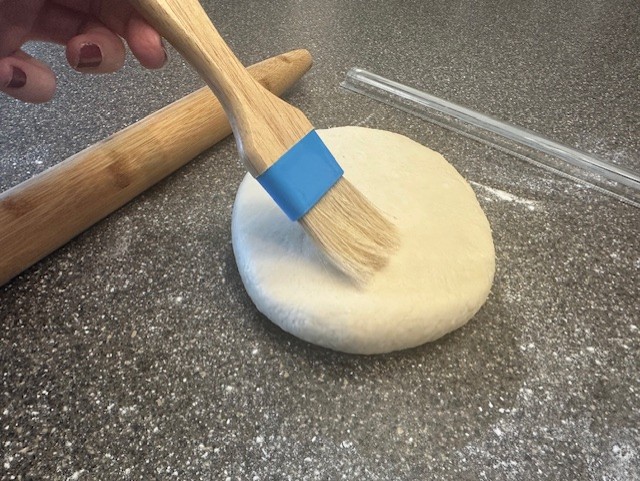
Step 4: In the meantime, place the 185 grams of cold, unsalted butter onto a piece of folded parchment paper. Using a pastry brush, gently brush the surface on both the top and bottom of the butter very lightly with flour, and then fold the piece of parchment over the butter.
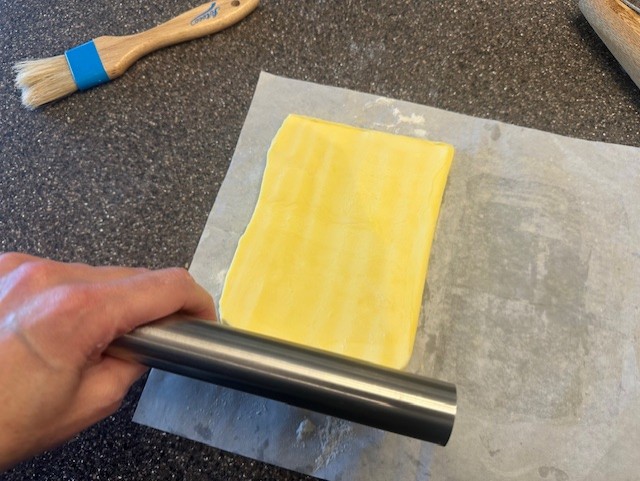
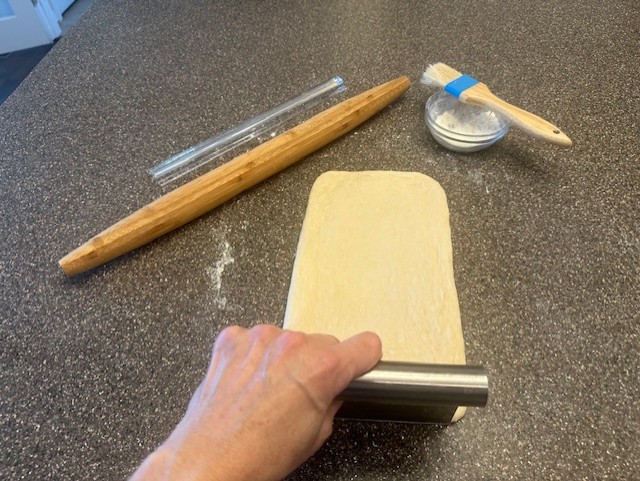
Step 5: Using the rolling pin, gently begin tapping the butter into an even 6" x 6" square block, rotating the parchment every so often to keep the proper shape. Use the ruler to measure the dimensions, and if needed, use the edge of the bench scraper to push the butter back into a square. Work quickly to ensure the butter stays cool and pliable without getting too soft.
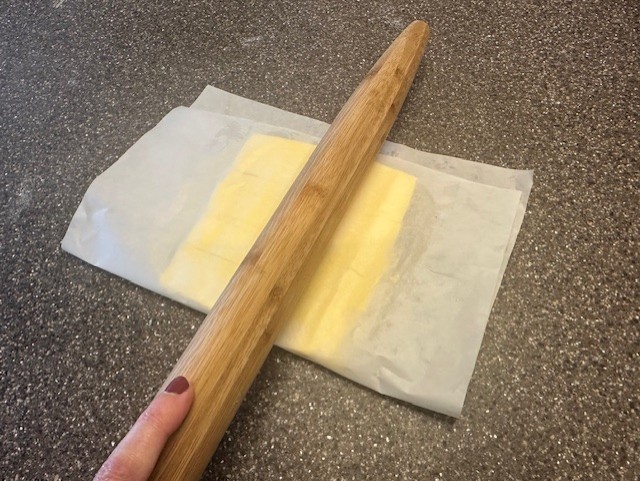
Once you have the right a proper square, place the butter into the refrigerator to firm up. You won't need your butter until Step 8, when you begin incorporating it into your dough.
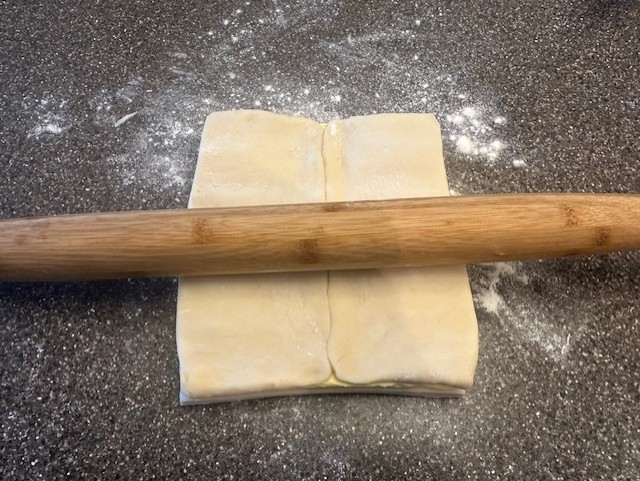
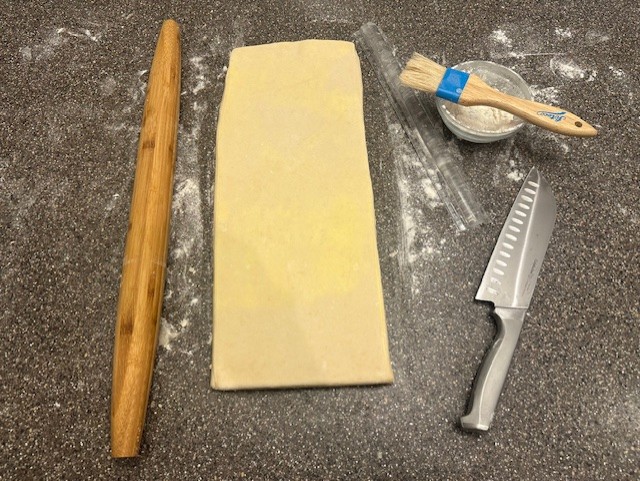
Step 6: After allowing the dough to rest, remove it from refrigeration, unwrap it, and place the ball onto a clean worksurface dusted lightly with flour. You'll also need a rolling pin and a ruler. Reserve the plastic wrap, as you'll use it again after rolling the dough.
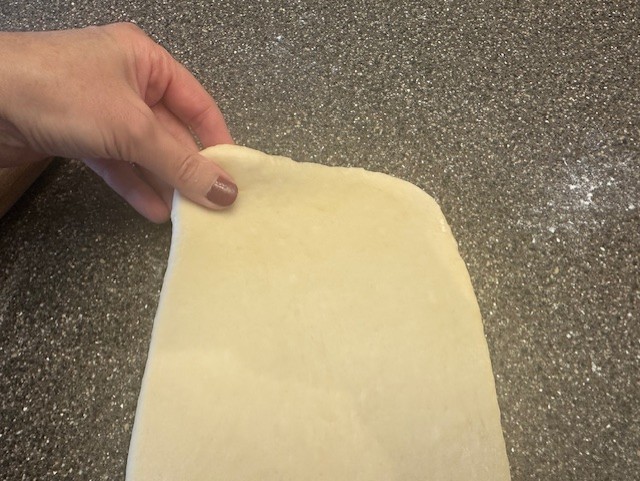
Holding your rolling pin with both hands, gently press down across the center of the dough, rocking back and forth, essentially walking the length of the dough by creating slight indentations along the surface. Flip the dough over and repeat, then turn back over to the original side. This step will begin to stretch the dough into a rectangular shape without overworking it.
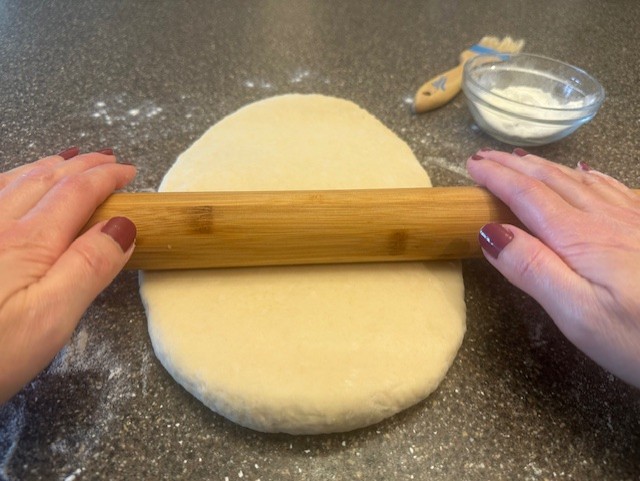
Step 7: Begin rolling the dough into a long rectangle, 12" x 6". As the dough lengthens, use your fingers to pinch and create four corners of the dough, ensuring you don't end up with rounded edges. Use your ruler to keep close dimensions, using your bench scraper as needed to push the sides or ends of the dough back, accordingly. Flip the dough once or twice, as needed, lightly brushing with flour to ensure that the dough itself is not sticking to the worksurface.
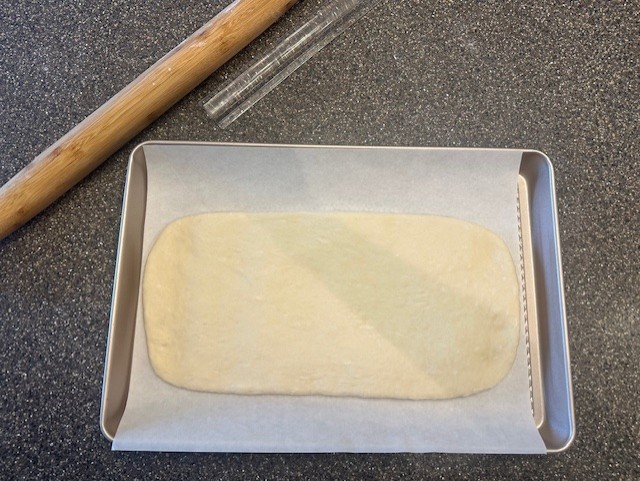
Once the dough measures 12" x 6", cover tightly with the reserved plastic wrap, and place onto a parchment lined baking sheet. Move the pan to the freezer, where you'll chill the dough for no less than 30 minutes.
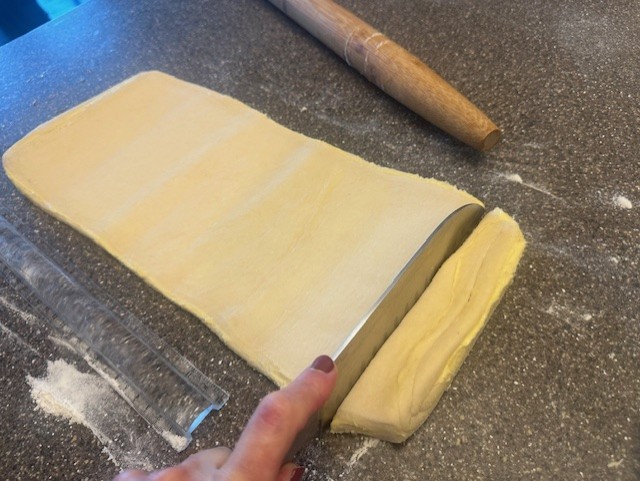
Step 8: After thirty minutes in the freezer, your dough should be quite firm but not solid. Remove the prepared square of butter from the freezer and place it directly onto the center of the dough, ensuring the height is aligned so that no butter hangs over the top or bottom of the dough.
Using a chef's knife, trim the sides of the dough on either side of the square of butter.
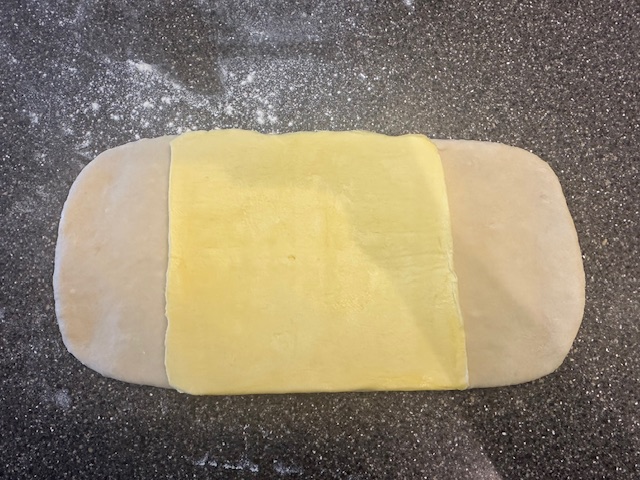

Step 9: On a lightly flour-dusted worksurface, gently roll out the pieces of dough so that they are more rectangular in shape, pinching the rounded corners and pulling them outwards making them square. Place the pieces of dough on top, sandwiching the butter in between, and pressing the seam in the center of the dough to form a more cohesive layer.
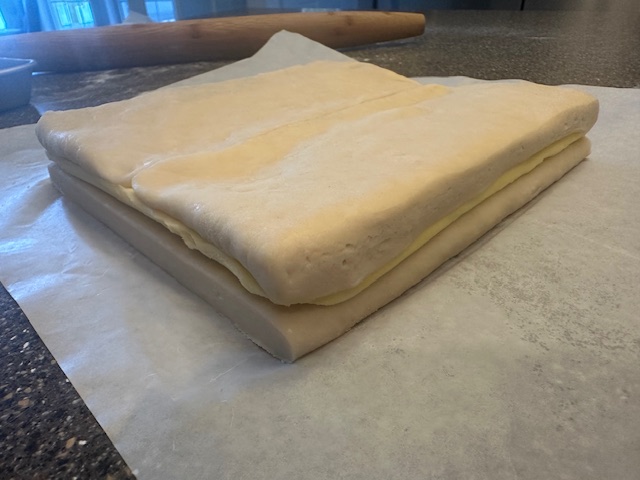
If the butter appears to be softening, return the dough to the fridge for 10-15 minutes, just to chill and make it easier to roll.
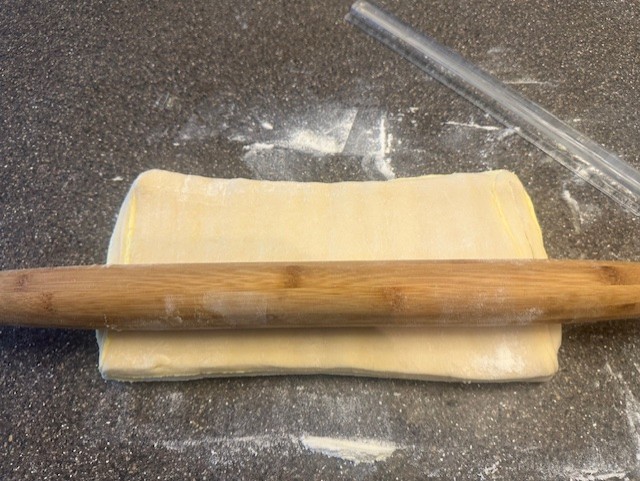
Step 10: When ready, roll the dough to a 16" x 6 ½" rectangle. You'll again find it easiest to walk the rolling pin down the length of the dough by rocking it back and forth and then rolling. Rotate the dough 90° and roll until you've reached the required width.
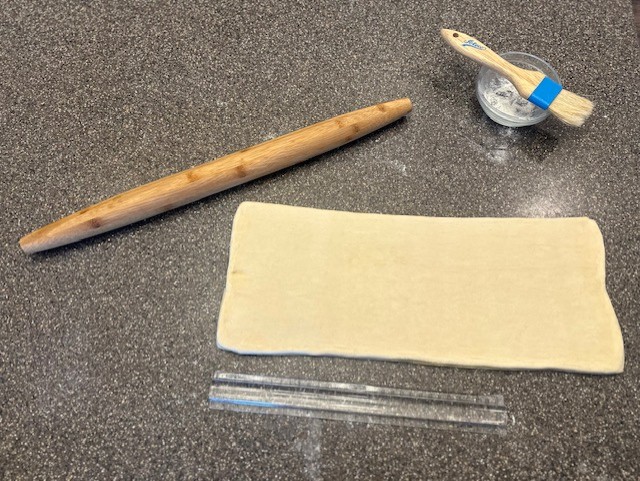
Be sure to trim up the edges to keep clean, straight lines.
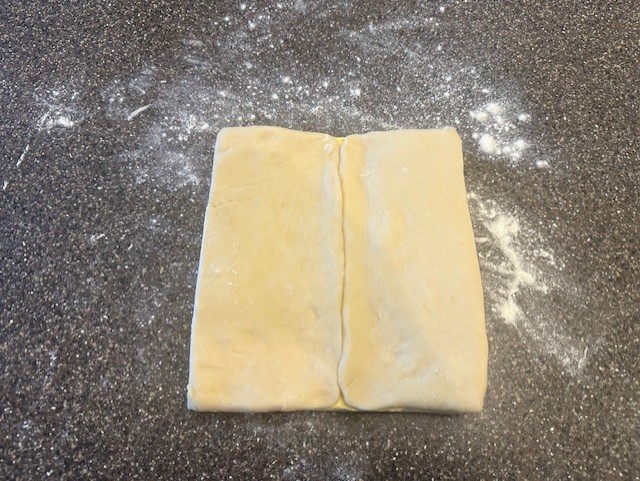
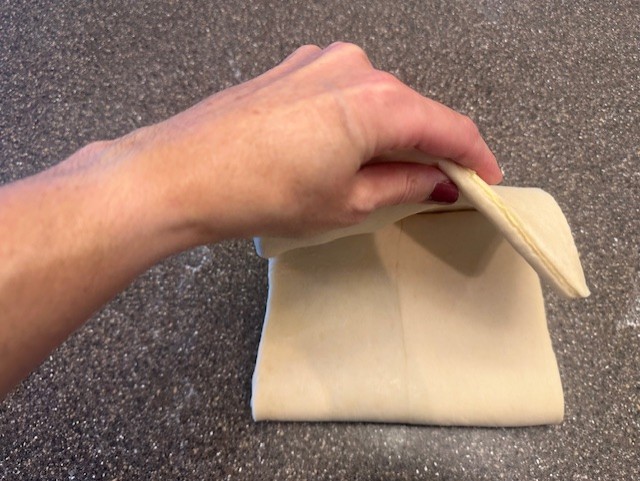
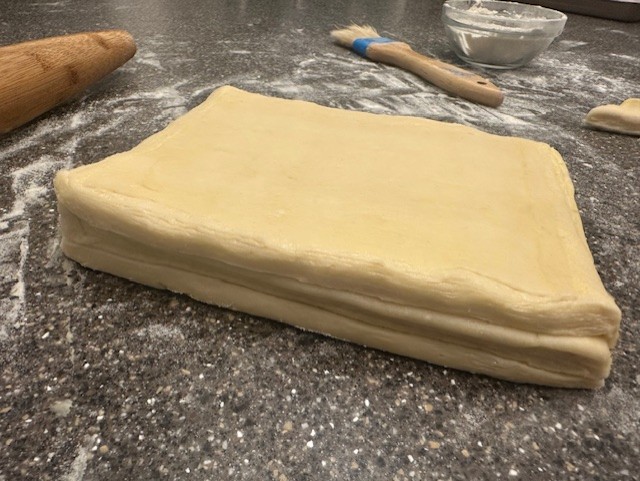
Step 11: Fold the dough over into equal thirds, the slit side facing up, so that the outer layer of your dough is smooth, lining up the top fold to be as flush to the edge as possible.
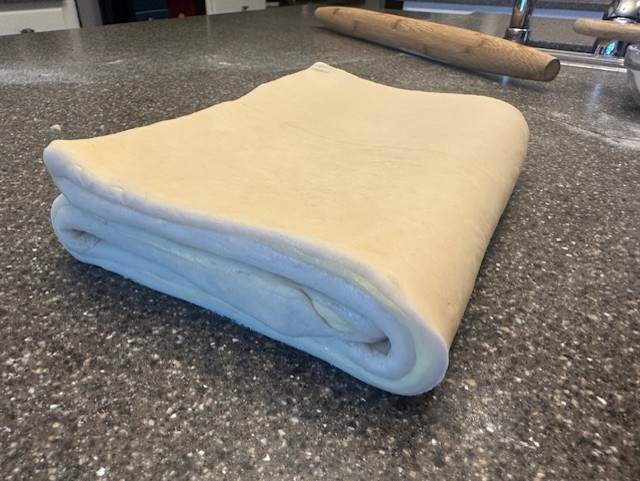
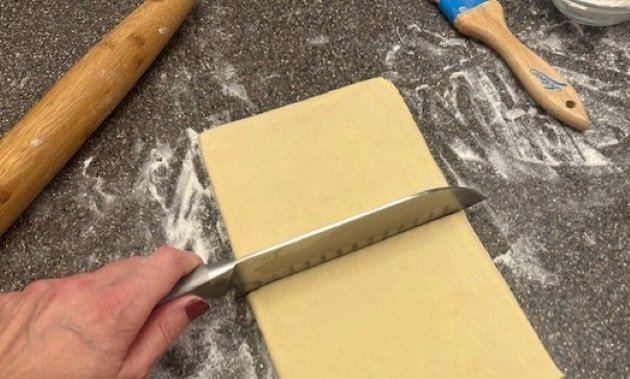
Step 12: Using a chef's knife, carefully cut a slice into the folded edges, not all the way through, but enough to score the sides. If the butter has softened, you may opt to pop the dough back into the freezer for another few minutes before continuing on.
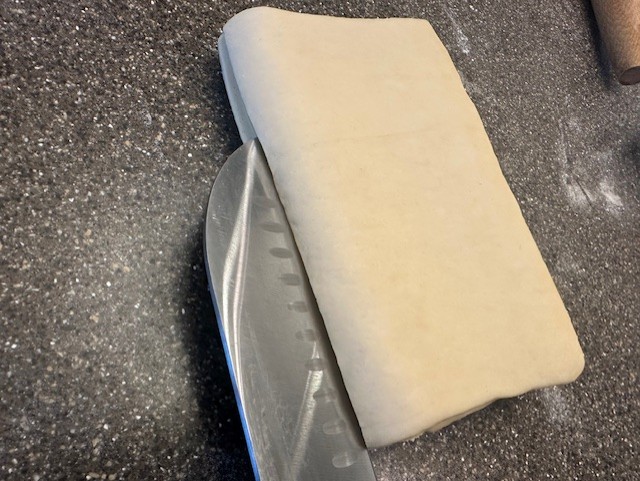
Step 13: Roll the dough to a 10" x 7" rectangle, then divide the dough evenly in half, creating two 5" x 7" pieces.
Rotate the dough a half turn, so that the longest length is facing you, and roll the dough again until it measures a 10" x 5 ½" rectangle. Wrap in plastic wrap, return to the fridge, and allow the dough to chill for thirty minutes.

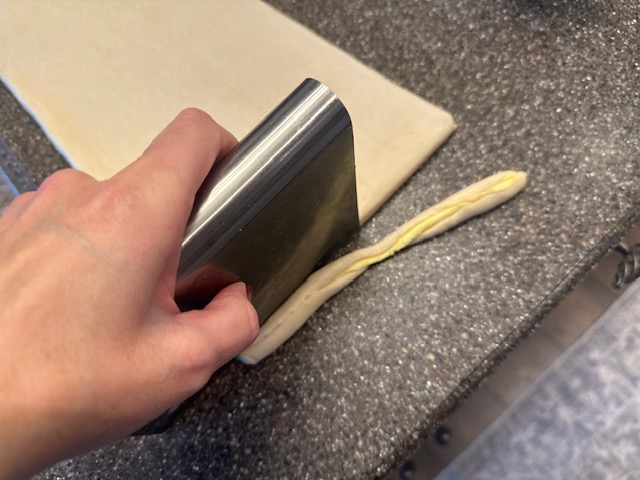
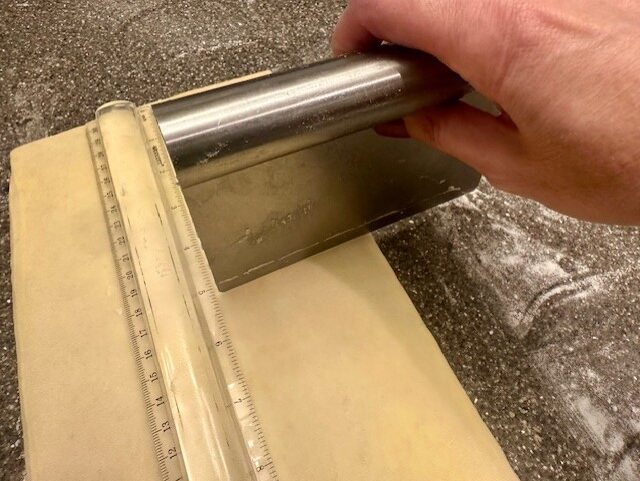
Step 14: After the dough has chilled the previous step, remove it from the refrigerator, and roll to a length of 16", being sure to keep your worksurface lightly dusted with flour. Trim up the short edges about a half an inch on each end, leaving you with a 15" length. This will keep the edges and corners sharp.
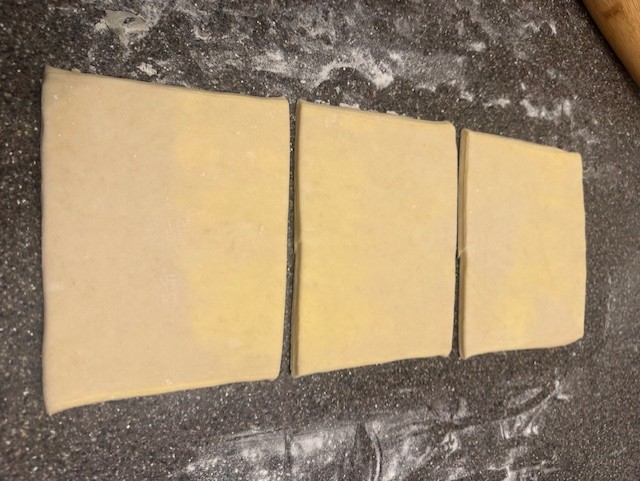
Step 15: Using the ruler and a knife (or bench scraper), mark the dough at two equal intervals, cutting the dough into 3 equal pieces approximately 5" wide. Carefully brush away any excess flour from the dough, then layering the three cut pieces on top of one another. Excess flour between the layers will make it harder to press them together cohesively when rolling.
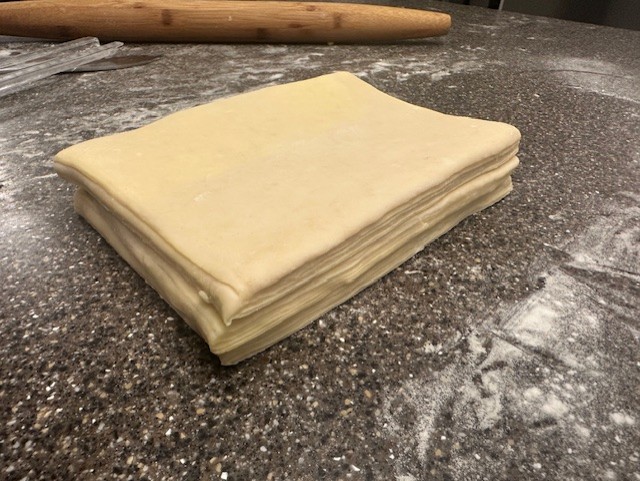
Step 16: Gently roll the dough to approximately 9" x 7", using your bench scraper along the sides to keep the sections as aligned as possible. Cover tightly with plastic wrap and store in the fridge for 45 minutes. At this point, the butter will likely have softened a bit, needing to be chilled for a bit longer than usual.
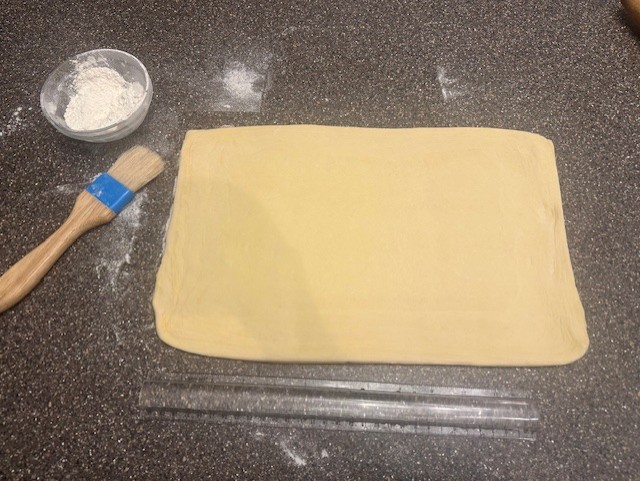
Step 17: After this last refrigeration, remove the dough and roll into a 14" x 9" rectangle on a lightly floured worksurface. Trim up approximately ½" from each of the shorter ends, squaring off the corners and providing a clean edge.
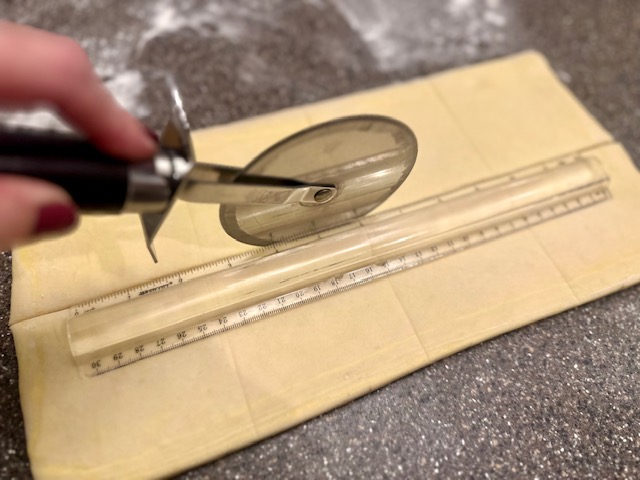
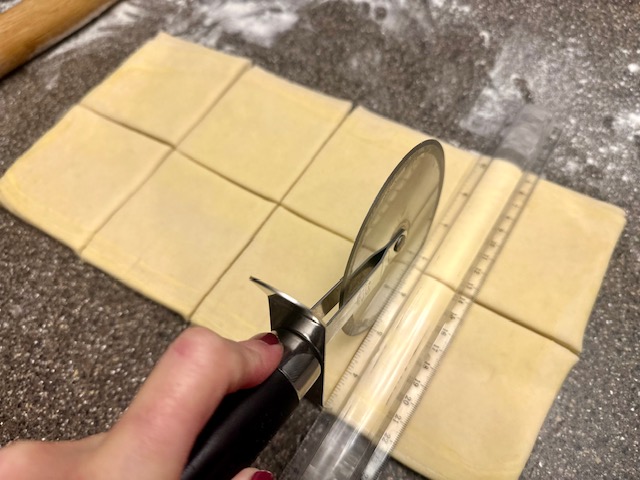
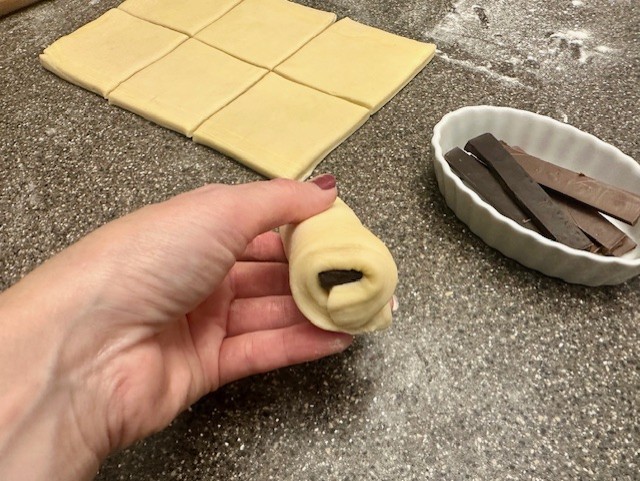
Step 18: Assuming a 13" length of dough, cut the dough into 8 equal squares by marking the dough in half lengthwise at 4.5", in half vertically at 7.5" and each half at 3.75". Use a pizza cutter or a sharp Chef's knife to cut through the dough cleanly.
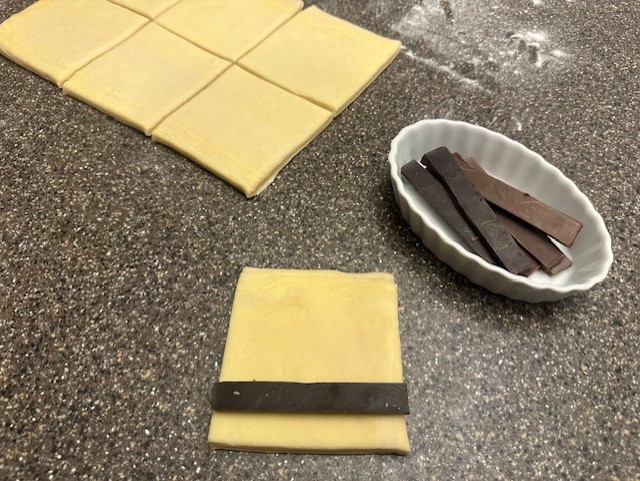
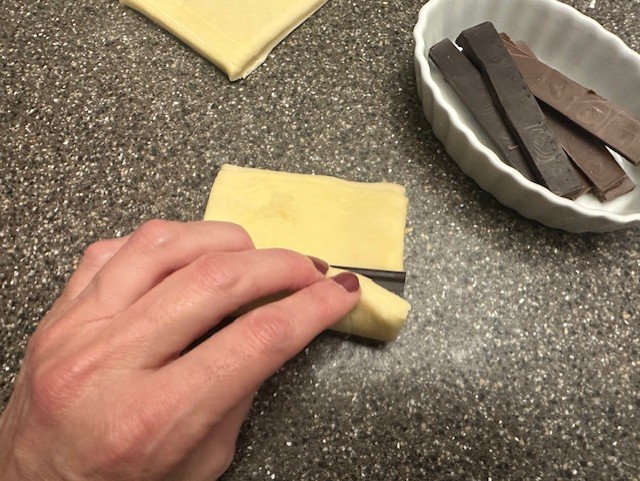
Step 19: Trim each chocolate baton so that the length of each piece fits to the edge.
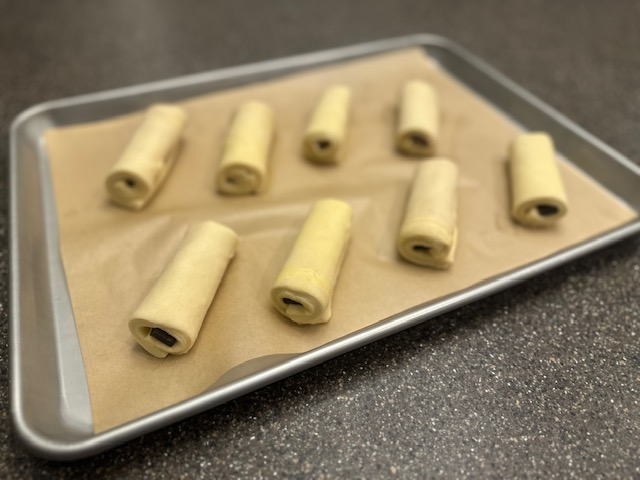
Section off each square of dough, placing a piece of chocolate near the bottom, leaving enough dough to gently fold over the chocolate. Roll and tuck the edges into a spiral, placing each pain au chocolat onto a parchment-lined sheet pan, seam side down.
If using chocolate chips instead of batons, you'll need a scant tablespoon for each square. Gently press the chips directly into the bottom of the dough (don't push all the way through) to help them stick and reduce the pieces from escaping as you roll the dough up in the same manner as above.
Step 20: To proof, place the prepared pan into a cold oven, using only the internal light to create enough warmth to help the dough relax and rise. Place a small baking dish filled with boiling water beneath the tray to provide moisture and steam, recreating a similar environment to a professional baker's oven.
Check the dough after about 90 minutes. If you press your finger gently onto the surface of the dough, and the indent begins to slowly fill back in, the proofing is almost complete. Remove the pan from the oven and place on the counter, then remove the pan of water.
Step 21: Preheat your oven to 400℉.
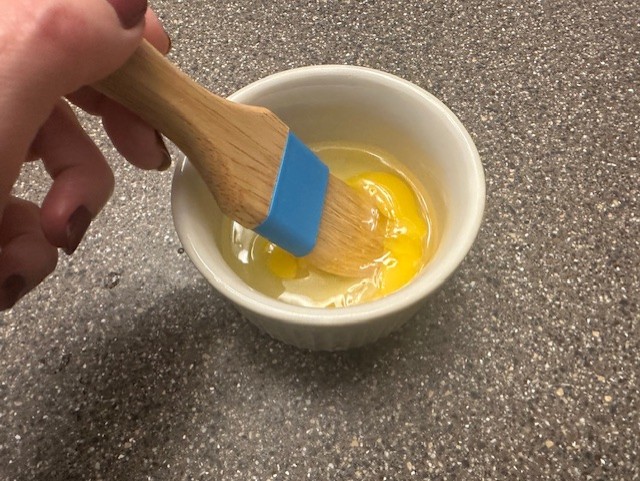
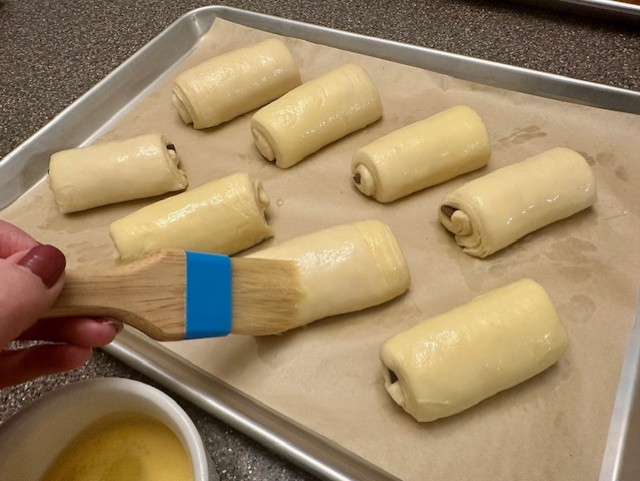
In the meantime, a few minutes before the oven reaches 400℉, prepare a quick egg wash. Mix together the egg, water and salt; whisk together vigorously, then lightly brush the egg wash onto the top of each pastry.
Step 22: Reduce the oven temperature to 375℉ just before placing the pan into the oven, and bake for 25 minutes, just until the pastry is golden brown.
Remove from the oven and cool a several minutes before enjoying.
If not eating right away, cool pain au chocolat completely and store in a tight-fitting container or Ziploc bag, up to 2-3 days. Reheat room temperature pastries in the air fryer for 3.5 minutes.
OVERNIGHT METHOD
Don't have 6-½ consecutive hours to make your Pain au Chocolat in a single day? No worries. You can split up the prep and bake, completing steps 1 through 17, up to shaping your pastries and then placing them into the refrigerator overnight, wrapped tightly, and then begin the next day with step 18, at the proofing stage. Allow two hours for the proofed dough to come to room temperature, then continue and bake as instructed.

Pain Au Chocolat
Equipment
- Kitchen-Aid Mixer or other stand mixer, fitted with the dough hook
- Rolling Pin
- Pastry Brush
- Plastic Ruler
- Rubber Spatula
- Plastic Wrap
- Parchment Paper
- Parchment-Lined Sheet Pan
- Metal Bench Scraper
- Pizza Cutter
Ingredients
Dough
- 65 g Whole Milk, Cold
- 121 g Ice Water
- 8 g Instant Yeast
- 375 g Bread Flour plus an additional few tablespoons for dusting a clean worksurface (All Purpose Flour may be substituted)
- 37 g Granulated Sugar
- 8 g Kosher Salt
- 37 g Unsalted Butter, cut into small cubes
Butter Block
- 185 g High Quality Butter, unsalted and kept refrigerated High Butterfat Content, 82-83%
- 2-3 Tbsp. Light Dusting of Flour
Chocolate
- 2 oz Chocolate batons (.25 oz each) or 8 Tbsp. chocolate chips
Egg Wash
- 1 Lg. Egg
- 1 Tbsp. Water at Room Temperature
- Scant Pinch of Kosher Salt
Instructions
- Gather and weigh all of your ingredients carefully using a kitchen scale.
- Into the bowl of a stand mixer, add both the water and the milk, along with the yeast. Next, add the flour, sugar, salt and lastly, the butter. Mix on the lowest setting for about 5 minutes, stopping the machine after about 4 minutes to scrape down any dough that may stick to the bottom or sides of the bowl.
- Lightly dust a clean worksurface with a little flour, then remove the dough from the mixer and place it on top. The dough will appear a big shaggy. Using the palm of your hand, gently press the dough down and away, then fold the top over, drawing your hand back and rolling the dough towards yourself. Rotate the dough and repeat this step, 3 or 4 times, just until the dough is cohesive and begins to form a ball.
- Using both hands, tuck palms under the bottom of the dough and rotate in a circle, gently pulling the dough in towards the center as you shape it into a round ball. Wrap the dough tightly with plastic wrap and place into the fridge to rest for at least 30 minutes, but up to two hours.
- In the meantime, place the 185 grams of cold, unsalted butter onto a piece of folded parchment paper. Using a pastry brush, gently brush the surface on both the top and bottom of the butter very lightly with flour, and then fold the piece of parchment over the butter.
- Using the rolling pin, gently begin tapping the butter into an even 6" x 6" square block, rotating the parchment every so often to keep the proper shape. Use the ruler to measure the dimensions, and if needed, use the edge of the bench scraper to push the butter back into a square. Work quickly to ensure the butter stays cool and pliable without getting too soft.Once you have the right a proper square, place the butter into the refrigerator to firm up.
- After allowing the dough to rest, remove it from refrigeration, unwrap it, and place the ball onto a clean worksurface dusted lightly with flour. You'll also need a rolling pin and a ruler. Reserve the plastic wrap, as you'll use it again after rolling the dough.
- Holding your rolling pin with both hands, gently press down across the center of the dough, rocking back and forth, essentially walking the length of the dough by creating slight indentations along the surface. Flip the dough over and repeat, then turn back over to the original side. This step will begin to stretch the dough into a rectangular shape without overworking it.
- Begin rolling the dough into a long rectangle, 12" x 6". As the dough lengthens, use your fingers to pinch and create four corners of the dough, ensuring you don't end up with rounded edges. Use your ruler to keep close dimensions, using your bench scraper as needed to push the sides or ends of the dough back, accordingly. Flip the dough once or twice, as needed, lightly brushing with flour to ensure that the dough itself is not sticking to the worksurface.Once the dough measures 12" x 6", cover tightly with the reserved plastic wrap, and place onto a parchment lined baking sheet. Move the pan to the freezer, where you'll chill the dough for no less than 30 minutes.
- After thirty minutes in the freezer, your dough should be quite firm but not solid. Remove the prepared square of butter from the freezer and place it directly onto the center of the dough, ensuring the height is aligned so that no butter hangs over the top or bottom of the dough.
- Using a chef's knife, trim the sides of the dough on either side of the square of butter. On a lightly flour-dusted worksurface, gently roll out the pieces of dough so that they are more rectangular in shape, pinching the rounded corners and pulling them outwards making them square. Place the pieces of dough on top, sandwiching the butter in between, and pressing the seam in the center of the dough to form a more cohesive layer.If the butter appears to be softening, return the dough to the fridge for 10-15 minutes, just to chill and make it easier to roll.
- When ready, roll the dough to a 16" x 6 ½" rectangle. You'll again find it easiest to walk the rolling pin down the length of the dough by rocking it back and forth and then rolling. Rotate the dough 90° and roll until you've reached the required width. Fold the dough over into equal thirds, lining up the top fold to be as flush to the edge as possible.Using a chef's knife, carefully cut the folded edges, not all the way through, but enough to score the sides. If the butter has softened, you may opt to pop the dough back into the freezer for another few minutes before continuing on.
- Roll the dough to a 10" x 7" rectangle, then divide the dough evenly in half, creating two 5" x 7" pieces. Rotate the dough a half turn, so that the longest length is facing you, and roll the dough again until it measures a 10" x 5 ½" rectangle. Wrap in plastic wrap, return to the fridge, and allow the dough to chill for thirty minutes.
- After the dough has chilled the previous step, remove it from the refrigerator, and roll to a length of 16", being sure to keep your worksurface lightly dusted with flour. Trim up the short edges about a half an inch on each end, leaving you with a 15" length. This will keep the edges and corners sharp.
- Using the ruler and a knife (or bench scraper), mark the dough at two equal intervals, cutting the dough into 3 equal pieces approximately 5" wide. Carefully brush away any excess flour from the dough, then layering the three cut pieces on top of one another. Excess flour between the layers will make it harder to press them together cohesively when rolling. Gently roll the dough to approximately 9" x 7", using your bench scraper along the sides to keep the sections as aligned as possible. Cover tightly with plastic wrap and store in the fridge for 45 minutes. At this point, the butter will likely have softened a bit, needing to be chilled for a bit longer than usual.
- After this last refrigeration, remove the dough and roll into a 14" x 9" rectangle on a lightly floured worksurface. Trim up approximately ½" from each of the shorter ends, squaring off the corners and providing a clean edge. Assuming a 13" length of dough, cut the dough into 8 equal squares by marking the dough in half lengthwise at 4.5", in half vertically at 7.5" and each half at 3.75". Use a pizza cutter or a sharp Chef's knife to cut through the dough cleanly.
- Trim each chocolate baton so that the length of each piece fits to the edge.Section off each square of dough, placing a piece of chocolate near the bottom, leaving enough dough to gently fold over the chocolate. Roll and tuck the edges into a spiral, placing each pain au chocolat onto a parchment-lined sheet pan, seam side down.If using chocolate chips instead of batons, you'll need a scant tablespoon for each square. Gently press the chips directly into the bottom of the dough (don't push all the way through) to help them stick and reduce the pieces from escaping as you roll the dough up in the same manner as above.
- To proof, place the prepared pan into a cold oven, using only the internal light to create enough warmth to help the dough relax and rise. Place a small baking dish filled with boiling water beneath the tray to provide moisture and steam, recreating a similar environment to a professional baker's oven. Check the dough after about 90 minutes. If you press your finger gently onto the surface of the dough, and the indent begins to slowly fill back in, the proofing is almost complete. Remove the pan from the oven and place on the counter, then remove the pan of water.
- Preheat your oven to 400℉.In the meantime, a few minutes before the oven reaches 400℉, prepare a quick egg wash. Mix together the egg, water and salt; whisk together vigorously, then lightly brush the egg wash onto the top of each pastry.
- Reduce the oven temperature to 375℉ just before placing the pan into the oven, and bake for 25 minutes, just until the pastry is golden brown.Remove from the oven and cool a few minutes before enjoying. If not eating right away, cool pain au chocolat completely and store in a tight-fitting container or Ziploc bag, up to 2-3 days. Reheat room temperature pastries in the air fryer for 3.5 minutes.