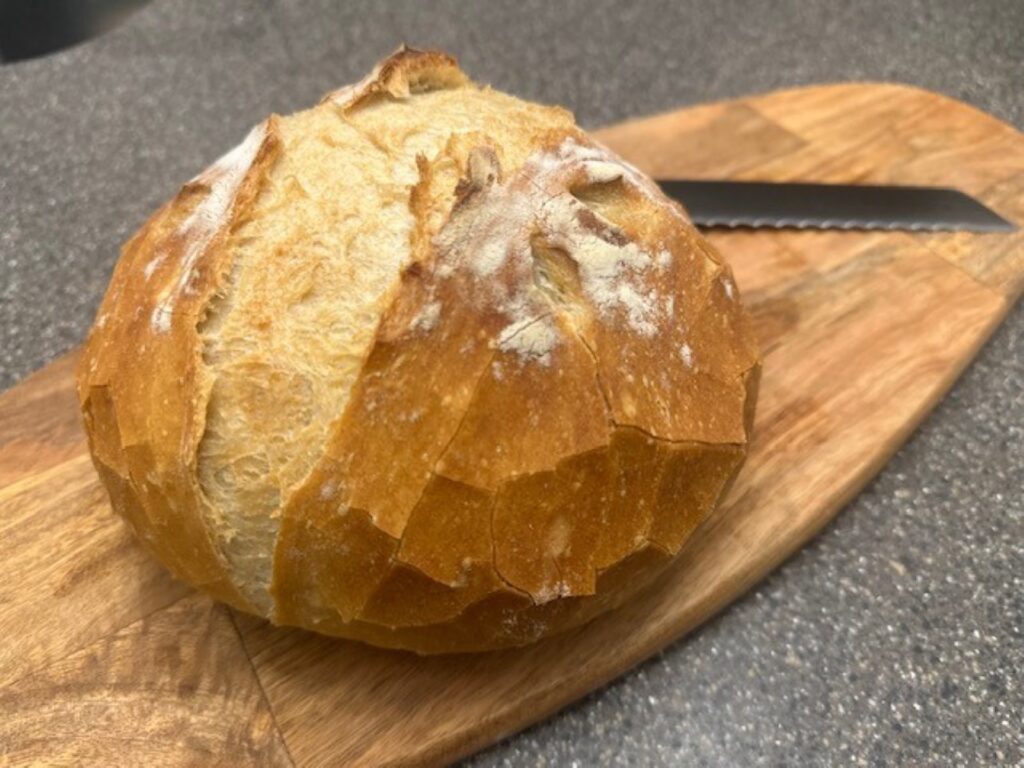
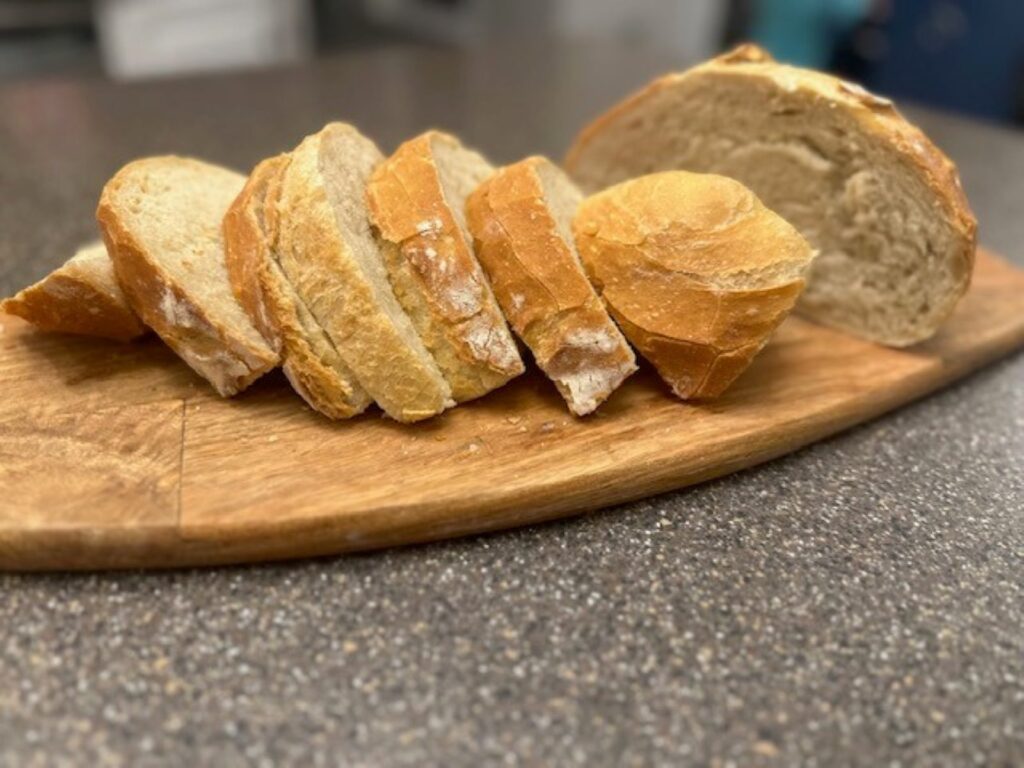
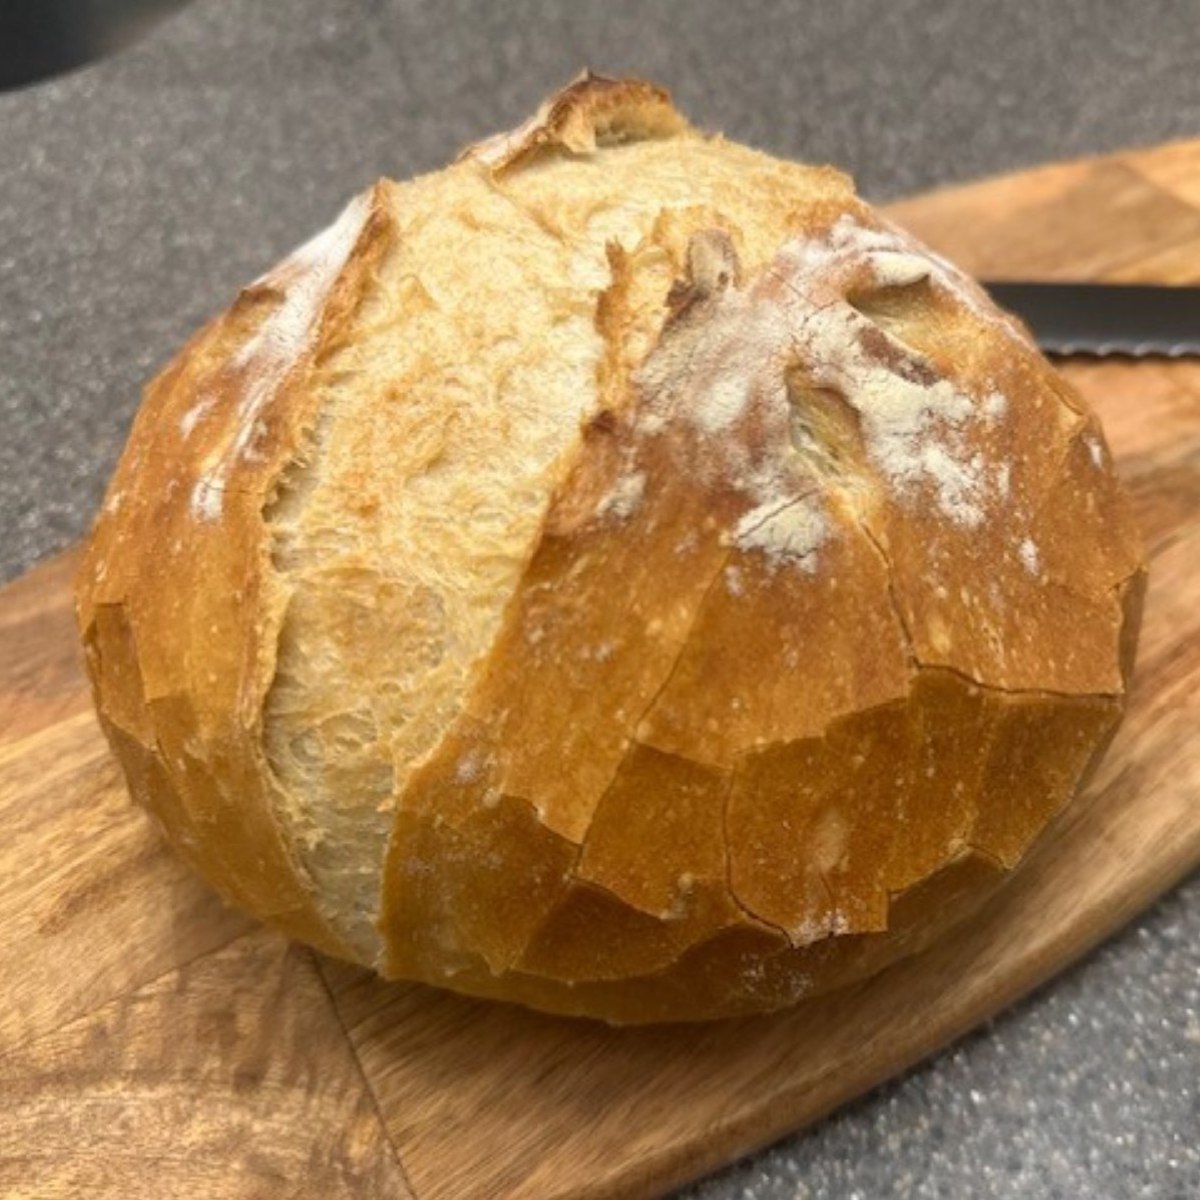
Freshly baked bread that looks like it came from an artisan bakery isn't as difficult as it may seem. Although it does take a bit of time for the dough to rest, allowing for the gluten and flavors to fully develop, yielding that beautiful crackle in the crust and tender crumb is only a few simple steps away. With just 4 ingredients you probably already have in your pantry, you can start the process in the morning and have a perfect boule on the table for dinner tonight! The refrigerated rise allows a lot of flexibility for preparing your bread dough in advance as well, up to 7 days! The longer the dough rests, the more intense the flavor will become, almost resembling a sourdough.
INGREDIENTS
- 450 g All Purpose Flour 3-¾ C. measured using the "scoop and sweep" method, plus extra flour for dusting
- 340 g Lukewarm Water 1-⅓ C., 105-110℉
- 9 g Kosher Salt 2 tsp
- 7 g Instant Yeast 1 tsp
- Olive Oil for greasing
- Boiling Water for creating steam during baking
INSTRUCTIONS
Step 1: Gather and measure your ingredients carefully. If you are not using a kitchen scale, be sure to use the "spoon and sweep" method* for measuring the all-purpose flour.

If you are using a thermometer to determine the temperature of the water, it should read anywhere between 105-110℉. If you are going strictly by touch, the water should be noticeably warmer than room temperature, but not hot enough to burn.

*The 'spoon and sweep' method is the most accurate way to measure flour, aside from weighing it on a kitchen scale. Use your spoon to gently stir and fluff the flour in its container, then scoop the flour directly into the measuring cup, using the straight edge of the spoon to sweep away the excess flour on top once the measuring cup is full.
Step 2: Add the flour, yeast, salt and lukewarm water to the bowl of the stand mixer, and, using a dough hook, mix the ingredients together until a sticky dough has formed, usually no more than a few minutes. The warm water will activate the yeast, so you can expect to see small bubbles forming.


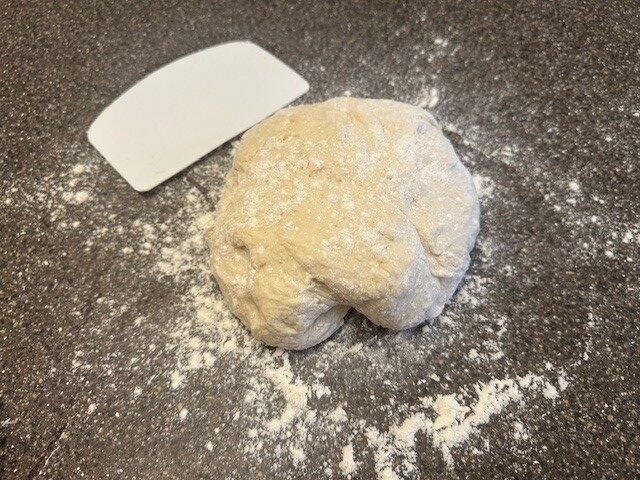
Step 3: Use a plastic bench scraper to remove the dough from the mixing bowl and place it on a clean, lightly floured surface. Knead the dough into a ball using your hands. The dough does not need to be smooth at this stage.

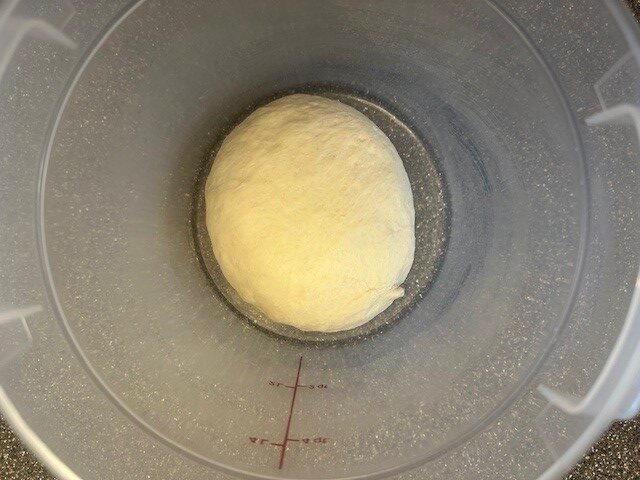
Step 4: Lightly grease the bottom of your dough bucket (container or bowl) with oil and add your dough. Cover and allow to rest at room temperature for 2 hours. The dough will rise, but perhaps not double in size.
Step 5: After two hours has passed, move the covered dough into the refrigerator, where it will continue to proof (rise) for two to three hours, at a minimum. See notes below.

Step 6: Following the second rise, remove the dough from the refrigerator. You'll notice that it has only risen slightly more, but there are more visible air bubbles as the dough has continued to ferment.

Lightly sprinkle the top of the dough with some flour and lightly flour your work surface as well.

Step 7: Remove the dough from the bucket, place onto the prepared work surface, and begin kneading into a smooth, round ball. The sides of your hands should be pressed directly against the flat surface, with your thumbs pointing upwards, palms facing inward towards the dough. Gently, and continuously, scoop the dough into your hands by pressing inwards and upwards, rotating the dough to one side, without lifting the dough much off the counter. This will create a smooth, rounded surface to the top of the dough with a seam on the bottom.

Step 8: Lay the formed ball of dough onto a baking sheet lined with parchment paper, sprinkle lightly with flour, and cover loosely with plastic wrap. Place the sheet in a warm, draft-free area of your kitchen, and allow a third, and final rise of one hour. This will allow your dough to come to room temperature before baking.

Step 9: While the dough is rising, preheat the oven to 450℉. If you are using either a Cloche or a Dutch oven, place the baking dish into the oven about 30 minutes before you are ready to bake. If you are using a baking sheet, you may skip this step.
Bring a few cups of water to a boil, either in a kettle or in a small saucepan.
Step 10: Grab a metal baking dish and place it on the bottom rack of the oven, then remove the cloche (or Dutch oven), and gently place it on a heat-proof surface. Make sure to close the oven door.
Quickly and carefully, remove the baker's lid, and place the dough into the center of the baker. Use a pair of kitchen scissors to snip a few cuts into the top of the dough (or use the tip of a paring knife, careful not to cut too deeply). Return the lid and place the baker back into the oven.


If you are baking your boule on a sheet pan, place the pan directly onto a rack in the center of the oven, and continue these steps outlined below.
Step 11: Carefully, pour the boiling water directly into the metal pan and shut the oven door as quickly as possible. This will create steam in your oven, similar to how artisan bakery ovens provide steam.

Bake for twenty to thirty minutes and then remove the baker's lid. You may opt to continue baking a few additional minutes, uncovered, to add more golden-brown to the crust.

Allow your boule to cool to room temperature before slicing.
Notes
If you are making dough ahead, the dough can be kept in the refrigerator until you are ready to bake, up to 7 days, but keep in mind that the dough will need to rest at room temperature again for another hour before baking, so plan accordingly.
If not enjoying the entire boule the day it is baked, store any remaining bread in a tightly sealed bag or container, where it will stay fresh for an additional few days.
Freshly Baked Boule
Equipment
- Kitchen Scale or measuring cups and spoons
- KitchenAid Stand Mixer fitted with the dough hook attachment
- Instant-Read Thermometer optional
- Medium-Sized Dough Bucket or large container with a lid, or bowl with plastic wrap
- Parchment-Lined Baking Sheet
- Plastic Wrap
- Stoneware Cloche or covered cast iron Dutch oven, optional
- Kitchen scissors or a small paring knife
- Tea Kettle or Small Saucepan for boiling water
- Medium Metal Baking Dish to add water and create steam during baking
- Oven Mitts
Ingredients
- 450 g All Purpose Flour 3-¾ C. measured using the "scoop and sweep" method, plus extra flour for dusting
- 340 g Lukewarm Water 1-⅓ C., 105-110℉
- 9 g Kosher Salt 2 tsp
- 7 g Instant Yeast 1 tsp
- Olive Oil for greasing
- Boiling Water for creating steam during baking
Instructions
- Gather and measure your ingredients carefully. If you are not using a kitchen scale, be sure to use the "spoon and sweep" method* for measuring the all-purpose flour. If you are using a thermometer to determine the temperature of the water, it should read anywhere between 105-110℉. If you are going strictly by touch, the water should be noticeably warmer than room temperature, but not hot enough to burn you. *The 'spoon and sweep' method is the most accurate way to measure flour, aside from weighing it on a kitchen scale. Use your spoon to gently stir and fluff the flour in its container, then scoop the flour directly into the measuring cup, using the straight edge of the spoon to sweep away the excess flour on top once the measuring cup is full.
- Add the flour, yeast, salt and lukewarm water to the bowl of the stand mixer, and, using a dough hook, mix the ingredients together until a sticky dough has formed, usually no more than a few minutes. Use a plastic bench scraper to remove the dough from the mixing bowl and place it on a clean, lightly floured surface. Knead the dough into a ball using your hands.
- Lightly grease the bottom of your dough bucket (container or bowl) with oil and add your dough. Cover and allow to rest at room temperature for 2 hours. The dough will rise, but perhaps not double in size.
- After two hours has passed, move the covered dough into the refrigerator, where it will continue to proof (rise) for two to three hours, at a minimum. See notes below.
- Following the second rise, remove the dough from the refrigerator and dust the top lightly with flour. You'll also want to lightly dust a clean work surface with additional flour as well. Remove the dough from the bucket, place onto the prepared work surface, and begin kneading into a smooth, round ball. The sides of your hands should be pressed directly against the flat surface, with your thumbs pointing upwards, palms facing inward towards the dough. Gently, and continuously, scoop the dough into your hands by pressing inwards and upwards, rotating the dough to one side, without lifting the dough much off the counter. This will create a smooth, rounded surface to the top of the dough with a seam on the bottom.
- Lay the formed ball of dough onto a baking sheet lined with parchment paper and cover loosely with plastic wrap. Place the sheet in a warm, draft-free area of your kitchen, and allow a third, and final rise of one hour. This will allow your dough to come to room temperature before baking.
- While the dough is rising, preheat the oven to 450℉. If you are using either a Cloche or a Dutch oven, place the baking dish into the oven about 30 minutes before you are ready to bake. If you are using a baking sheet, you may skip this step.Bring a few cups of water to a boil, either in a kettle or in a small saucepan.
- Grab a metal baking dish and place it on the bottom rack of the oven, then remove the cloche (or Dutch oven), and gently place it on a heat-proof surface. Make sure to close the oven door.
- Quickly and carefully, remove the baker's lid, and place the dough into the center of the baker. Use a pair of kitchen scissors to snip a few cuts into the top of the dough (or use the tip of a paring knife, careful not to cut too deeply). Return the lid and place the baker back into the oven. If using a sheet pan, add the pan to the center rack of the oven.
- Carefully, pour the boiling water directly into the metal pan and shut the oven door as quickly as possible. This will create steam in your oven, similar to how artisan bakery ovens provide steam.
- Bake for twenty to thirty minutes and then remove the baker's lid. You may opt to continue baking a few additional minutes, uncovered, to add more golden-brown to the crust.
- Allow your boule to cool to room temperature before slicing.


