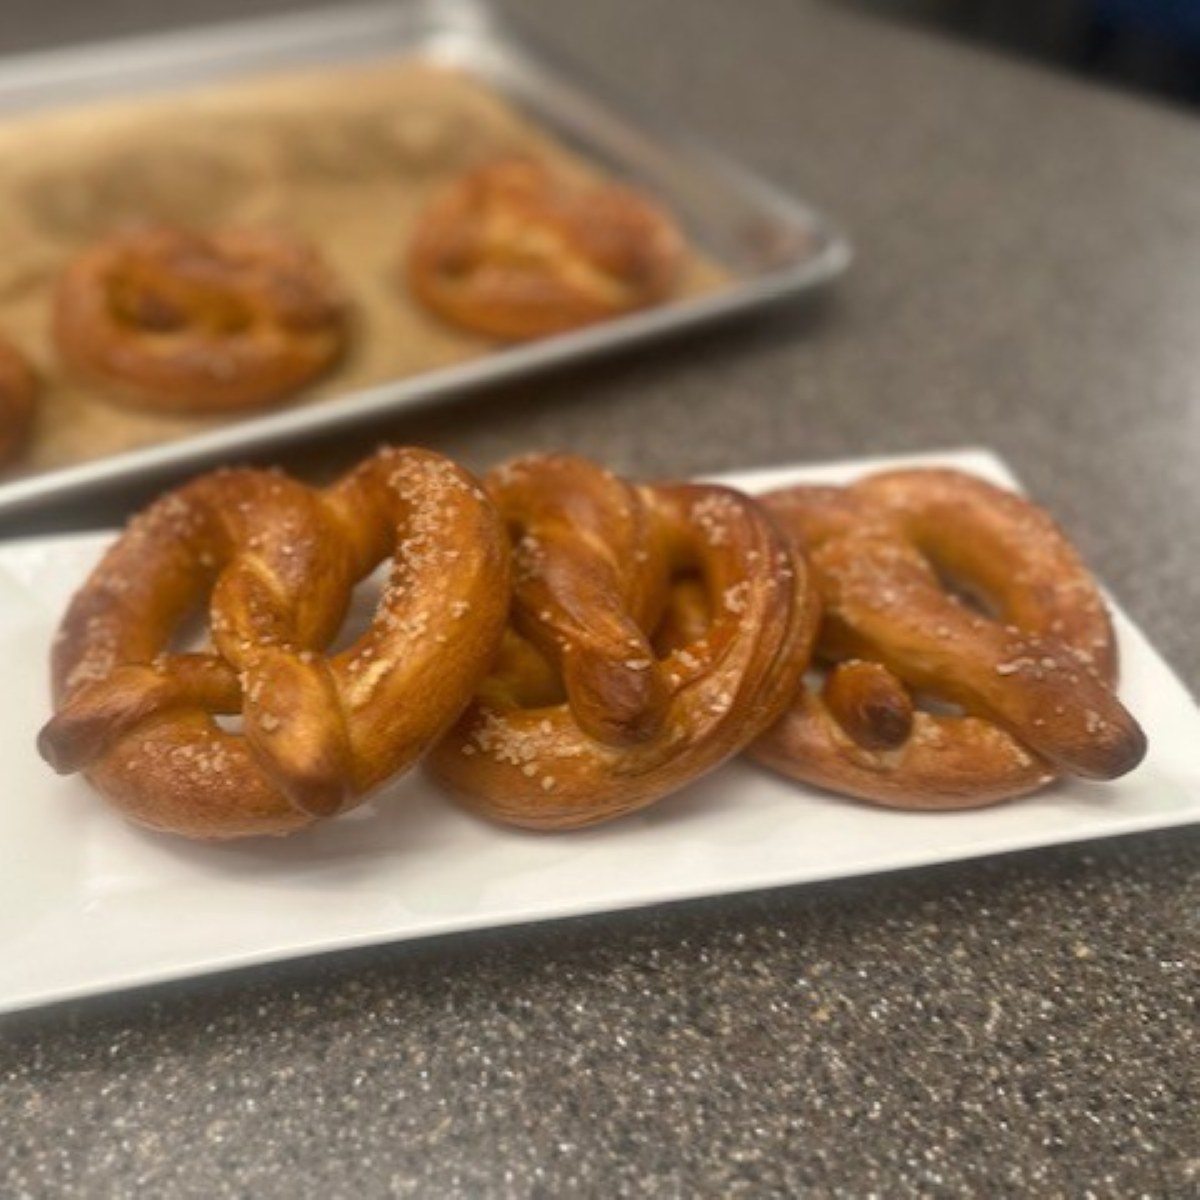
Growing up near Philadelphia, soft pretzels (along with cheesesteaks) are practically part of my DNA. They're hard to pass up, and even as an adult, it's still one of my favorite ballpark treats. Around the city, you're more likely to find oval shaped pretzels with a twist in the center, baked in tight rows to be broken apart and shared with a friend. Gas station varieties are typically cold and damp (not yummy) since they're slipped into plastic bags right after baking and then stored on a shelf, waiting. While still delicious, those you get in the mall are soft, dripping with butter or seasoned with cinnamon sugar, but are missing that crunchy exterior and soft, chewy inside. The classic, German-origin style is how I love them best, and this version adapted from King Arthur Flour, is perfection. Give yourself a couple of hours to make these, which mostly includes rest time, but you'll get to enjoy them the same day!*
Ingredients
- 360 grams Unbleached Bread Flour appx. 3 Cups*
- 209 grams Warm Water, (105-110°F) just shy of 1 Cup
- 20 grams Unsalted Butter, at room temperature, cut into small pieces
- 8 grams Fine Sea Salt appx. 1-¼ tsp.
- 5 grams Instant Yeast appx. 1-½ tsp.
- 10 Cups Boiling Water (for the water bath, not to be used in the recipe)
- 4 Tbsp. Baking Soda (for the water bath, not to be used in the recipe)
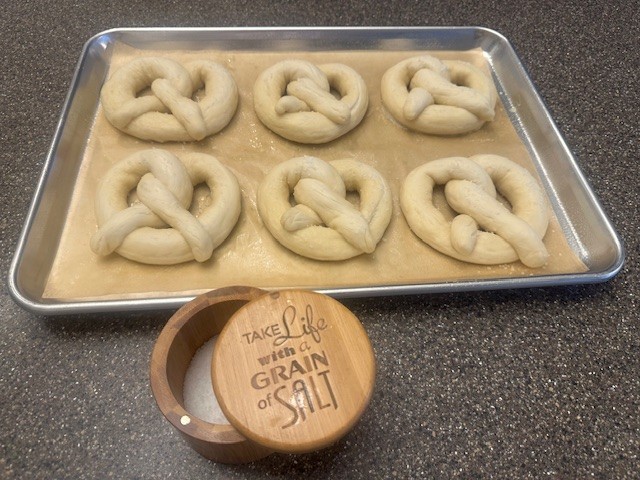
- 2-3 Tbsp. Kosher Salt (to season the pretzels)
- 1-2 Tbsp. Salted Butter, melted (to brush on the pretzels after baking)
Instructions
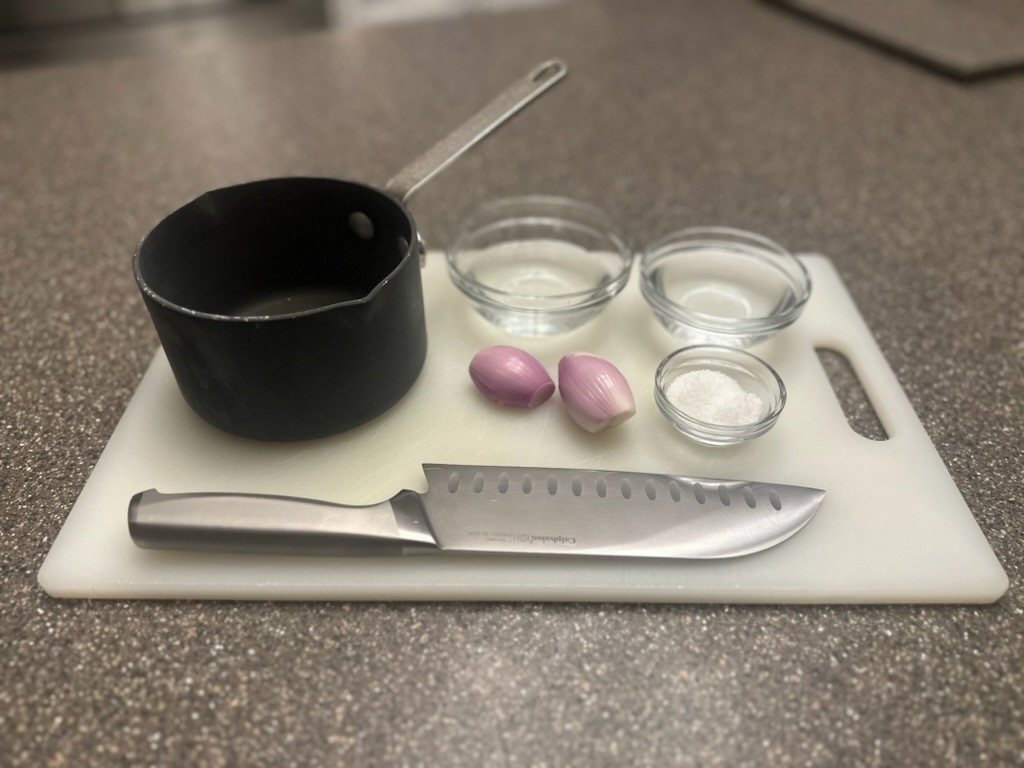
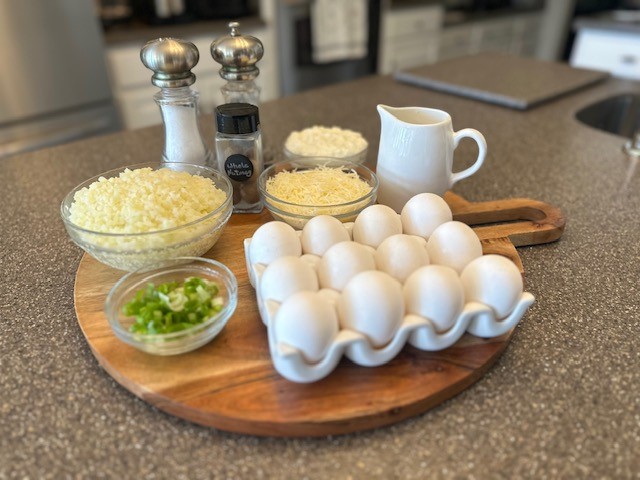
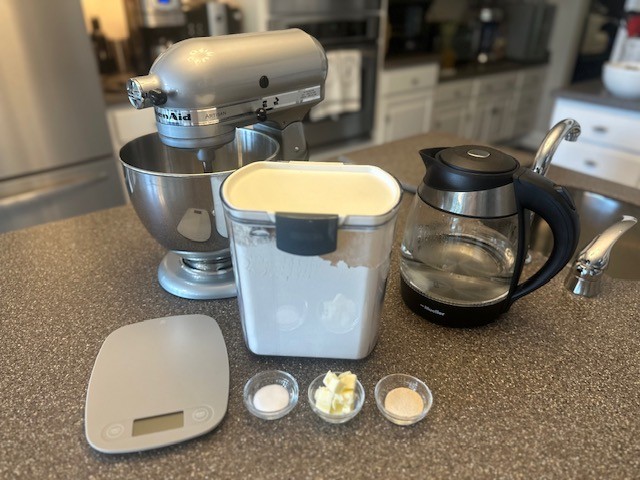
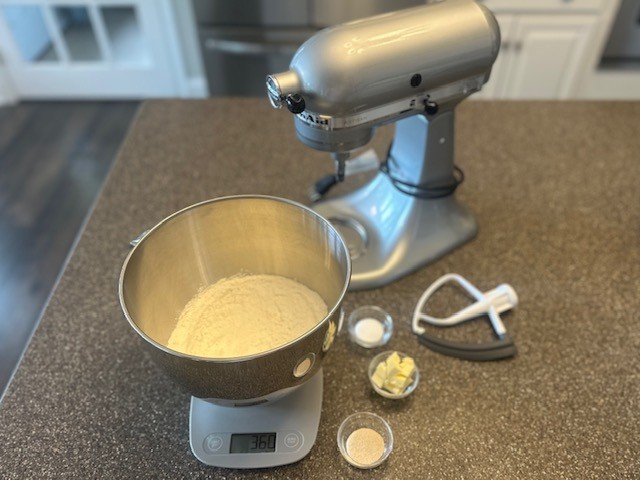
Step 1: Gather all of your ingredients, along with a kitchen scale, glass liquid measuring cup and digital thermometer.
Step 2: Place the bowl of your stand mixer onto the kitchen scale and be sure to tare (zero out) the weight of the bowl itself so you get an accurate measurement. Weigh 360 grams of flour. If not using a scale, use the Spoon and Sweep Method*.
The 'spoon and sweep' method is the most accurate way to measure flour, aside from weighing it on a kitchen scale. Use your spoon to gently stir and fluff the flour in its container, then scoop the flour directly into the measuring cup, using the straight edge of the spoon to sweep away the excess flour once the cup is full.
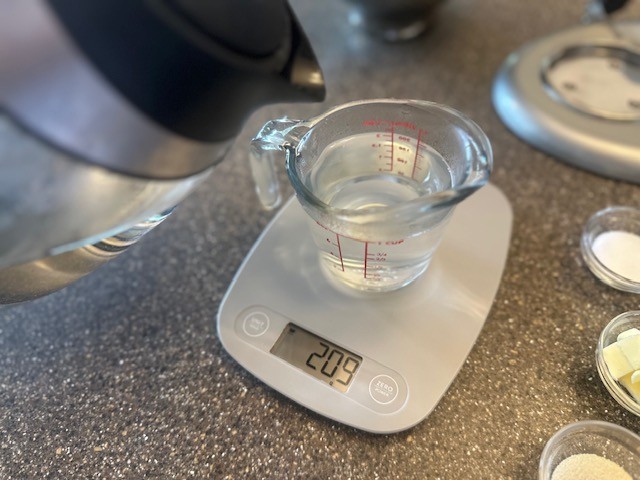
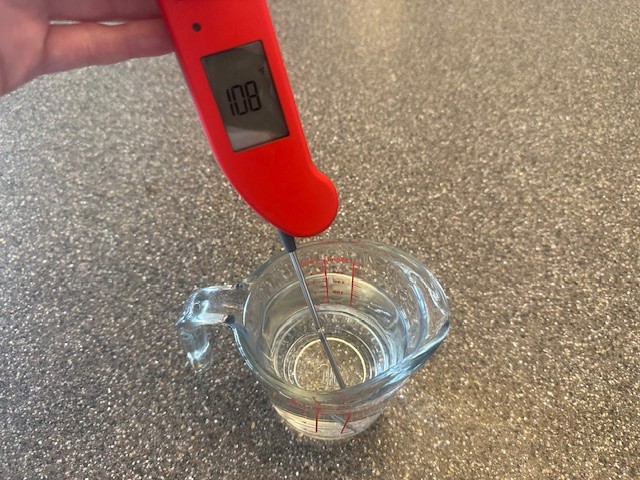
Step 3: Measure out the warm water to 209 grams (or just shy of one liquid cup), and use a thermometer to make sure the temperature is anywhere between 105°F and 110°F.
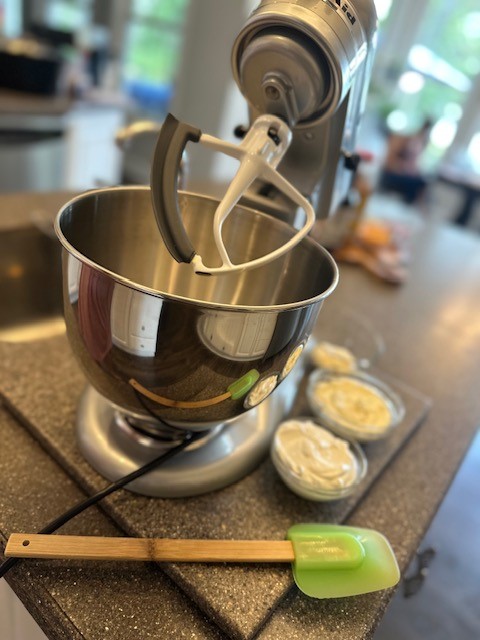
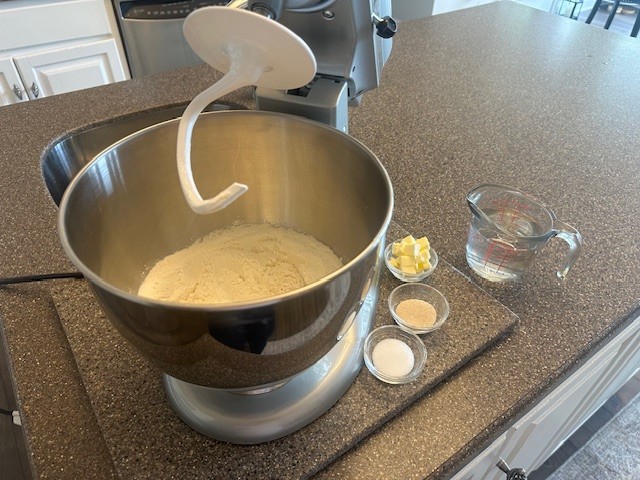
Step 4: Affix the mixing bowl back to its base, and with the dough hook attached, add the measured salt, yeast, water and butter. Mix all of the ingredients together for a minute or two on a medium-low setting, just until everything comes together and forms a sticky dough. Use a flexible scraper to clean up the sides and bottom of the bowl and make sure all of the ingredients are incorporated.
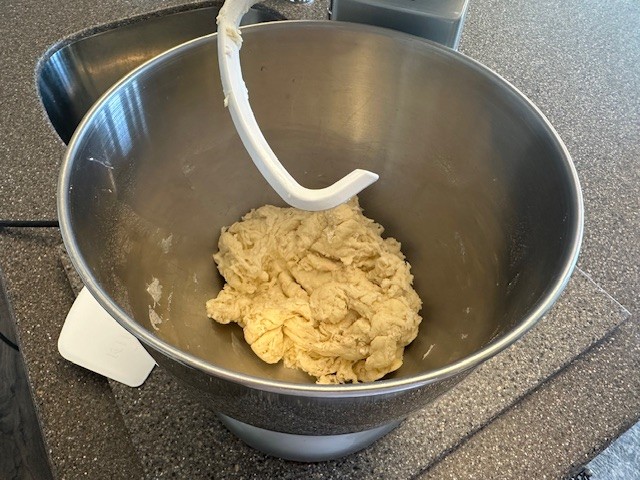
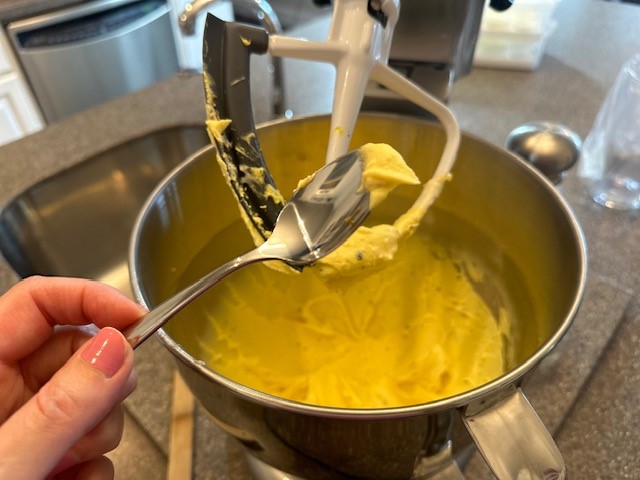
Step 5: Increase the speed to medium-high and mix for about 6 minutes, until the dough has thoroughly been kneaded.
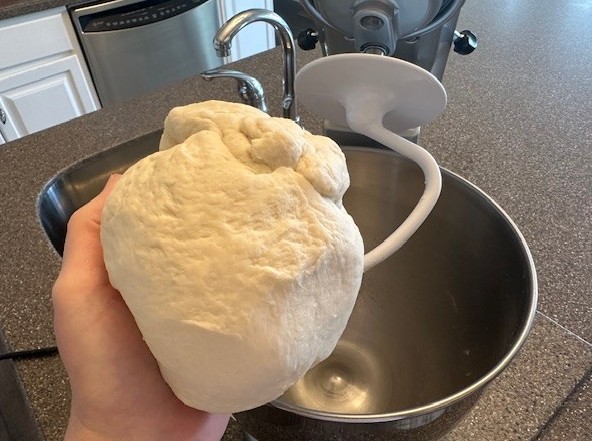
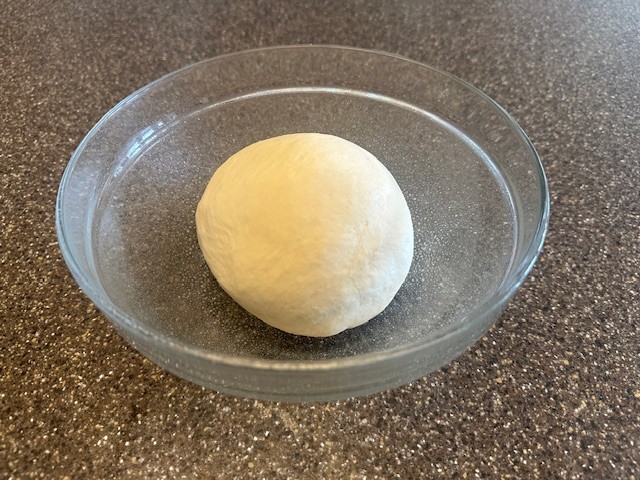
Step 6: Using your hands, gently shape the dough and place in a lightly oiled glass bowl. Cover the bowl tightly with plastic wrap and set aside in a warm place in your kitchen. Allow the dough to rest and double in size, about ninety (90) minutes.
Step 7: After resting, remove the dough from the bowl, gently kneading it with your hands to deflate, and place it onto a clean, lightly floured work surface. You'll also want to have your bench scraper and kitchen scale (if using) handy.
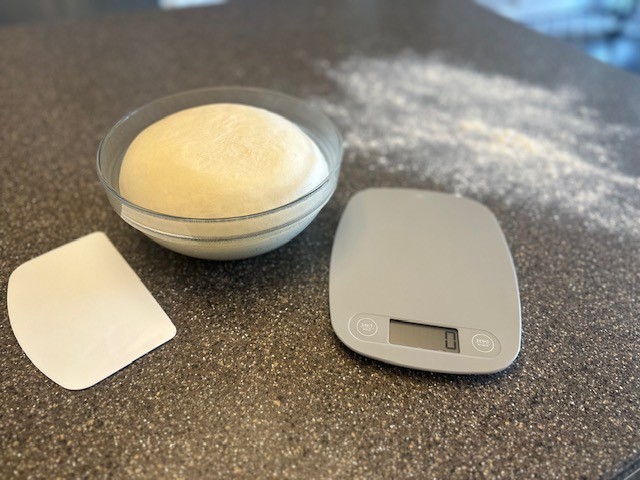
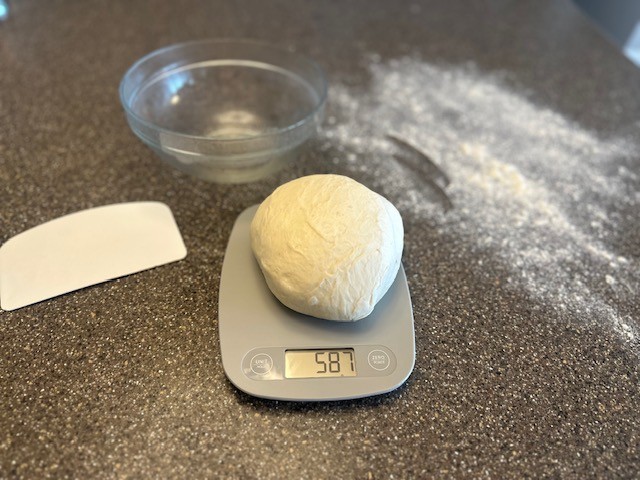
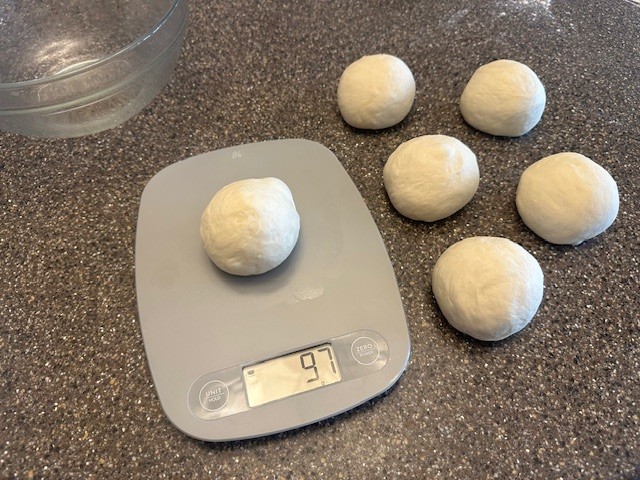
Step 8: Remove the dough from the bowl, gently punch down to remove any air, and place the entire ball onto the digital scale. Note the total amount, in grams. Divide this amount by 6, the number of portions you'll need to make your pretzels, (Example, 587 grams / 6 = Appx. 97 grams).
Step 9: Measure out each portion of dough to approximately the same weight. If not using a kitchen scale, section the dough in half, and each half in half again, as close in size as you can, so you end up with 6, equal balls of dough.
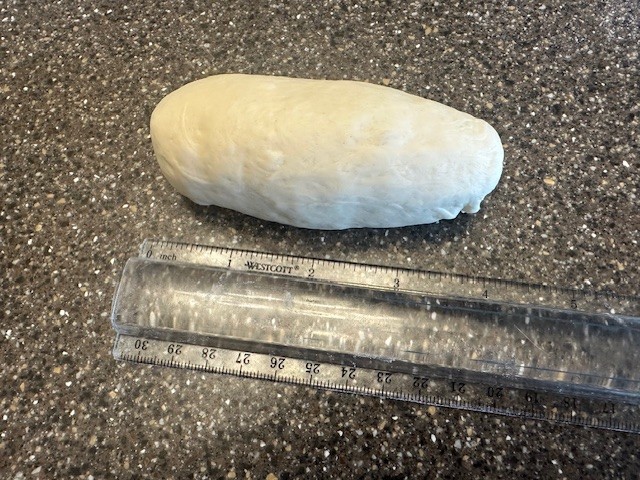
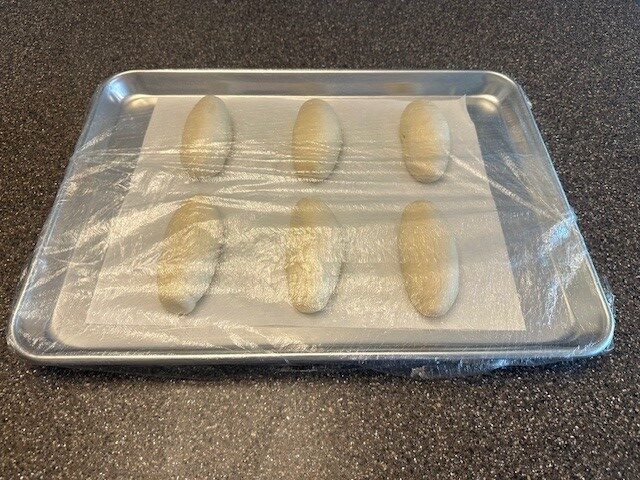
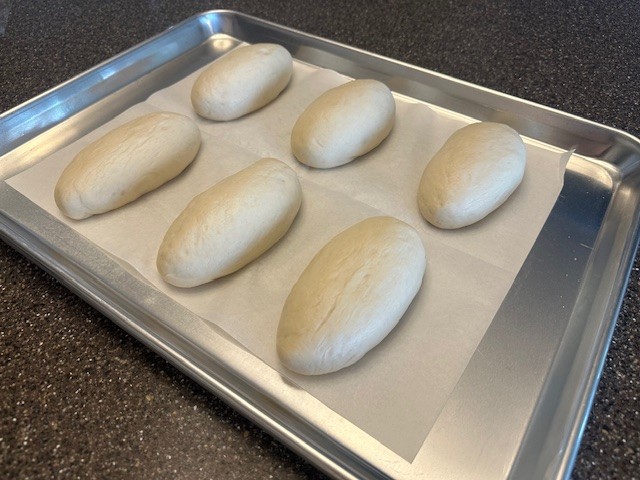
Step 10: Grab a kitchen ruler, if you have one, and gently shape each ball of dough into an approximate 4" log. Place the logs onto a parchment lined sheet pan, sprayed lightly with cooking spray. Cover tightly with plastic wrap and allow the dough to rest again at room temperature to relax the gluten in the dough, about thirty (30) minutes.
Step 11: After this second rise, the dough should be quite puffy, yet not quite doubling in size. Carefully remove the plastic wrap and set aside to use again.
Step 12: If available, measure out a long strip of painter's tape 24" in length, marking a line on the tape at 18", and adhering it to your clean work surface.
Starting with one portion at a time, stretch the dough from the center and pull outwards towards the ends, and then, laying on the work surface and using your fingertips, roll outwards from the center and up into a V-shape, as the rope of dough lengthens.
Lay each log on the side of your work surface, covered loosely under a sheet of plastic wrap, and note which portion you begin and end with, keeping them in order.
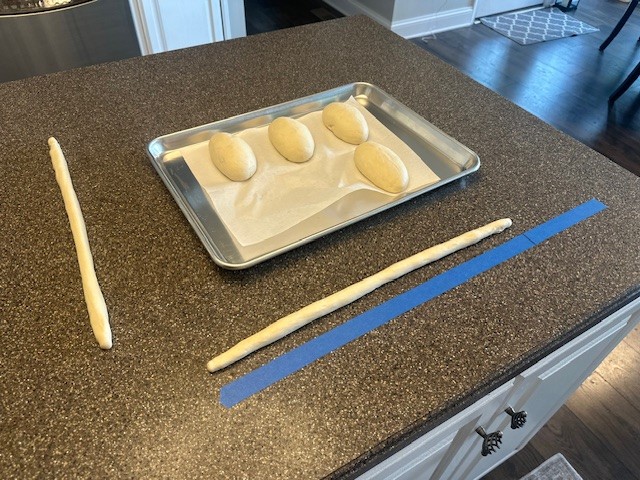
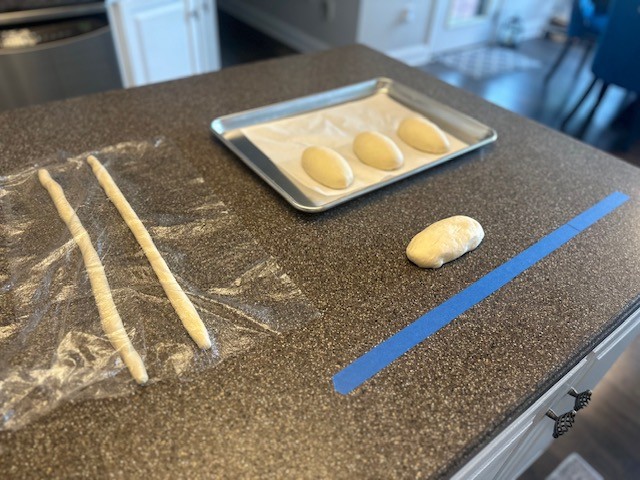
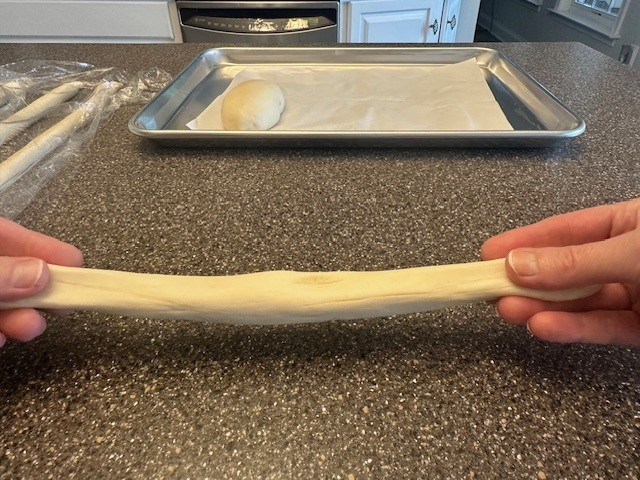

Step 13: Once you've rolled each portion of dough to 18" in length, grab the first portion you started with, and repeat the process, now stretching the dough to 24" in length. The short rest time in between should allow the gluten to relax, making it easier to stretch out the dough again without it shrinking back.
Step 14: Now the fun part, shaping the pretzels! Be sure to have a large sheet pan lined with a lightly sprayed piece of parchment nearby.
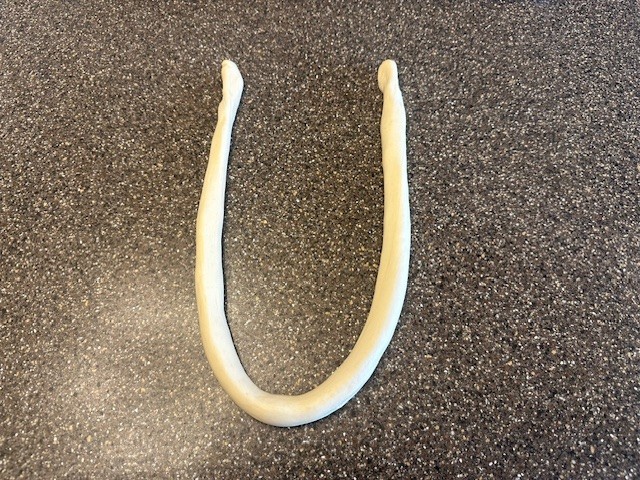
- Using one portion of dough at a time, make a 'U' shape.
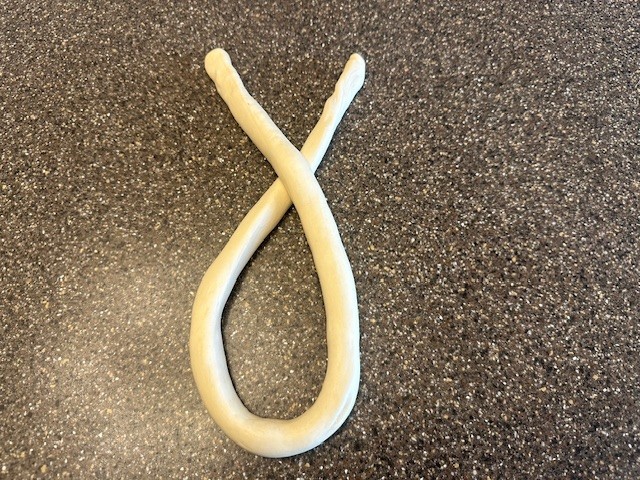
- Cross the top by laying one length over the other, making an 'X' about ⅓ of the way down from the top and a loop on the bottom.
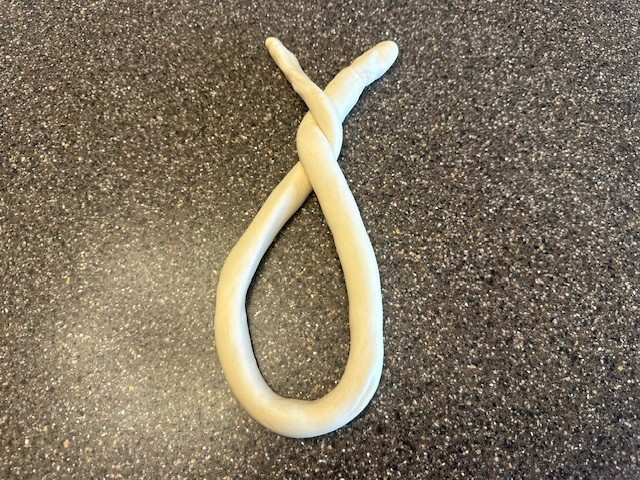
- Next, twist the dough again, pulling the portion underneath the other and crossing it up and over the top length.
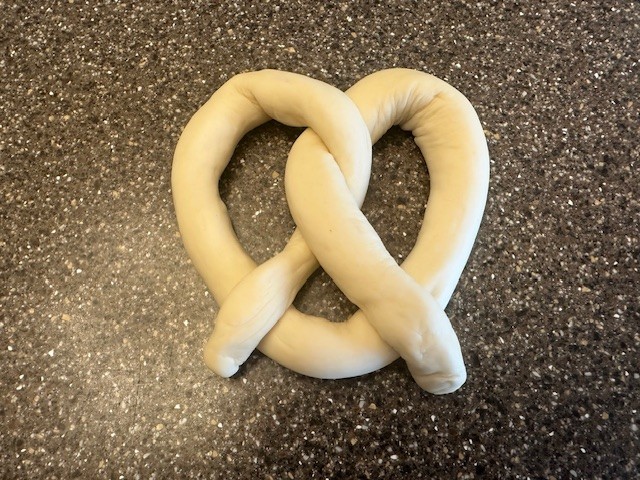
- Lastly, holding both tips of the now 'V' shape, pull the twisted portion down until the twist is in the center of the loop.
- Gently press down on the dough where the upper portion of the dough now rests on the bottom of the loop. Carefully move each shaped pretzel onto the prepared sheet pan and repeat until all pretzels have been formed.

Step 15: Tightly cover the shaped pretzel with the portion of saved plastic wrap, and move the tray into the refrigerator, where the dough will rest again for about an hour. This time allows for the dough to firm up before the pretzels are boiled, which allows them to keep their shape.
Step 16: In the meantime, preheat your oven to 425°F.
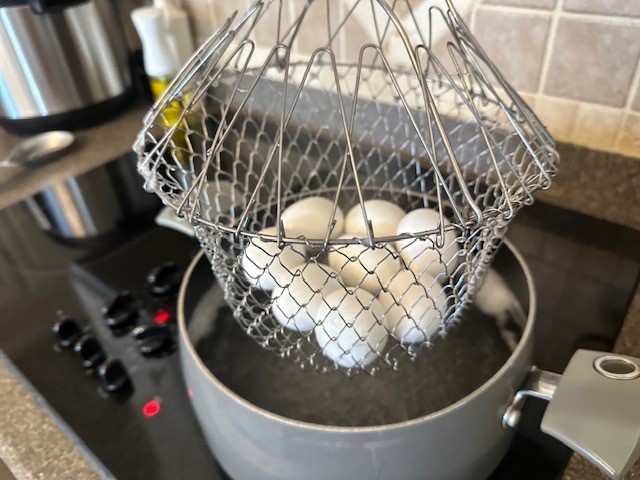
Just before your hour rest time is complete, bring 10 cups of water and 4 Tablespoons of baking soda to a boil in a large, wide pot. Stir the baking soda to ensure it fully dissolves. Have a large, slotted spoon, a wire kitchen spider, or a similar utensil, nearby, along with your kosher salt.
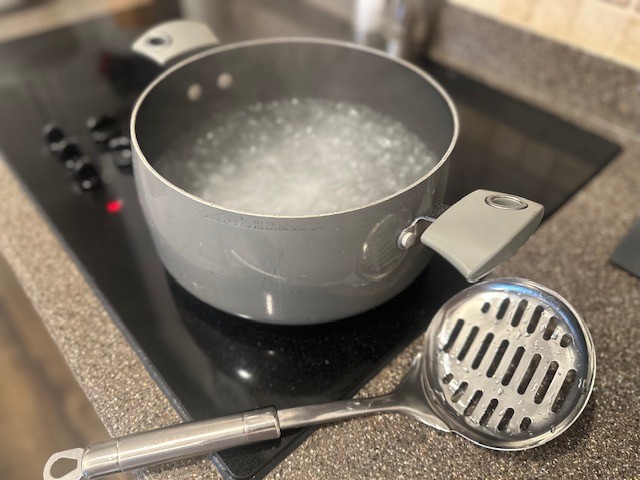
Step 17: After an hour, remove the pretzels from refrigeration. The pretzels will be cold and firm, making them easier to handle. With the sheet pan near the stove, carefully place 2-3 of the pretzels into the boiling water bath. Remove the pretzels from the water after about 30 seconds, just long enough for the dough to absorb a little of the baking soda water, which will help them keep their shape and develop that rich brown, classic pretzel color on the outside. Lightly spray the surface of the parchment again with cooking spray in the vacant spots to ensure no sticking!

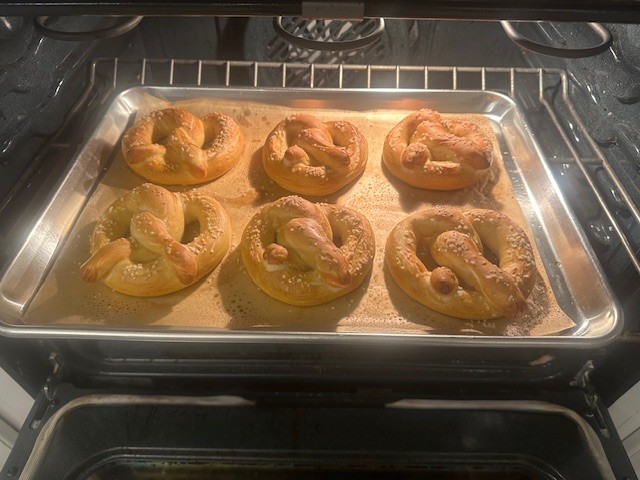
Step 18: Generously sprinkle the surface of the boiled pretzels with kosher salt and immediately move into the preheated oven. Set a timer for 10 minutes.
Step 19: At 10 minutes, you'll want to check to see how your pretzels are baking. They should already be developing a gorgeous brown color, but depending on your oven, may need to be rotated to ensure even baking and browning. If the ones in the back appear to be taking on a little more color than the front row, just rotate the pan around and continue baking for another 5-8 minutes.
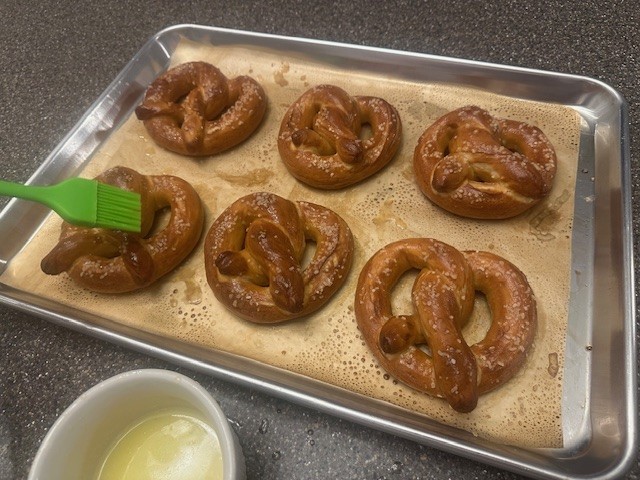
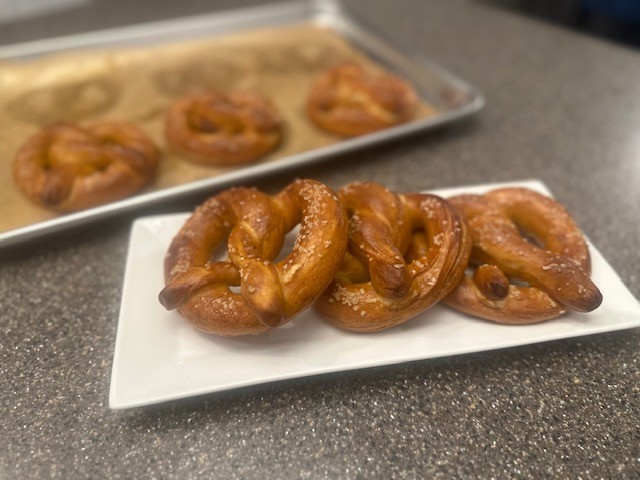
Step 20: In just the last few minutes of baking, melt a few tablespoons of salted butter. Immediately after removing the pretzels from the oven, brush the tops lightly with the melted butter which will immediately be absorbed and give them a delicious, salty finish and sheen. If you wait until they've cooled, the melted butter can actually make the texture soggy, so don't hesitate.
Pretzels can be enjoyed right away, 'wit or without' your favorite mustard!
*Note: Pretzels do not store well overnight, so baking ahead is not recommended. If you do need to make the dough in advance, prepare the recipe through Step 15 (refrigerating the shaped dough), cover tightly, and continue on with the final steps the next day.
Classic Soft Pretzels
Equipment
- Kitchen-Aid Mixer fitted with the dough hook
- Digital Thermometer
- Glass Liquid Measuring Cup
- Measuring Cups and Spoons
- Flexible Bench Scraper
- Large, Glass Mixing Bowl
- Plastic Wrap
- Plastic Ruler
- Sheet Pan, lined with Parchment Paper
- Blue Painters Tape optional
- Wide, Heavy Bottomed Pot
Ingredients
- 360 g Unbleached Bread Flour 3 Cups, measured by the Spoon & Sweep Method
- 209 g Warm Water, 105℉-110℉ Just shy of 1 Cup
- 20 g Unsalted Butter, at room temperature 1-½ Tablespoons
- 8 g Fine Sea Salt appx. 1-½ teaspoons
- 5 g Instant Yeast appx. 1-½ teaspoons
- Cooking Spray to prepare the parchment-lined sheet pans
Baking Soda Bath
- 10 C Boiling Water for the water bath, not for the recipe
- 4 Tbsp. Baking Soda for the water bath, not for the recipe
- 2-3 Tbsp. Kosher Salt to season the pretzels before baking
- 1-2 Tbsp. Salted Butter, melted to brush on the pretzels immediately after baking
Instructions
- Gather all of your ingredients, along with a kitchen scale, glass liquid measuring cup and digital thermometer.
- Place the bowl of your stand mixer onto the kitchen scale and be sure to tare (zero out) the weight of the bowl itself so you get an accurate measurement. Weigh 360 grams of flour. If not using a scale, use the Spoon and Sweep Method*.The 'spoon and sweep' method is the most accurate way to measure flour, aside from weighing it on a kitchen scale. Use your spoon to gently stir and fluff the flour in its container, then scoop the flour directly into the measuring cup, using the straight edge of the spoon to sweep away the excess flour once the cup is full.
- In a liquid measuring cup, measure out 209 grams of warm water (or just shy of one cup), and use a digital thermometer to ensure that the water is anywhere from 105-110℉.
- Fit your mixing bowl onto the stand, adding the yeast, salt, warm water and butter to the bread flour.
- Mix all of the ingredients together for a minute or two on a medium-low setting, just until everything comes together and forms a sticky dough. Use a flexible scraper to clean up the sides and bottom of the bowl and make sure all of the ingredients are incorporated. Increase the speed to medium-high and mix for about 6 minutes, until the dough has thoroughly been kneaded.
- Using your hands, gently shape the dough and place in a lightly oiled glass bowl. Cover the bowl tightly with plastic wrap and set aside in a warm place in your kitchen. Allow the dough to rest and double in size, about 90 minutes.
- After resting, remove the dough from the bowl, gently kneading it with your hands to deflate, and place it onto a clean, lightly floured work surface. You'll also want to have your bench scraper and kitchen scale (if using) handy.
- Remove the dough from the bowl, gently punch down to remove any air, and place the entire ball onto the digital scale. Note the total amount, in grams. Divide this amount by 6: (Example, 587 grams / 6 = Appx. 97 grams).
- Measure out each portion of dough to approximately the same weight. If not using a kitchen scale, section the dough in half, and each half in half again, as close in size as you can, so you end up with 6, equal balls of dough.
- Grab a kitchen ruler, if you have one, and gently shape each ball of dough into an approximate 4" log. Place the logs onto a parchment lined sheet pan, sprayed lightly with cooking spray. Cover tightly with plastic wrap and allow the dough to rest again at room temperature to relax the gluten in the dough, about thirty (30) minutes.
- In the meantime, measure out a piece of blue painter's tape to 24" in length and adhere to your clean work surface. Mark the tape at 18" as well. (Note: If not using tape, do your best to estimate these measurements)
- After this second rise, the dough should be quite puffy, yet not quite doubling in size. Carefully remove the plastic wrap and set aside to use again.Starting with one portion at a time, stretch the dough from the center and pull outwards towards the ends, and then, laying on the work surface and using your fingertips, roll outwards from the center and up into a V-shape, as the rope of dough lengthens.Lay each log on the side of your work surface, covered loosely under a sheet of plastic wrap, and note which portion you begin and end with, keeping them in order.
- Once you've rolled each portion of dough to 18" in length, grab the first portion you started with, and repeat the process, now stretching the dough to 24" in length. The short rest time in between should allow the gluten to relax, making it easier to stretch out the dough again without it shrinking back.
- Now the fun part, shaping the pretzels! Be sure to have a large sheet pan lined with a lightly sprayed piece of parchment nearby.Using one portion of dough at a time, make a 'U' shape.Cross the top by laying one length over the other, making an 'X' about ⅓ of the way down from the top and a loop on the bottom. Next, twist the dough again, pulling the portion underneath the other and crossing it up and over the top length. Lastly, holding both tips of the now 'V' shape, pull the twisted portion down until the twist is in the center of the loop. Gently press down on the dough where the upper portion of the dough now rests on the bottom of the loop.
- Carefully move each shaped pretzel onto the prepared sheet pan and repeat until all pretzels have been formed.
- Tightly cover the shaped pretzel with the portion of saved plastic wrap, and move the tray into the refrigerator, where the dough will rest again for about an hour. This time allows for the dough to firm up before the pretzels are boiled, which allows them to keep their shape.
- In the meantime, preheat your oven to 425°F. Just before your hour rest time is complete, bring 10 cups of water and 4 Tablespoons of baking soda to a boil in a large, wide pot. Stir the baking soda to ensure it fully dissolves. Have a large, slotted spoon, a wire kitchen spider, or a similar utensil, nearby, along with your kosher salt.
- After an hour, remove the pretzels from refrigeration. The pretzels will be cold and firm, making them easier to handle. With the sheet pan near the stove, carefully place 2-3 of the pretzels into the boiling water bath. Remove the pretzels from the water after about 30 seconds, just long enough for the dough to absorb a little of the baking soda water, which will help them keep their shape and develop that rich brown, classic pretzel color on the outside. Lightly spray the surface of the parchment again with cooking spray in the vacant spots to ensure no sticking!
- Generously sprinkle the surface of the boiled pretzels with kosher salt and immediately move into the preheated oven. Set a timer for 10 minutes.
- At 10 minutes, you'll want to check to see how your pretzels are baking. They should already be developing a gorgeous brown color, but depending on your oven, may need to be rotated to ensure even baking and browning. If the ones in the back appear to be taking on a little more color than the front row, just rotate the pan around and continue baking for another 5-8 minutes.
- In just the last few minutes of baking, melt a few tablespoons of salted butter. Immediately after removing the pretzels from the oven, brush the tops lightly with the melted butter which will immediately be absorbed and give them a delicious, salty finish and sheen. If you wait until they've cooled, the melted butter can actually make the texture soggy, so don't hesitate.
- Pretzels can be enjoyed right away, 'wit or without' your favorite mustard!